The post 5 Things To Consider Before Editing Your Blog Design appeared first on The Blogging Brew.
]]>As someone who blogs about blogging and all that goes with it, I try to give the best advice and information I can to help my readers become the best bloggers they can be. That being said, I don’t expect any of my readers (or myself for that matter) to be perfect bloggers with perfect blogging habits. I mean, do perfect bloggers even exist?? Anyway, today my goal is to help bloggers who deal with a something that everyone says you shouldn’t do, yet I’m fairly well known for—editing your blog design.
Usually, when you find yourself tweaking with your design, it means you’re not quite satisfied with the design you purchased and might need a redesign to settle your thoughts. If you’re like me though, tweaking is just a fun thing to do and a great way to explore the backend of your design and learn new skills! Now I’m not recommending that all of you should go mess with your blog designs, because there are still several reasons you should avoid that (you lose consistency, your audience may not recognize your blog as well as others, or you may mess with something you don’t know how to fix), but if you’re a self-proclaimed tweaker, there are a few things you should consider when changing up your design to avoid disastrous results! Rather than give you a bullet point list of tips, I’m going to list some questions to ask yourself during your tweaking process:
HOW BIG OF A CHANGE IS THIS?
There’s a difference between “tweaking” and “redesigning”, and the former can quickly become the latter if you get carried away. Examples of tweaking might be rearranging your sidebar, cleaning up any part of your design, generally moving things around. Once you start playing with fonts, colors, logos, and other major design elements, you’re heading into redesign territory. Those elements play a big part in your visual identity, and changing them can make or break what you’ve built your blog to be. For example, if you’re really sick of your main color scheme, consider going for a full brand redesign rather than changing around the colors on your blog several times. Your website probably isn’t the problem, so spending some time narrowing down which colors you really want would be more beneficial than tweaking!
HOW WILL THIS LOOK ON OTHER SCREENS?
Responsive design is basically a requirement when designing blogs these days, so making sure your tweaks show up well on every screen size is extremely important. This is where things can get tricky, because if you haven’t implemented a responsive design before, it can be confusing. For example, when I changed my header layout last week to display my logo better, I completely forgot to check how my blog would look on mobile devices! After spending an hour or so trying to get my second menu to not look horrible on mobile, I finally got the responsive features to work, but I can’t promise it will be that simple for everyone. To test your blog’s responsiveness, just squeeze your screen down and see how everything changes based on the screen width.
HOW LONG WILL IT TAKE TO CHANGE THIS?
The tough thing about tweaking is that you can’t really shut down your blog to do your work. If the change you want to make will only take a few minutes, that shouldn’t really matter, and your readers probably won’t notice it. But if you’re taking on a major coding job, I’d suggest you a) do it when your blog is the least busy (I’ve definitely done design work at 4am for this exact reason), b) edit a separate page on your blog that your readers won’t be viewing (this works better for WordPress, where you can edit your PHP so certain features only show up on specific pages), or c) set up a testing blog that looks exactly like your current blog, but no one knows the domain so you can edit it freely and then transfer over your work.
DO I HAVE A WAY TO GET MY ORIGINAL DESIGN BACK?
If you’ve ever read a Blogger tutorial, you probably have the words “backup your template!” embedded in your mind. But it’s all with good intentions—you will love yourself so much more if you save your design before working on it, because if something goes horribly wrong (who knows, your sidebar could end up in the middle of your content), you’ll know you have a working design to go back to. That’s it. Just save your template. Always.
DO I KNOW WHAT I’M DOING?
Earlier I said that tweaking is a great way to learn more about coding and teach yourself new skills, but you should know what you’re doing to some extent once you open your blog’s files. This is less of a concern on Blogger, where you’re mainly editing your blog’s CSS, which only affects how things look. Once you start digging deeper into the backend of your design, you need to be extremely careful with what you’re editing and ensure you have saved copies of every file you edit. For example, if your blog is on WordPress and you want to edit a PHP file for your blog, every single character matters. Leaving out a bracket can leave you with the “white screen of death”, where your dashboard and blog become white screens with no way to access them other than through your host. Basically, it’s a very stressful situation that you don’t want to deal with!
If you’re looking for more design/coding tutorials, check out this page, where I’ve compiled all of my posts regarding those topics! Can’t find what you’re looking for? You can always suggest a topic in the comments! ☺️
The post 5 Things To Consider Before Editing Your Blog Design appeared first on The Blogging Brew.
]]>The post 2 Free Alternatives To Photoshop For Bloggers appeared first on The Blogging Brew.
]]>For a lot of bloggers, paying for a Creative Cloud subscription (to gain access to Photoshop) is out of the question. I didn’t earn money from my blog for over a year, so I spent a lot of time using free versions of everything! Creating blog graphics had always felt like a hassle to me, so I knew I needed to find some great programs to work with.
While searching for a free alternative, I had a few requirements in mind:
- Ability to use my own fonts
- Unlimited use (no limit to the amount of graphics I can make before being forced to upgrade)
- A snap-to-grid function
- A feature for adding shapes/lines/other graphics
- Easy to use, not glitchy
After reviewing several free programs, I ended up with two strong fits: PicMonkey and Canva.
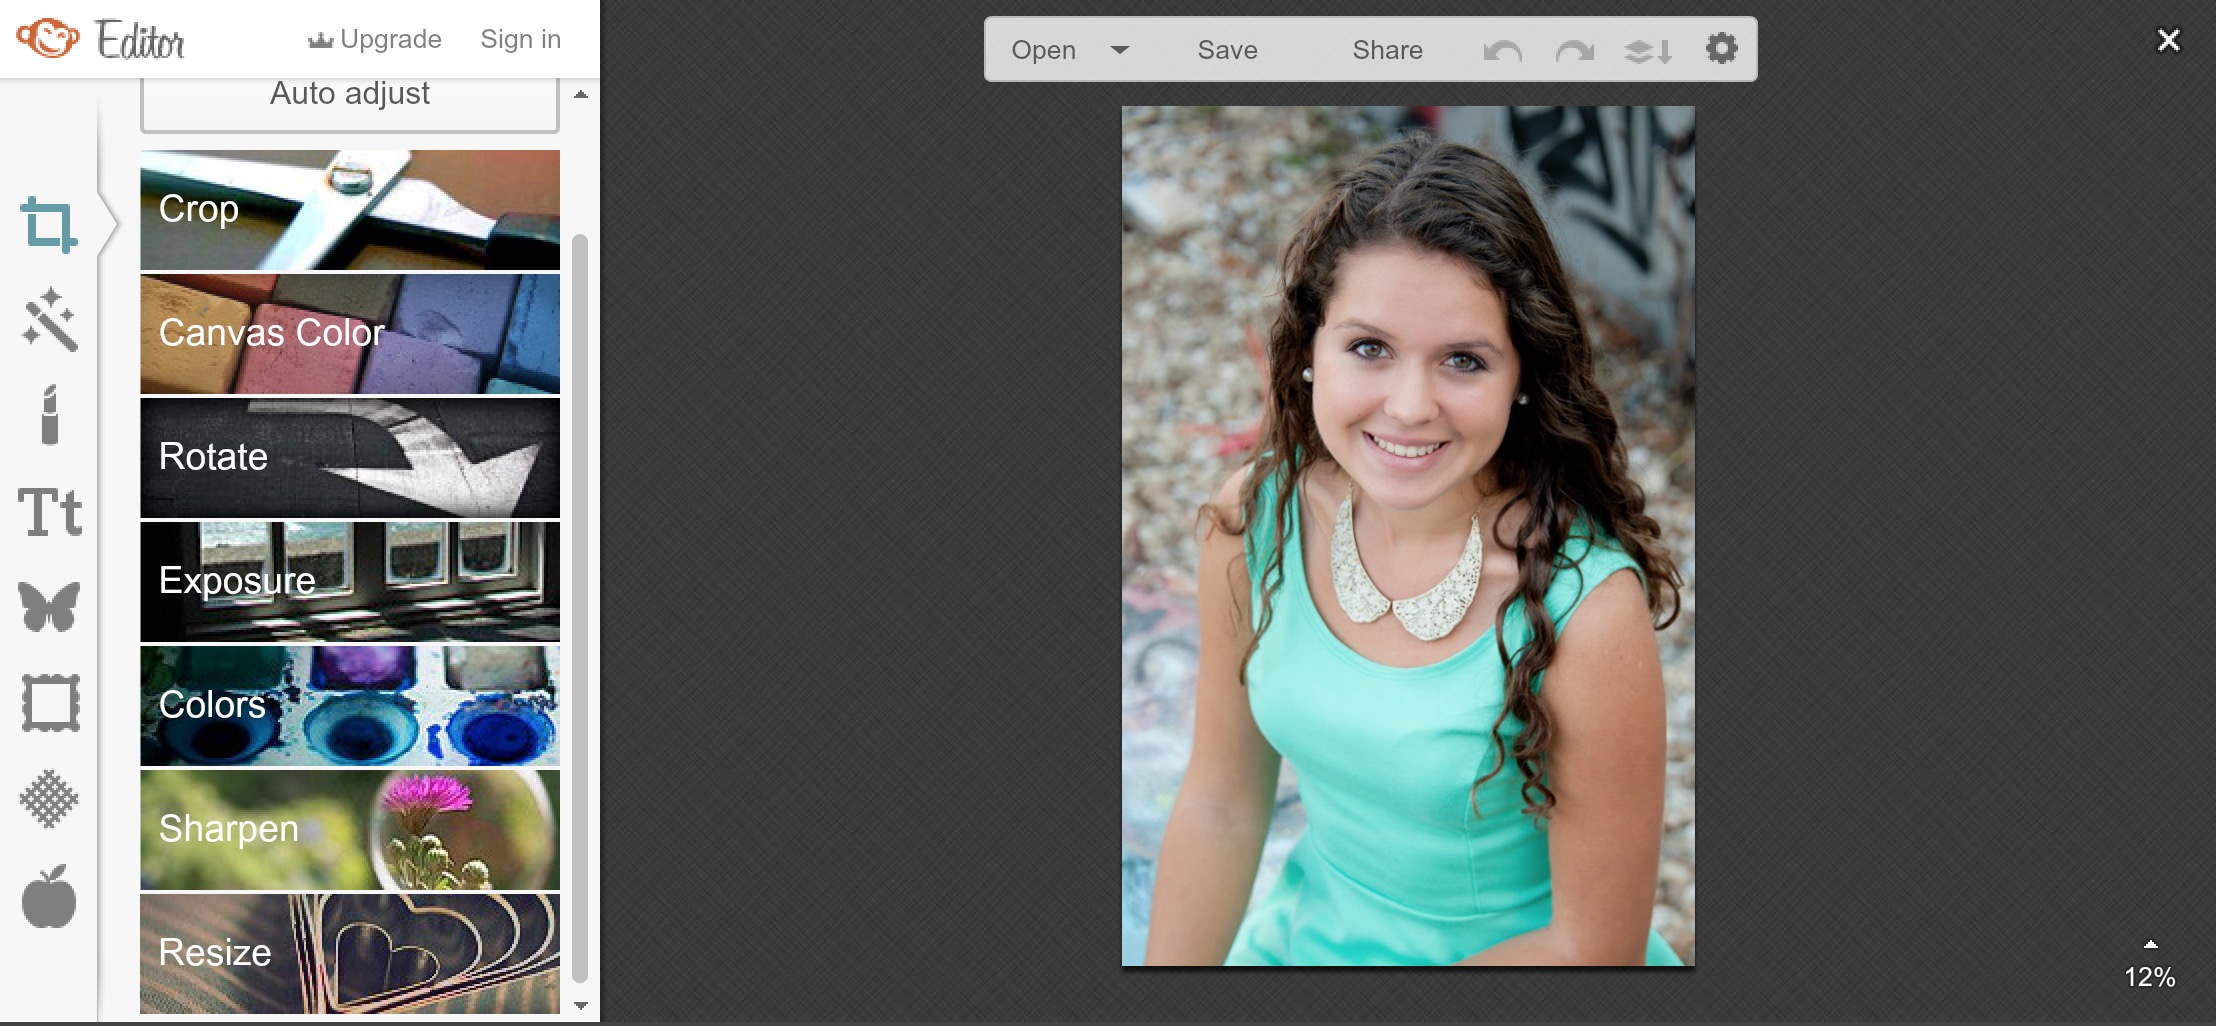
PicMonkey
PicMonkey is my go-to website for photo-editing, designs with transparent backgrounds, and any quick edits I need to make. It’s extremely easy to use, and it comes with a lot of pre-made add-ons like filters, frames, and graphics. Here’s a basic summary of its features:
- A text feature that allows you to use your own fonts
- An “overlay” feature with tons of pre-made graphics, from trees and flowers to banners and flourishes
- The ability to use a transparent background, which isn’t available on a lot of free websites!
- Basic editing features like cropping, exposure, rotation, and resizing.
For my visual readers, this is what the format looks like:
There are extra features available to those who upgrade, but I’ve never found a need to make that jump. It’s only $4.99 though, so if you do find some features you want to unlock (like more filters and overlays), it’s not too much of an investment!
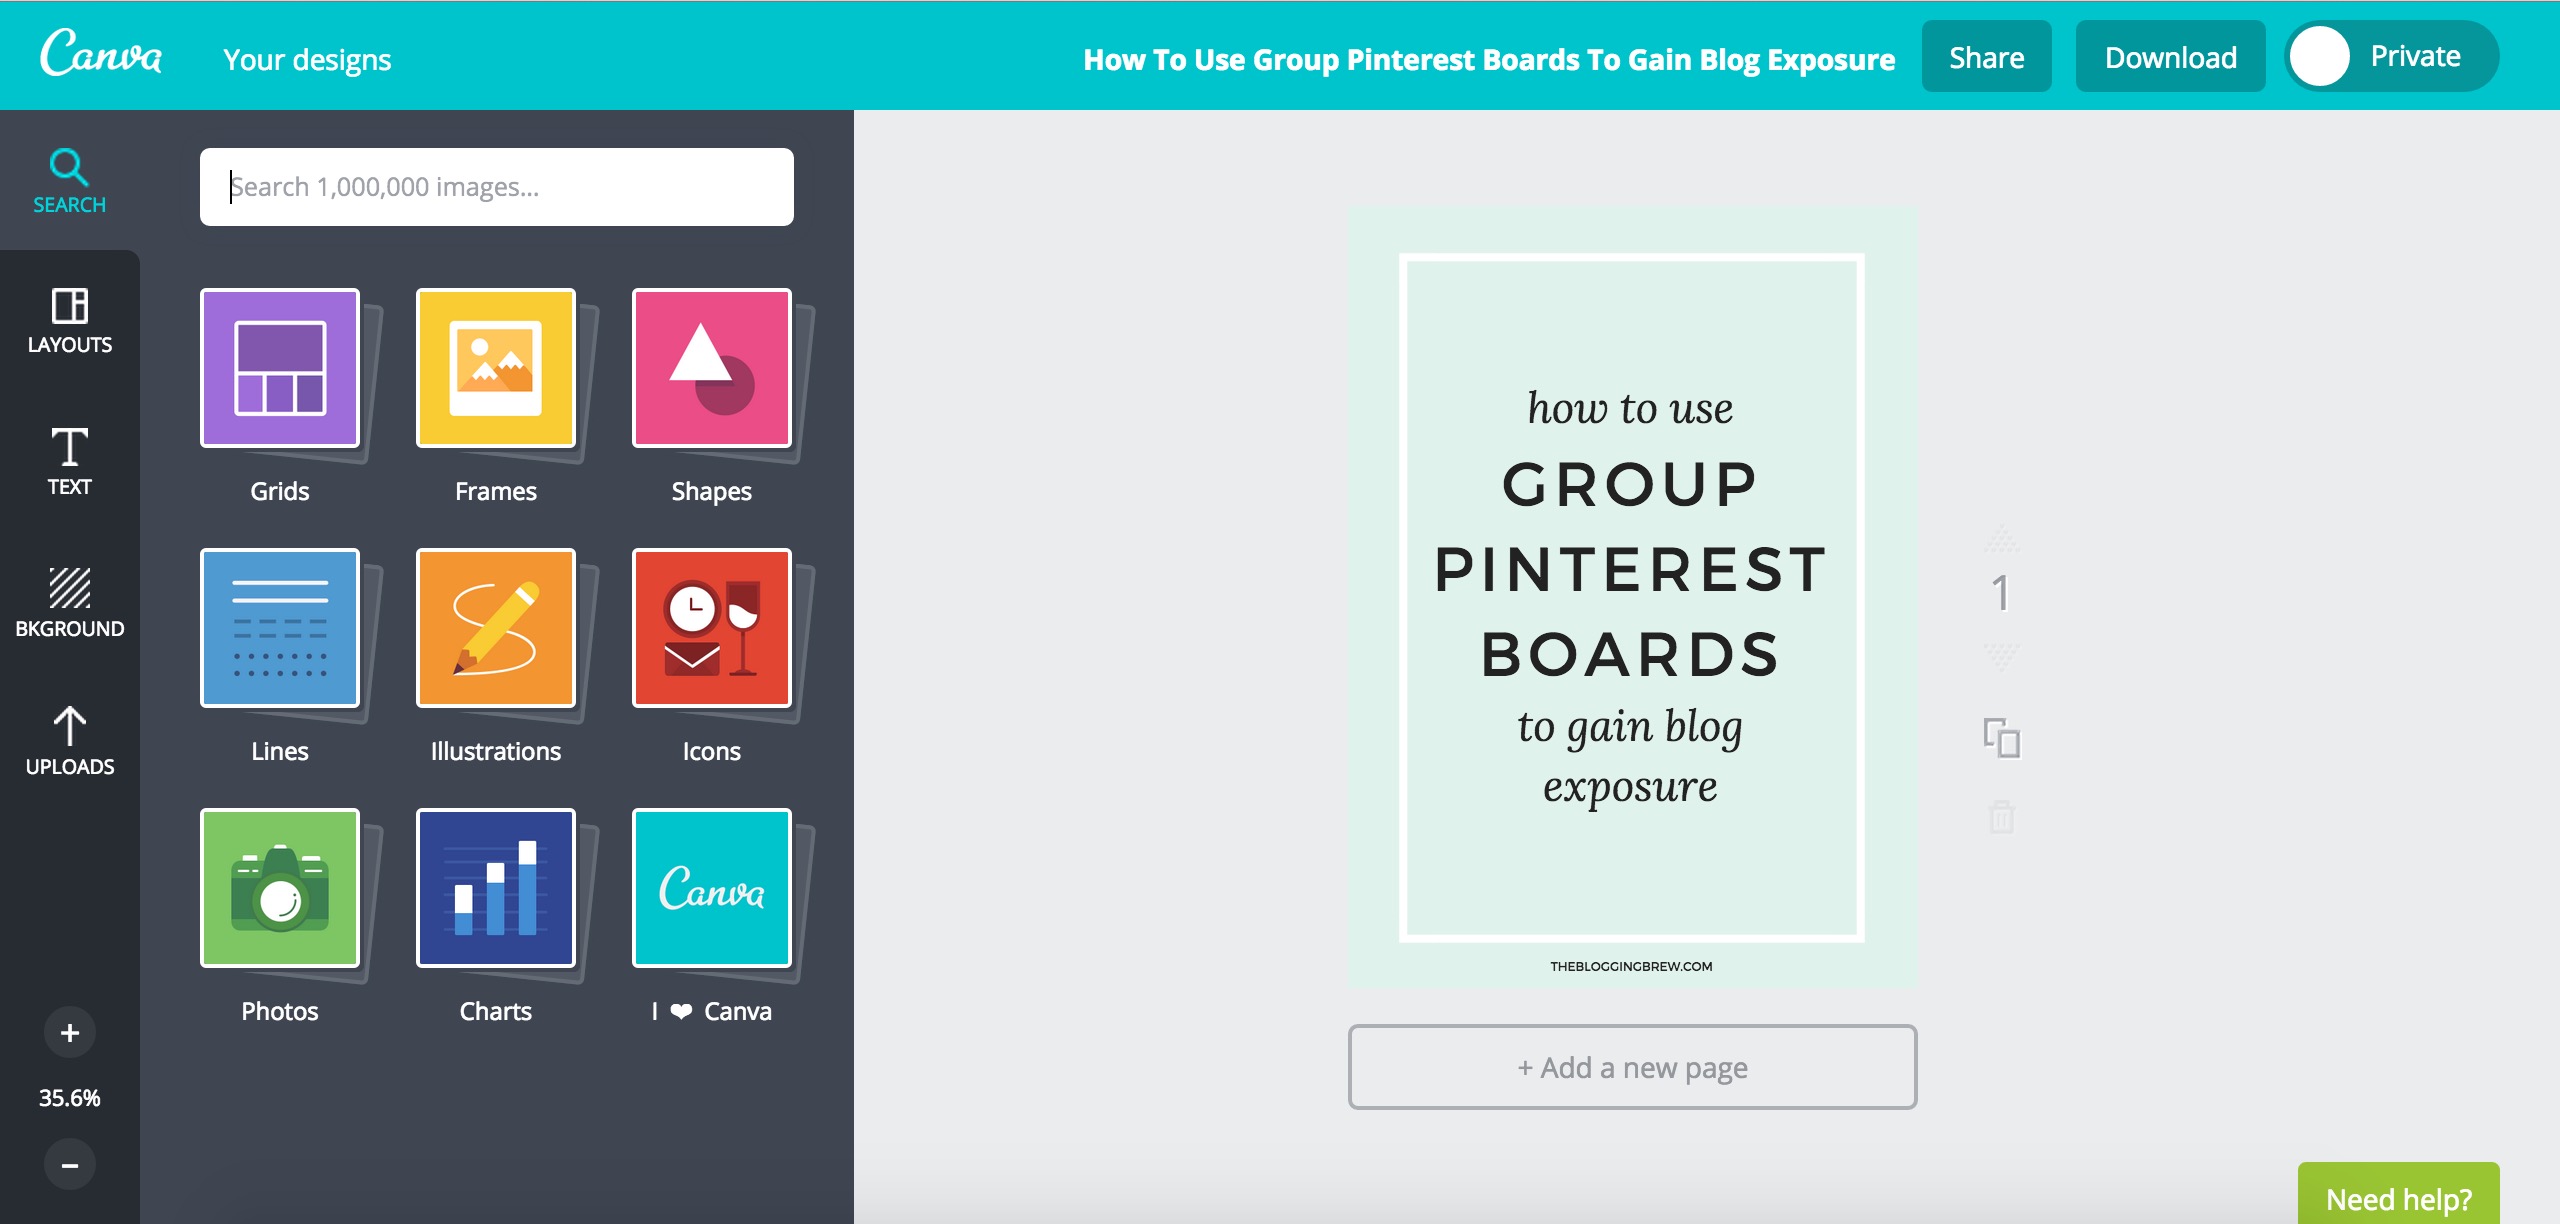
Canva
Canva is what I use to create most of my graphics, including the one I made for this post. This website is more suited for graphics that don’t involve photos, although it still has a few features for them! There are hundreds of pre-made graphics, to the point that it’s nearly impossible you won’t find the shape or line you’re looking for. Canva also saves all of your graphics into a simple feed, so you can always go back and edit one or copy it for use as a template. Here are some other useful features:
- A snap-to-grid feature, perfect for centering your work
- Pre-made graphs and charts for use in infographics
- A grids feature with tons of collage layouts
- Textured/patterned backgrounds, like the one in my graphic above
- Dimensions for different uses, like Facebook cover photos or Pinterest graphics
The layout is simple and ad-free, which is always great!
Canva also has a great blog, called Design School, where they provide tips for using their website and creating beautiful graphics. Definitely a bonus!
Why Do I Use Two Websites?
While Photoshop has just about every feature you could need built into one package, that’s not the case for most free websites. PicMonkey and Canva are both great websites, but neither of them do everything I need. Fortunately, when combined, they have most of the features I’m looking for, and switching between them isn’t a horrible inconvenience. For example, PicMonkey allows me to use my own fonts and transparent backgrounds, while Canva has a snap-to-grid feature and more pre-made graphics. “Two is better than one” just holds true for this scenario!
What graphics program do you primarily use for your blog? How is it working out for you?
The post 2 Free Alternatives To Photoshop For Bloggers appeared first on The Blogging Brew.
]]>The post How To Find A Beautiful Blog Design appeared first on The Blogging Brew.
]]>Blogging is so much more fun when you have a design that fits your style and speaks to your content. One big part of getting a design is the price that comes with it, which is why I’ll be dividing this post up based on how much you’re willing to spend. Even if you’re set on paying a certain amount (or nothing at all), be sure to explore the other options, because you may decide spending more/less will be better for you and your blog in the long run!
Design Budget: $0
For many bloggers that are just starting out, spending money on a design doesn’t sound very intriguing. You don’t know how long you’ll be blogging, or whether you even like blogging yet, so making an investment right away may not be the best decision. Not to worry—there are several free options for you!
1. Templates provided by your platform
Most platforms offer a selection of pre-made templates that are great to start from. They’re usually very simple, but will generally have customizable options like the main colors or logo image. They won’t be too complicated to work with, so this is a minimum time/minimum budget choice!
2. Free templates made elsewhere
If you Google “Free templates for *your platform*”, you’ll most likely find several websites that have compiled a list of free templates made by individual designers. These designs will be similar to those offered by your platform, but you’ll have a larger selection to choose from! Warning: you may end up spending HOURS searching through these websites before you find the perfect template. More options means a harder decision!
3. Design your own
If you have some design skills (even just relative knowledge of HTML/CSS depending on what platform you’re using), this is a great option. You don’t have to start from scratch by any means, and it’s probably easier to take a free template and edit that to your liking. For example, if you’re on Blogger, take the Simple template and play around with the CSS stylesheet until you get something you like! There are TONS of tutorials out there, and you can check out my resources page for some specific lessons.
Design Budget: $30 – $60
This is kind of a tough middle-ground, because you’re sitting between free templates that may not be up to the standards you’re looking for, and hiring a designer that will give you exactly what you want. Fortunately, lots of designers make pre-made templates that start off around $30, making them a great budget-friendly option! If you’re not familiar with pre-made templates, they’re basically blog templates that a designer created with the intention of selling them multiple times, so yes, if you purchase one, someone else may also purchase that exact template. They’ll give you instructions for the installation, and some even offer help after you download it! These are some of my favorite places to find pre-made templates:
- Etsy – Just search “blog templates for *your platform*” and you’ll find some beautiful designs! I’d definitely recommend shopping here if you’re using Blogger. Be sure to check out the shop owner’s policies before you purchase, and look through their store for add-on options like blog installation or extra widgets!
- themeforest – This website has a ton of goodies, including WordPress and Tumblr templates. Their average price seems to be around $48, but the templates are very professional and come with a lot of features!
- Studiopress – Another WordPress theme site, and this is actually where I purchased the theme I worked off of! If you’ve ever heard of the Genesis Framework, this is the site you’d buy it from in order to use their themes. For reference, I chose the Fun theme!
Note: Make sure you check what platform the template you buy is for, because you don’t want to accidentally purchase a template that doesn’t work on yours!
Design Budget: $100 – ???
The question marks are there because I honestly don’t know how high prices go for custom blog designs (which is what this option will get you!). The range is huge, and what you’ll get for $100 will most likely be way different from what you’ll get for, say, $1000, as you would probably expect! Getting a custom blog design is a big commitment, but it can be so rewarding. For one, you get to work with a real person (eep!) to create the blog of your dreams. They’ll help you get your thoughts together and narrow down what you want for your blog, and everything will be customized just for you. Designers often offer different packages (blog design, branding, logo design) and may give you add-on options as well (social media covers, business cards, signatures). The choices are really endless if you find the right designer! If this is the route you’re going for, be sure to consider a few things:
- The price you pay may be greatly affected by the platform you’re using, which is why I chose such a wide price range. For example, a designer may charge $100 for a Blogger design and $500 for a WordPress design simply because the design options are very limiting to designers on Blogger in comparison to WordPress, meaning they can do less with the design and will most likely spend less time designing your blog. This doesn’t mean you can’t get a beautiful design on blogger (seriously, there are some fantastic Blogger designs out there!), it just means the design process won’t be as intensive for the designer.
- Bargaining with a designer is almost never a good idea. Having a low budget and wanting a custom design can be a tough position, but asking a designer to make you an exception to their prices can come off as rude. They value their work at whatever price they chose, so asking for the same amount of work at a lower price just means they’re losing time and money! If you’re unable to pay full price for their service, consider waiting a little longer and saving up, or searching for a beautiful pre-made template at a price that fits your budget.
- The prices out there may seem daunting, but if you find the right designer, spending a few hundred dollars or more could really make the difference you’re looking for. You may find some designers that offer custom designs for $50, but I can’t guarantee that those designs will be much more than the pre-made templates I talked about earlier with some extra customizations. You’re paying for a person’s time and other resources, so consider what you would charge someone if they were asking for a few days of your time.
How did you end up with your beautiful blog design? Let me know in the comments!
The post How To Find A Beautiful Blog Design appeared first on The Blogging Brew.
]]>The post How To Design An Effective Blog Footer appeared first on The Blogging Brew.
]]>I wrote about six ways to dress up your sidebar a few months ago, and I received a lot of comments from bloggers who were either thinking about or in the process of redesigning their sidebars. It sounded like everyone was excited to tackle that project, and I loved hearing how inspired they were! So to continue on the blog inspiration trend, I want to talk about another neglected space of most blogs—the footer.
Unlike the sidebar, the footer is hidden for most of the time a reader spends on your blog. The only way they’ll usually see it is if they’re curious about your blog and want to scroll through your home page, or if they decide to comment on a post they enjoy. It can seem redundant to spend time designing a part of your blog that doesn’t get nearly as many eyes as your content, but the eyes that do see it are most likely ones that are interested in your blog and want to learn more!
Similar to the sidebar, your footer takes up a good chunk of space on your blog, and has the ability to take up more than you might think. My footer is a little over 200 pixels in height, and I’ve seen even bigger ones! A lot of bloggers just put an attribution there, which is perfect if you’re looking for something simple and don’t want it to draw attention, but if you want to make your footer even more effective, there are tons of things you can add and style to your liking! Here are some examples:
- Email subscription opt-in
- Category buttons
- A logo element
- Your contact info
- Social media icons
- Navigation links
- Instagram/Pinterest widget
- Mini bio
- Popular posts list
What’s best for my blog?
Depending on your blog’s content and your content marketing plan, some footer elements may benefit you more than others. For example, if you offer a mailing subscription for your readers, I would definitely recommend placing an opt-in in your footer! Likewise, if you create beautiful artwork, products, or anything visual and post about it on a social network, placing a widget for that social network in your footer would be beneficial. It’s all based on your needs! That said, try to avoid putting too much in your footer. It can easily take on a cluttered look, which isn’t what you want your readers to see after they’ve finished reading your amazing content!
Styling Your Footer
For simple styling, you can generally just edit the CSS of the “footer” tag. Here’s an example on one of my demo blogs:
footer {
     display: block;
     background-color: black;
     color: white;
     border-top: 3px solid #c4a0a4;
}
This is the effect that code would produce (the link color was set elsewhere in my stylesheet):

Footer Inspiration
I’m sort of a blog design enthusiast, so I love finding inspiration from other blogs and seeing what creative ideas are out there. If you’re planning on redesigning your footer, try searching around your favorite blogs and see what they included, or how they went about designing their footer to match their blog. I’m not saying you should steal their ideas, but looking around can really help when you’re stuck on what to do! Here are some of my favorite footer designs:
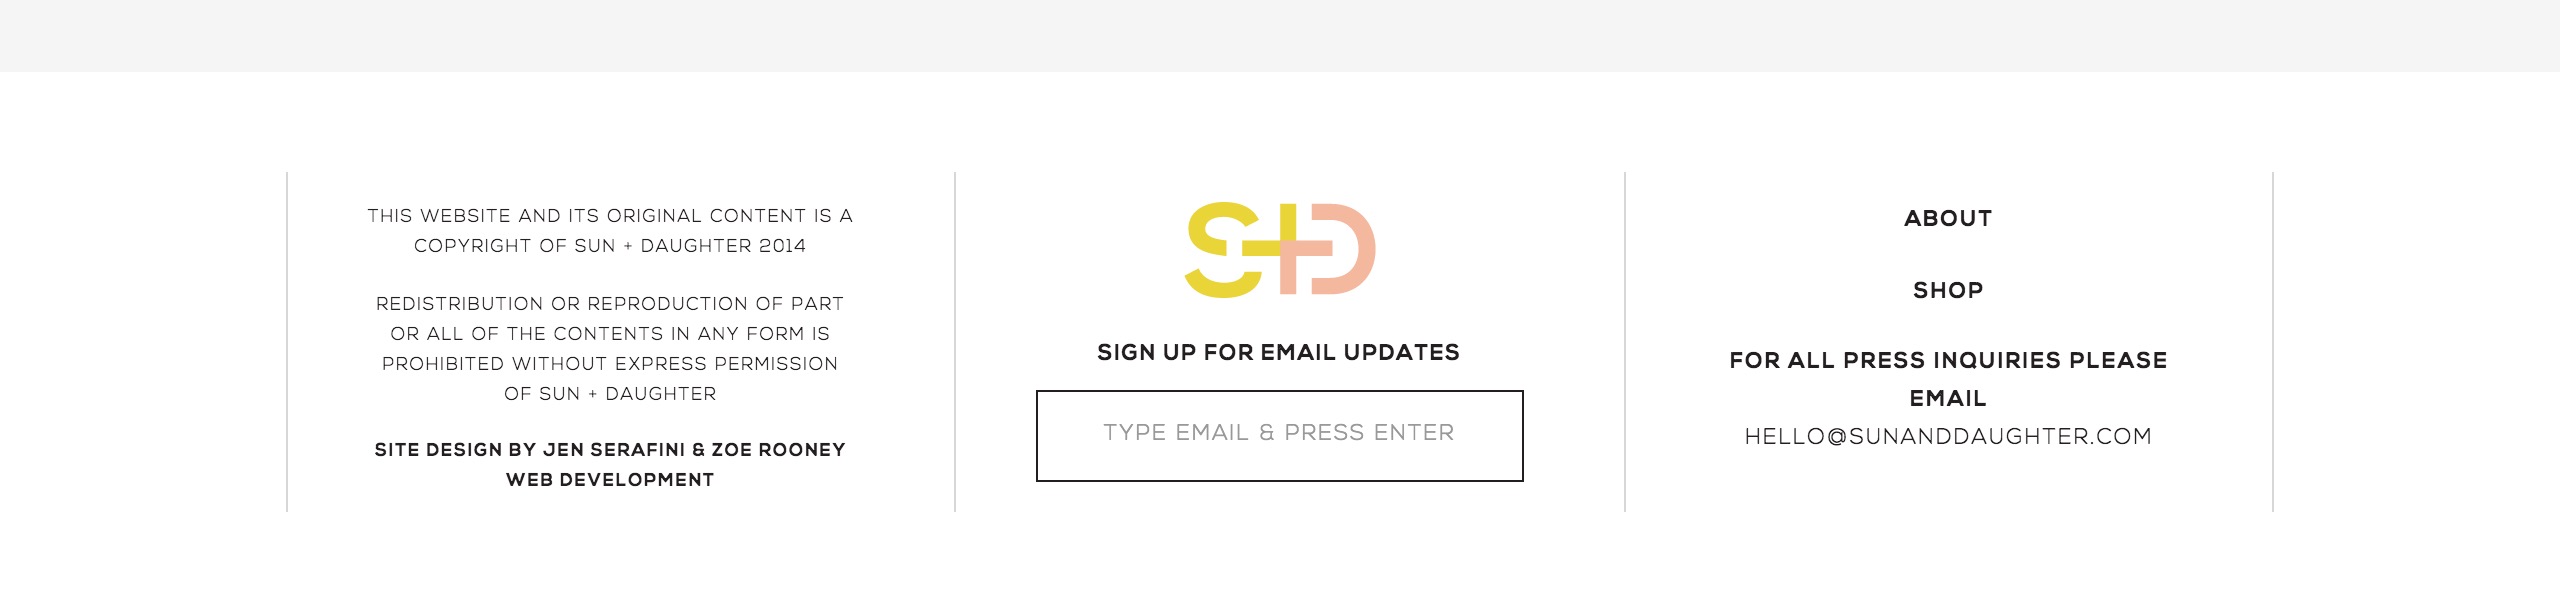
Source: Sun + Daughter

Source: Love Grows Design

Source: Meredith Noelle
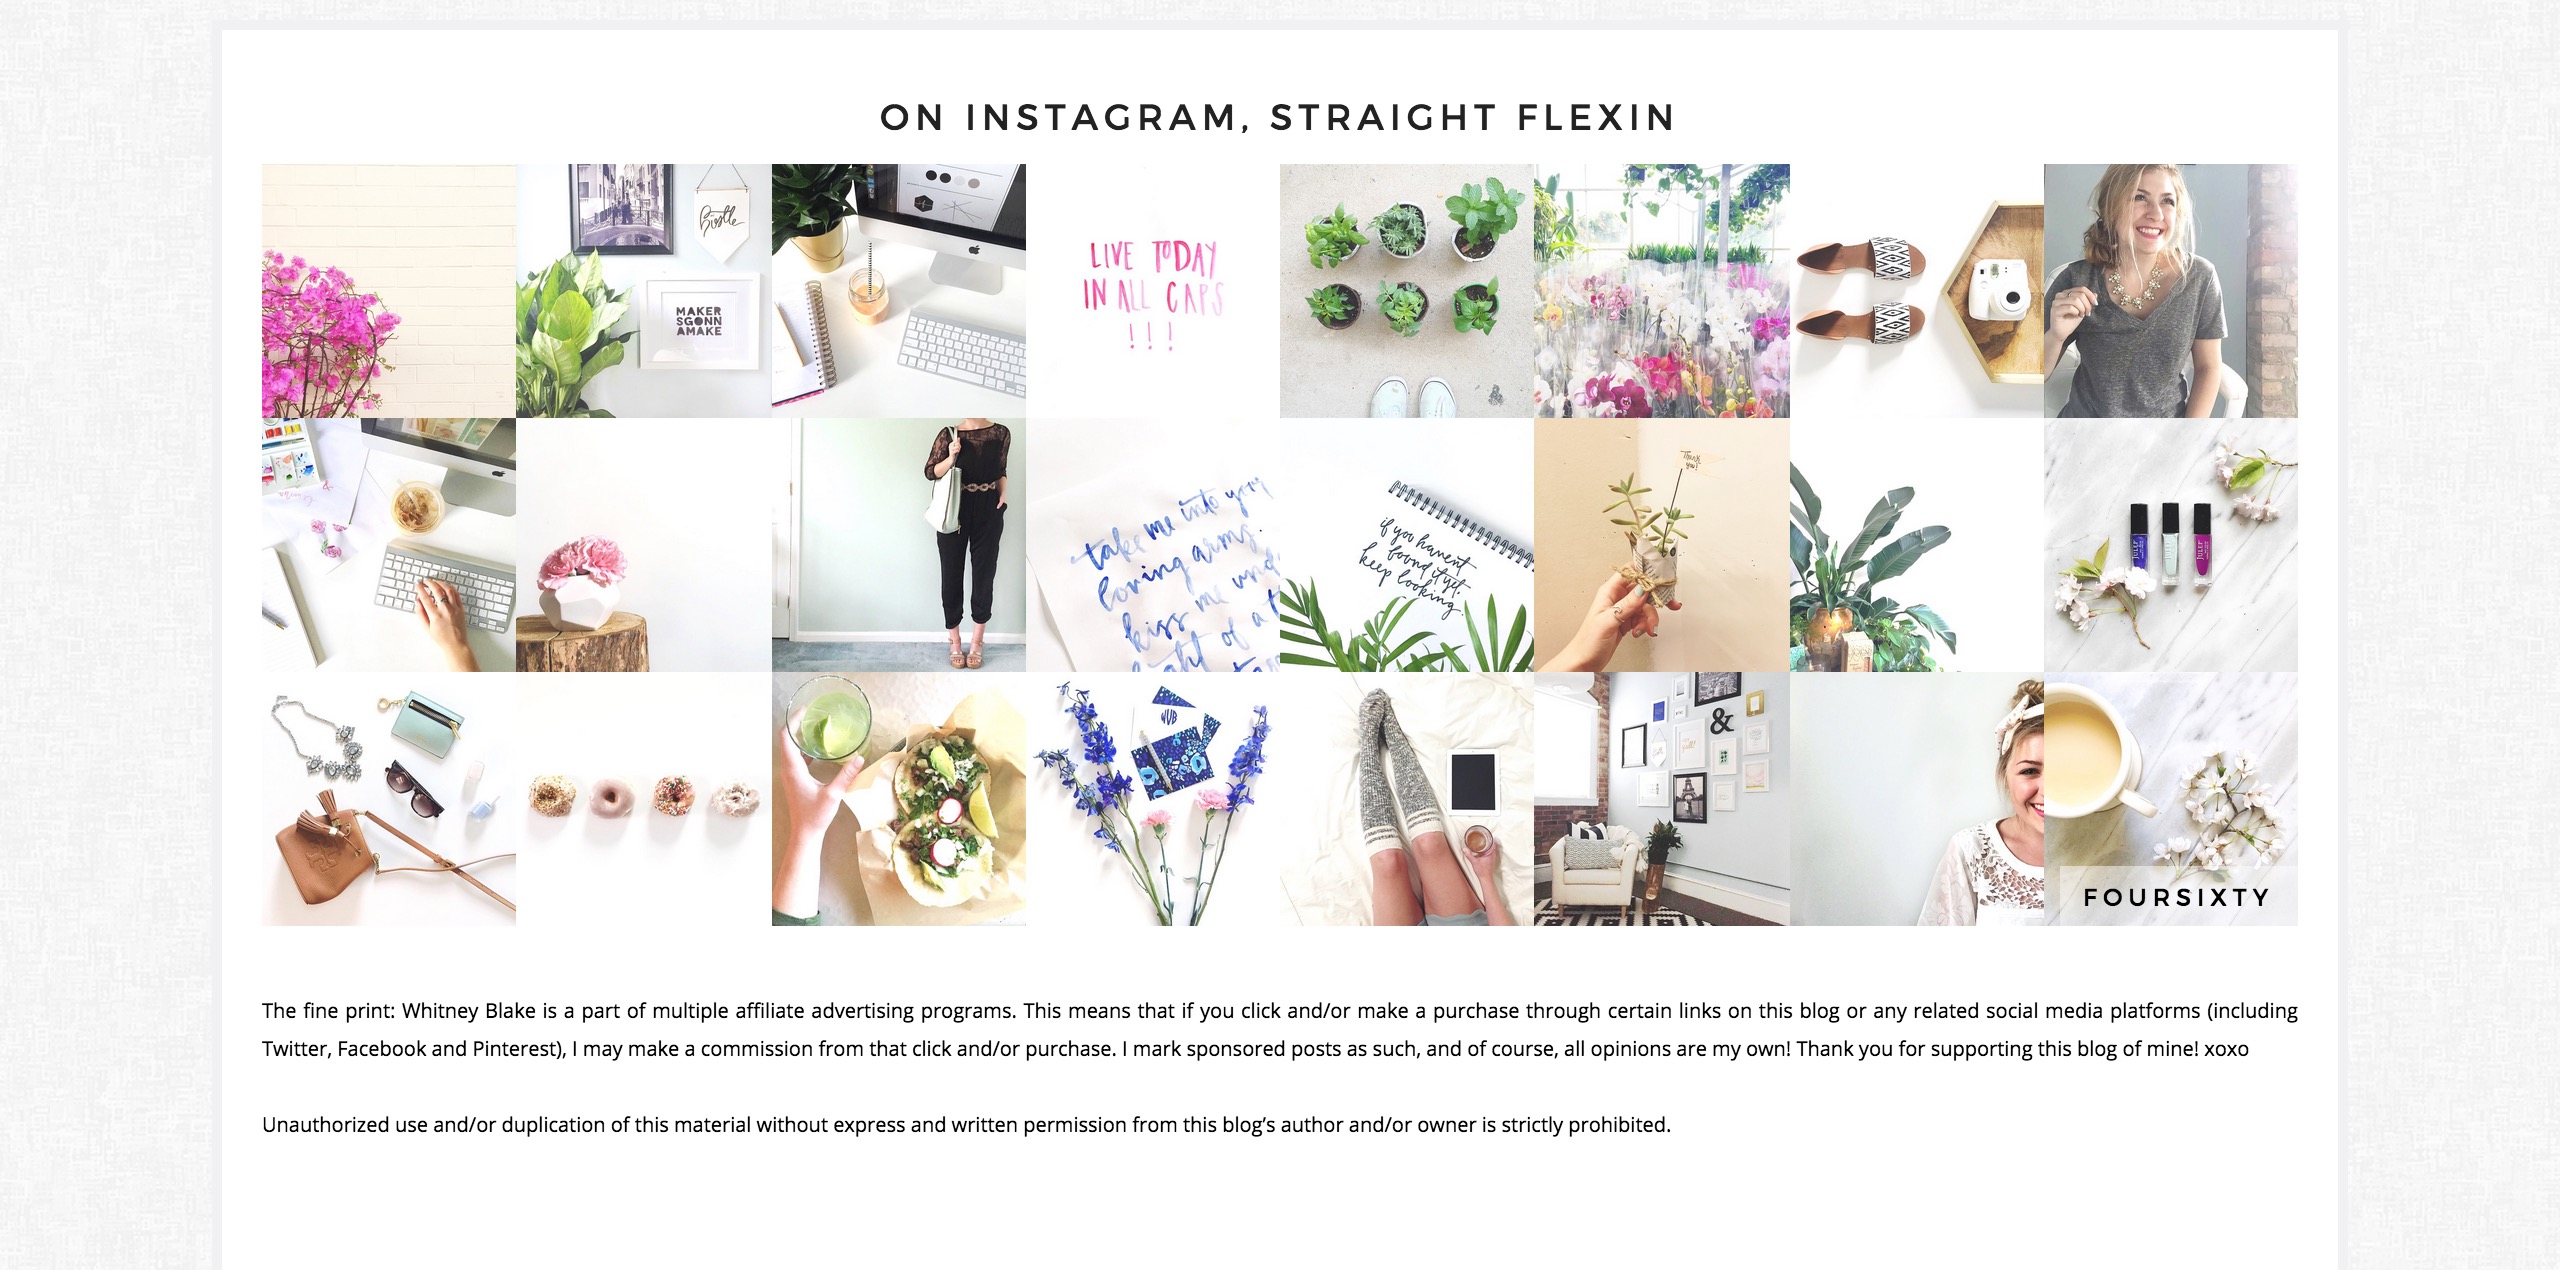
Source: Whitney Blake
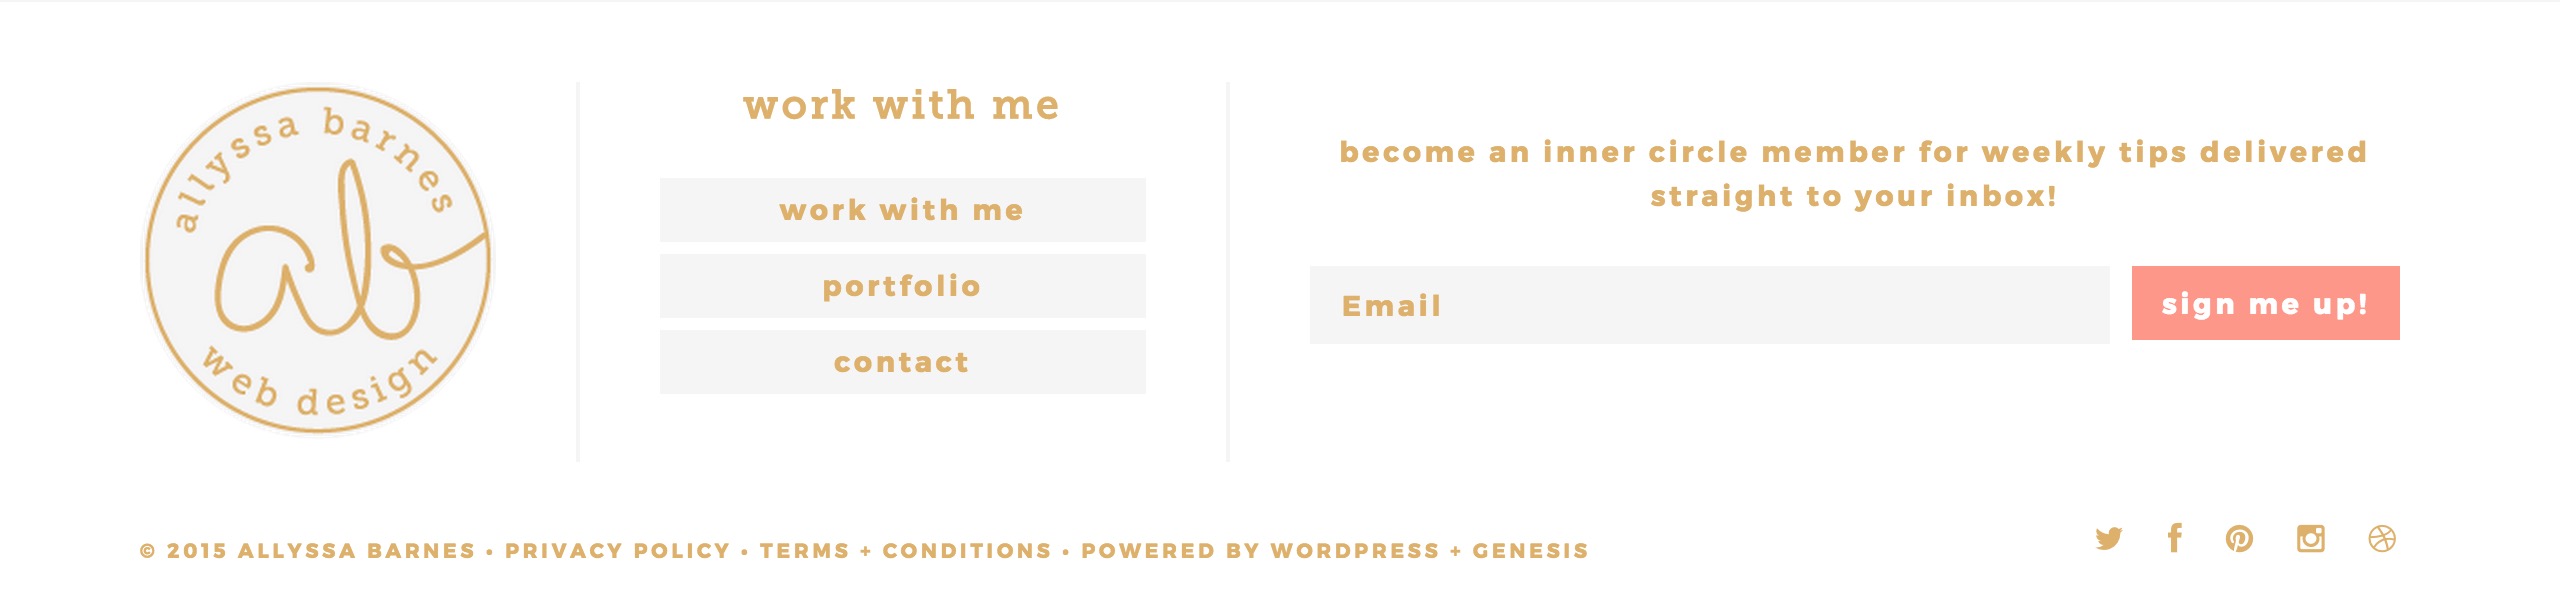
Source: Allyssa Barnes
Are you considering giving your footer a makeover? What are some things you’d consider “must-haves” for a footer?
The post How To Design An Effective Blog Footer appeared first on The Blogging Brew.
]]>The post Beautiful Blog Designs No. 1 appeared first on The Blogging Brew.
]]>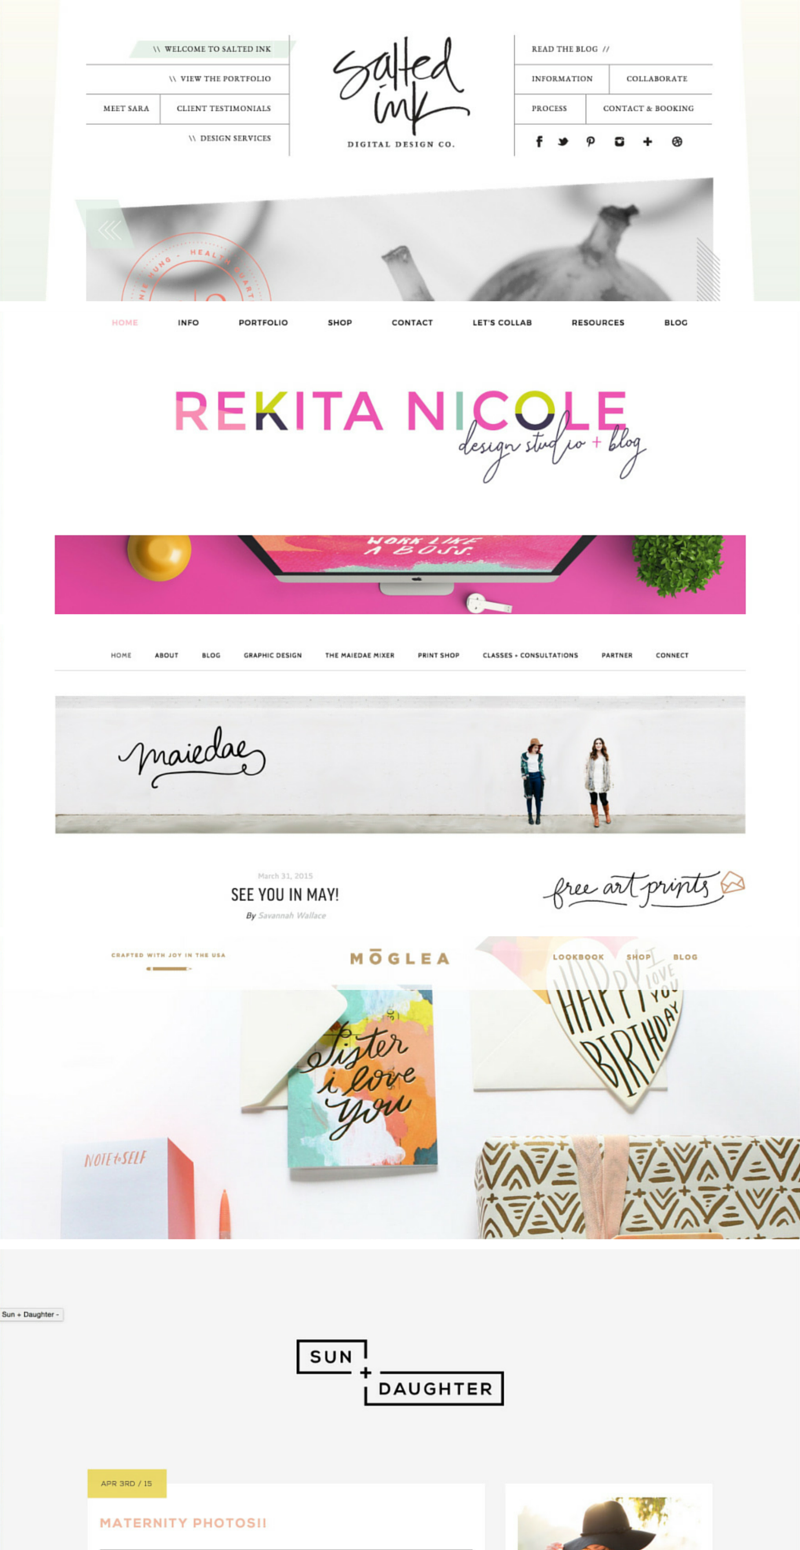
For those of you who don’t know, I’m kind of a blog design enthusiast. I love seeing how designers make such beautiful creations out of pixels, it’s like an art form in itself! I’ve been tapping into the design world recently with hopes of selling pre-made templates soon (eep!), and whenever I’m feeling uninspired, I start blog hopping in search of new ideas and beautiful blogs. I thought I’d share some of my recent favorites with y’all, because I have to imagine most bloggers out there love seeing great designs as much as I do! These are the blogs/shops from the graphic above:
I love the relaxing vibe of this website. It has one of my favorite logo designs, and the same handwriting is used throughout the website’s graphics. The slanted look of the main content area is something I haven’t seen before, and it looks so great!
The color palette on this website is just gorgeous! There’s enough white space that the colors aren’t too in-your-face, but it still gives off an energetic and fun vibe. And that logo is beautiful!
First of all, this is one of my favorite blog names. The letters just work so well together, and they form into a beautiful logo. The wide graphic below the navigation is another look I’m loving! If I had a blog partner, that would definitely be a must-have.
Another interesting blog name! I love how the front page has almost no text—just images. It’s a great interactive look, and their beautiful products get all of the attention!
This blog has such a simple design, but I can’t get over how much I love the color combo! The logo follows this simplistic theme, and of course, it’s also one of my favorites. I think I just love everything?
The post Beautiful Blog Designs No. 1 appeared first on The Blogging Brew.
]]>The post How To Use The Genesis Framework To Your Advantage appeared first on The Blogging Brew.
]]>So you decided to take the leap and purchase the Genesis Framework. Every other blogger you know has been raving about it, meaning it has to be fantastic, right? You complete the download, install it onto your blog, and…now what?
If you’ve never designed a blog before, or are still dipping your toes into those waters, it can feel a bit overwhelming to make such a big purchase and not really know what to do with it. You might see other blogs claiming to be built off the Genesis Framework and think, how in the world did they go from this to that??? I felt the exact same way for a while, and thought I’d just wasted a huge chunk of money. Let me tell you. That was one of the best investments I’ve made in this blog to date.
Before I get into my tips for using the Genesis Framework, if you’re new to WordPress, I would suggest learning the terminology used throughout this platform. That was probably my biggest issue when I switched over, because every time I read a tutorial, I had to go searching for the definition of words like “child-theme”, “framework”, and “plugin”. Once you have all of that down, working your way around WordPress will be a breeze.
Now, I like to think of the Genesis Framework as my personal assistant. It organizes all of the complicated aspects of WordPress into a simple, easy to use format. Rather than having to learn about every single WordPress feature, I can focus on my job — creating content and designing my blog. Here are a few other ways to get the most out of the Genesis Framework!
Make use of the Genesis widgets
Included with your Genesis Framework purchase are a few widgets that you’ll find to be extremely useful. They’re fairly simple, but that’s what makes them so great. You can display featured posts/pages in your sidebar, provide a subscription sign-up, or even add an image slider! Because they’re from Genesis, they’ll integrate perfectly with your blog, and you don’t have to go searching for plugins to do the same job.
Choose the right child theme
To be honest, any of the child themes are great starting points. As long as you know how to code or have a designer to code a design for you, there’s a good chance you can transform a pre-made theme into exactly what you want. For example, my blog looks nothing like the original child theme I chose!
I suggest looking through each child theme to see what features it already has built in though, especially widget areas and page templates, because those can be hard to code yourself. I loved how my theme came with a home page with a ton of widget areas, so if I ever want to make a shop website, I can simply reuse that theme!
Get to know your CSS stylesheet
My absolute favorite part about the Genesis Framework is that child themes are the default. You automatically receive the Genesis Theme with your purchase, meaning you can start coding a design right away. Whether you choose to stick with that theme or purchase a different one, the first thing you should do is look through the CSS stylesheet (this should be the style.css file within your editor). This is the code that styles your blog, and affects everything from your post title font to the background color of your sidebar. If you know the basic layout of your CSS stylesheet, it’ll make designing your blog a quicker process, and you won’t end up rewriting code that’s already been made.
Make your posts SEO friendly
The Genesis Framework does wonders in the SEO world, and is designed to take advantage of meta tags and page structures. While just having the Genesis Framework installed on your blog can help boost your ratings, you still need to feed it great content and SEO friendly work! That means including keywords in your post titles, creating strong first sentences that give an idea of what your post is about, and writing keyword-rich, lengthy content.
Use the provided resources
With your Genesis purchase comes a fantastic resource – the Studiopress website. The support groups will be your life saver during the implementation and design process, trust me! Every time I ran into a problem, I just searched through that forum and almost every time someone had asked a similar question. If not, you can always make a new thread and wait for a response from some professional Genesis users! Be careful though, they seem to be very particular about how you make your questions, I guess to keep the forum clean and organized. After reading through a few threads, you’ll understand what I mean!
They also have an entire page of tutorials, which are perfect for when you’re first getting started and don’t want to skip a step in the installation process. There are even some more specific tutorials for design elements like sticky navigation bars and adding a Pinterest button! Seriously, you can do everything with Genesis.
Purchasing the Genesis Framework will cost you $59.95, but think of it this way. That’s a one time purchase, meaning you can use this framework on multiple blogs, as many times as you want. And that goes for the themes as well!
Have you purchased the Genesis Framework? What are your thoughts? If not, are you considering it?
The post How To Use The Genesis Framework To Your Advantage appeared first on The Blogging Brew.
]]>The post How To Make The Most Of Your Sidebar appeared first on The Blogging Brew.
]]>I’ll admit, when I was redesigning this blog, I was extremely tempted to opt out of having a sidebar and go for the full width look. After considering the benefits of a sidebar though, I realized how big of a role it plays in grabbing my readers’ attention and making this blog a more fun place! The name sidebar makes it sound like something extra that you don’t really need to pay much attention too, but think about this; that thing is taking up at least 250 pixels of your blog’s width. That’s a lot of space! Your content may be the best anyone’s ever read, but if your sidebar is an eyesore, it might lead them away. Give your sidebar some love, decorate it to your heart’s desire, and use these tips for dressing it up!
Create A Clean “About Me” Snippet
I don’t know about you, but when I visit a blog for the first time, my eyes go straight to this section. Most blogs have one now, and I think it plays a huge part in making the blog feel more personal and “handmade”. I want to know who I’m reading from, and by simply adding a picture and a short preview of who you are, I gain a bit of a connection to you. Be sure to keep it simple though, because too many fonts and colors can make your “above the fold” layout look a little crazy. Besides, why let a huge script font take the focus away from your beautiful headshot?
If you want to take it a step further, add in a link to your “about me” page under your snippet. Leave your readers wanting more, and make it easy to find that!
Add An Instagram & Pinterest Widget
These can really add some life to your sidebar if it’s filled with text and other flat designs. Not only do they allow your readers to learn a little more about you (because my pins definitely say a lot about me), but they may prompt some to head over to your profile and follow you too! I’m currently using the Alpine PhotoTile plugin for my Instagram and Pinterest widgets, but there are a ton of other options out there, including Blogger friendly options like Snapwidget. Play around with the settings and have some fun with these; I love the hover effects, which you can demo on my Instagram widget where I have the “fade out” effect turned on.
Display Your Best Posts
Think about it this way: your sidebar is essentially free advertisement space, for your own blog! Your readers may not want to scroll through your archive to find an interesting post, so by displaying some of your best work in your sidebar, you’re making it easy for them to click over. If you’re using the Genesis Framework, their featured posts widget is great for this, but I’m pretty sure there are other similar plugins, and for my Blogger readers, creating your own is just as simple! All you need to do is add an HTML widget with images and links from a few posts. This gives you even more control over what you display here. Here’s an example of how the HTML for that might look:
That will create a very basic featured posts widget with 4 posts, so you’ll want to style the classes in your CSS file to get it looking nicer!
Design Category Buttons That Match Your Brand
I’ve seen so many creative category buttons recently and I can’t decide which style I like the most! You can go for a full width look, or even create your own icons that relate to your blog’s categories (a laptop for “tech”, a camera for “photography). This is especially helpful if you have a ton of categories that your readers would have a hard time searching for in the first place.
Add An Email Opt-In Box
Practically every blogger has an email list these days, and we’re always looking for ways to advertise it. You might already have an opt-in box somewhere else on your blog, but your sidebar is a perfect location! It shows up on (usually) every page your readers visit, right? There are tons of plugins out there that can help you create one, like Optin Forms, or you can use the code provided by your mailing service.
For Mailchimp users, head to Lists > Your Newsletter > Signup Forms > Embedded Forms and customize a form to your liking! This is the route I used to create that snazzy opt-in form at the bottom of all my posts. It takes a bit of CSS + HTML knowledge to really customize, but here are some basic snippets of code to get you going:
Create Your Own Buttons + Graphics
Making your own graphics is crucial for tying your brand together, from blog photos to social media covers to business cards. Another place I’ve seen custom graphics lately is in sidebars, like my button for the TBB Newsletter. Like I said earlier, your sidebar is free ad space for your blog, so make the most of it!
You can easily put together your own graphics using tools like Canva, one of my favorite free photo editing platforms. From there, place it in your sidebar using an image widget or a text widget. If you use a text widget, just add this code and replace “IMAGE LINK” with the URL of your image. On WordPress, you can get that by going to Media, uploading the image, clicking it, and copying the URL on its editing page.
Make It Extend Your Brand
My absolute favorite example for this tip is A Beautiful Mess. Their sidebar is just gorgeous, and every part of it has design aspects that complement their brand. I’m not saying every blog needs bright colors and crazy patterns, but do what works for your blog and give that space some lovin’.
This is the main reason I stopped offering sidebar ad spots. Every time I added someone else’s image to my sidebar, I was taking away from my own brand’s consistency. I loved supporting other bloggers, but the sidebar image route just didn’t fit with the path I wanted my design to go on! If you’re stuck in the same dilemma, try offering other services. You could make a post about your favorite bloggers, or simply share their content on your social media.
What are your sidebar strategies? Have you had any success with a specific one?
The post How To Make The Most Of Your Sidebar appeared first on The Blogging Brew.
]]>