The post Why Facebook Groups Won’t Help You Grow Your Blog (And What They’re Actually Good For) appeared first on The Blogging Brew.
]]>If it weren’t for Facebook groups, I really don’t think I’d be using Facebook anymore, at least on a daily basis. They’re kind of that glue that’s keeping me attached to a social network that’s never done much for my blog—I want to give it up altogether, but the groups I’m in are worth too much to drop it completely. I feel like there are a lot of misconceptions out there about blogging related Facebook groups though, because while they carry a ton of benefits, spending time actively promoting your blog through them is pretty pointless.
For reference, I’m a part of three Facebook groups:
While all of these groups revolve around blogging in some way, they’re all run very differently and have totally different members! One thing that a lot of blogging groups have in common are daily or weekly promotion threads. You know, the ones where you can leave a link to your post or social media profile and everyone who adds their link is supposed to go back and view 5 other links?
But here’s the deal: they don’t.
There are a few wonderful and honest people out there that will go back and look at other links, but the majority just drop and go.
I used to spend half an hour every morning going through groups and adding in my posts, finding other links I thought were interesting, not really having time to read through them because I needed to get somewhere, and eventually forgetting to comment on them. Meanwhile, I noticed almost no engagement on my blog being referred from Facebook—the majority of my visitors were still coming through organic search, Pinterest, or Bloglovin’.
The “leave your social link” threads are pretty much in the same boat. If you’re lucky enough to get some clicks on your link, there’s no guarantee that your new followers are interested in the content you offer, especially if the group you’re in is diverse and filled with bloggers of varying niches.
The problem is, you’re going to end up with a lot of followers that don’t care about what you’re posting.
This is when you need to decide how important numbers are to you. If you’re just trying to appear like you have a large audience so companies will work with you, that’s one thing. But if you’re trying to grow your numbers in an effort to grow your blog, you’ve got the wrong strategy going. You could have 5,000 followers, but only 100 of them actually read your content and enjoy it. Or, you could have 500 followers that all love and share your content on a daily basis!
Coming up with a strategy for growing your blog is worth an entire post, so I won’t delve anymore into that, but the point is, drop-and-go threads are not worth your time, which is why a few weeks ago I stopped adding to these threads altogether. I completely shifted my focus within these groups, and ended up with two great reasons to stay active in them.
1) Facebook groups are the perfect place to get answers to your blogging problems.
I always hated asking questions in Facebook groups. I felt like my question wasn’t important enough, or that I might be breaking some sort of rule. The thing is, these Facebook groups wouldn’t go anywhere if their members didn’t ask questions! So if you have one, just ask it. That’s what these groups are for! But there are definitely some guidelines you should follow if you want to avoid getting removed from the group or looking spammy:
You shouldn’t ever have to write “please remove if this isn’t allowed!” in your post
Not only does this create some tension around your post and make it seem spammy (because whoever’s reading it is assuming you broke a rule), but if you’re having to add that line, you probably need to brush up on the rules yourself. Most Facebook groups have rules pinned at the top or in their description, so before you ask a question, just check to see if you followed all of them instead of making the admin check for you.
Don’t ask a question that’s based entirely around getting people to view your blog
Asking “what do you think about this post?” or “do you like the way my sidebar looks?” can get you kicked out of a lot of groups, and even if you are legitimately asking for someone’s opinion, it can still look like you’re just wanting some extra page views.
Instead of linking to your blog, try taking a screenshot of the section in question. I love that Melyssa from Blog + Biz BFFs actually made it a rule that blog links aren’t allowed, because the group’s feed is so much cleaner and anyone who had bad intentions with these kinds of posts disappeared, allowing people with legitimate ones to get the responses they needed.
As for the “what’s your opinion on my post?” questions, you probably shouldn’t ask them. That’s essentially telling someone to go comment on your blog, so you might as well have just said “go comment on my post!” instead, which obviously wouldn’t be allowed!
Search the group for an answer to your question before posting it
If you’re a member of a large Facebook group, at least 10 questions are getting added every day. That means there’s a good chance someone has asked your question in the past, so try using the search function in the group before posting a question yourself!
Avoid promoting your own content
I’ve seen bloggers stretch this rule in so many ways. No matter how hard you try to make it sound like your product/e-course/post is extra special and everyone in the group will benefit from it and you just want to help your fellow bloggers out, you’re still promoting your own content, which can come off as spammy. A lot of groups have rules specifically against this kind of post, and you can get removed immediately for them. Others do allow self-promotion, but in very small amounts, so try to limit these kinds of posts!
Try to fit your question into as few words as possible
If you’re looking for lots of responses, make it as easy as possible for someone to answer your question. Don’t tell a whole story and end up going in a loop that leaves the reader wondering what your actual question was! If any clarification is needed, you can add it in the comments, but a couple of paragraphs or less is usually enough.
Of course, if all these questions are constantly being posted, there needs to be someone to answer them! That leads me to my next point, which is what I’ve started to focus the majority of my time on:
2) If you want to grow your blog, establish yourself as an expert.
Well, more like a fairly knowledgable person in blogging related things that has opinions which could possibly be helpful to other bloggers.
If you scroll through any blogging Facebook group you’re a member of, the majority of the posts are probably questions. Some might be technical, others pretty broad (cough cough how do I grow my blog), and many that are just general “what are y’all’s opinions on this?”. I used to skip over all of these posts with the mindset that if it wasn’t my problem, I don’t need to read it, because I don’t need to know the answer to a problem I don’t have, and I probably don’t have an answer for them in the first place.
Once I started going through them though, I realized there were several questions that I could offer a great response to, and oftentimes I could just refer to a blog post I’d written! Because these groups are so diverse, there’s a huge variety of questions being added every day, so there’s bound to be one that you can answer using your specific skills (like branding/coding/graphic design) or experiences (hosting issues, changing your blog design, switching to a new platform).
Basically, figure out what you’re good at and start showing people you’re good at it.
How does this end up benefitting you or your blog? Once you’ve been answering questions for a while, other members will start recognizing your name when it pops up in comment threads, and the goal is to have your name attached to great advice. When people start realizing how helpful your answers are on Facebook, they’ll be more inclined to assume you have great content on your blog too! Which, by the way, is sort of a prerequisite to all of this because the plan here is to guide people to your great content 
What Facebook groups are you a member of, and what do you think is the best part about them?
The post Why Facebook Groups Won’t Help You Grow Your Blog (And What They’re Actually Good For) appeared first on The Blogging Brew.
]]>The post How To Grow Your Blog With Tumblr appeared first on The Blogging Brew.
]]>After cleaning up a lot of my social media accounts and creating some new ones specifically for my blog, I decided to expand my social reach and create a Tumblr account, something I’d never considered doing until I stumbled upon a few successful accounts made by other bloggers. Tumblr isn’t exactly new territory for me, but I’d never used it with the intention of getting my own content shared; it was just a fun platform to find cool pictures on. Since then, I’ve been following tons of blogs and learning about how successful users are getting their content shared so well, and I wanted to share some tips for anyone interested in trying this platform out too!

Create A Unique Blog Design
By default, every Tumblr user starts out with a basic blog layout with a single column of posts and a header. Standing out is always a good thing, so the first thing I did was find a new template and customize it to fit the tone of my blog. I love Olle Ota Themes, because their templates are very minimalistic and clean, but give a lot of options for customization! If you don’t have experience with Tumblr themes, they have a great tutorial for installing them too. Here’s how my design came out:
Make It Easy To Find Your Blog
Most themes give you the option to add links to your layout’s header, and this is where you can add a link to your main blog. I also mentioned my blog in my bio, so it’s easy to tell that my Tumblr is an extension of my main blog. This navigation area is also a great place to add your social media links; my theme made it super easy, and even has the icons for each platform ready to go!
Let Your Followers Contact You
Interacting with followers isn’t anything new, but it’s a little more complicated on Tumblr than other platforms. Make sure you have your messages set up so anyone can send an ask to you, including anonymous messengers! You might get some spam, but there are a lot of users out there that simply feel more comfortable asking a question without sharing their name.
Decide On A Tone For Your Blog
This is where having separate accounts for your personal life and your blog comes in handy. My personal blog has everything from funny pictures of kittens to beautiful landscape photography, meaning there is no consistency whatsoever. I’m a lot more restrictive on my blog’s account, and only reblog pictures if they’re of good quality, are 100% appropriate, and represent my blog’s values. I love bright colors, clothing, and traveling, so that’s about all you’ll find on my Tumblr!
Only Share Quality Photos, And Avoid Too Much Text
Tumblr is kind of like Pinterest in that your photo means everything. That doesn’t necessarily mean you need to put a ton of info in your image though, if any. Tumblr is a great place to use your raw pictures, without the text overlays and other promotional edits. Unfortunately, most of my blog graphics are exactly that, because they’re created with Pinterest in mind, so I try to get as much information as I can into one graphic. This pushed me to start taking more quality pictures throughout my day to use on Tumblr, and so far that plan is working out!
Bonus Tip: If you’re active on Instagram, connect your Tumblr account to it for easy sharing!
Look At What Other Users Are Asking
One of the most frustrating things about Tumblr is the long wait before users actually start asking you things. At 20 followers, I’m no where near that point, but I follow a lot of popular blogs and see what they’re being asked all the time. Occasionally, I’ll see someone ask a question that I’ve written a post about, and I’ll reblog the ask with a link to my post if it seems like they’d find it useful. This has also helped me find new blogs and gain more followers!
Talk To Other Users
Just posting on Tumblr isn’t enough to make yourself known. Talking to other users will really get your name out there, and potentially land you some new friendships! If you find a blog that you absolutely love, send them an ask and let them know. You’ll make their day just a little bit better, and maybe get a new follower too!
The Queue Is Your Best Friend
One of my favorite features of Tumblr? It has a queue built in, meaning no need for extra applications to schedule your posts! If I know I won’t have time to post for a few days, I run through my dashboard and queue up around 20 posts. Tumblr takes care of all the time intervals, and you can even choose how many posts you want to go out each day. That really helped me over the past two weeks when I didn’t have internet access!
The post How To Grow Your Blog With Tumblr appeared first on The Blogging Brew.
]]>The post Should You Separate Your Blog And Personal Social Media Accounts? appeared first on The Blogging Brew.
]]>Having a great social media presence can do wonders for your blog, so figuring out the best way to maintain that is one of my top blogging priorities. It’s not incredibly hard to do; I mean, you just have to post! But one decision I’ve struggled with since the beginning of my blogging days is whether I should separate my blog and personal social media accounts.
Related: Establishing A Consistent Social Media Presence
Initially, I created a separate account on almost every platform. I figured that would allow me to create a more professional presence, and I thought gaining followers would be pretty easy. Ha, that was definitely not the case. It was especially hard knowing my personal accounts already had hundreds of followers that I could be promoting to, while my new accounts had single digit followings. Eventually some grew faster than others, which led me to deleting the ones that became hard to maintain. I think I’ve finally settled on which accounts to keep separate, and I wanted to share about why I made those decisions for those struggling with the same issue!
I created my first Twitter years before I started a blog, meaning my original Twitter account was full of high school friends; basically, people who could care less about my new post on the Genesis Framework. I knew I wouldn’t get far with this crowd, so I created a separate account for my blog and I’ve stuck with that decision. I use this account to share my posts, share posts from other bloggers, and post organically to keep things from getting to promonition-y. By having this separate account, I’ve been able to grow a following of bloggers and blog-readers who are interested in my content, and are more likely to share it with their own followers. Overall, I would definitely suggest creating a separate account if you already have a personal one!
Related: 6 Tips For Growing Your Blog With Twitter
I’ve gone back and forth on this one, and for a while, having only one account wasn’t much of an issue. I almost never posted about my blog on Instagram because I didn’t see a reason to. You can’t easily link to your blog posts, and creating a graphic that blends well with your feed can take a lot of time. Recently though, I’ve been participating in sponsored campaigns and promoting my blog more often, and it was becoming more important that I maintain a certain style throughout my feed. Another issue was that my follower base mainly consisted of friends and family that don’t quite understand the concept of sponsored posts, or why I keep uploading pictures of tampons (I think I’ve gotten more than 20 questions about that one). So three days ago, I created a separate account, and it felt SO relieving! I can use this account to figure out my Instagram style, post freely about my blog, and create a following entirely comprised of bloggers and users that are interested in my content. I would absolutely suggest creating a separate account if you’re feeling awkward about certain posts, or held back from promoting your blog. It’s a little complicated to run two accounts (constantly logging in and out isn’t the most ideal situation), but I think it’ll be worth it in the long run.
Related: Finding Your Instagram Style
I don’t think I’ve heard of anyone who created a separate Facebook account for their blog, so this one is pretty simple. The main decision is whether or not to create a Facebook page for your blog, and all I can say is, it won’t hurt! I hardly ever post to my Facebook page, simply because I don’t personally use Facebook very often.
This is the one account I’ve never duplicated, and I think that decision helped me grow it to my most popular social media account today. The great thing about Pinterest is that you can separate your blog life from your personal interests through boards, and your followers can choose which boards they want to keep up with. For example, my college friends might not care much about my blogging tips board, while my blogging friends might not want to follow my college board. Whether someone’s following one of your boards or all 34 (I know, I’ve narrowed down a bit) doesn’t really affect you or your numbers, so there’s really no need to have a separate account. One thing you can do to make this easier for your followers is make organized boards with concise names so they can decide which ones they’ll find interesting. Oh, and join group boards! They’re great places to get your posts out to new eyes, and gain more followers for your own similar boards.
Related: How To Use Group Pinterest Boards To Gain Blog Exposure
Tumblr
I’ve been using Tumblr for years, and hadn’t ever considered promoting my blog on it. I always thought of Tumblr as a place for reblogging funny text posts and cute puppy pictures, until I discovered a whole side of bloggers promoting their content successfully! That led me to create an account for my blog last week, and while I’ve found it to be much harder to gain followers on Tumblr than any other social media platform, I think this will be a fun account to keep up with anyway! If I find any success with this account, I’ll make a post about it for anyone interested.
Do you have separate accounts for your blog and personal life? Which way do you think is more ideal?
The post Should You Separate Your Blog And Personal Social Media Accounts? appeared first on The Blogging Brew.
]]>The post How To Establish A Consistent Social Media Presence appeared first on The Blogging Brew.
]]>Maintaining consistency within your blog is one of the best ways to gain loyal followers and establish a visual identity for readers to remember you by. Post graphic templates, writing style, and a solid brand are the main ways to create that identity on your blog, but what about your other outlets? Keeping your online presence consistent will really solidify your audience’s perception of you, which is all they have considering they probably haven’t met you in person! While your blog is where you show off your talents and give your readers wonderful content, social media is where they get to know you on a more personal level, and that’s where your next focus should be when establishing your online presence.
There are several actions you can take to start streamlining your social media profiles. I’ll be going through some main steps, and beyond that, it’s your job to keep it up!
Make all of your profile images the same
You know that gorgeous image you have at the top of your sidebar? Upload that photo as your profile picture on all of your social media profiles. Your audience will start connecting that photo with your blog and overall presence, which is just the start of this process! Most social media platforms use a square profile picture, so having a high quality square image in your files will make things super simple.
Create a consistent cover photo
Most social media pages have a space for a cover photo, and using the same photo across them is just as important as using the same profile picture. Unfortunately, each platform has a different size, so you’ll have to do a bit of editing here. I’d suggest designing the biggest one first, and then cropping from there! Here are the sizes for the most used social media platforms:
Facebook: 851 x 315 px
Twitter: 1500 x 500 px
Google Plus: 1088 x 608 px
Use your own voice
By now you’ve probably developed a consistent writing style within your blog, so this part should be easy. When posting on social media, try to use that same voice, because your audience will recognize it! For example, I’m a fairly sarcastic person, and I try to be as relatable as I can in my posts. I maintain that style on social media by posting sarcastic tweets and random thoughts throughout my day, which my followers seem to connect well with!
Create a short bio to use across the board
A lot of bloggers have a short snippet about themselves on their blog, and it’s the perfect bio to use on social media. Using the same bio on every platform establishes who you are, and how you want your audience to see you, so choose your words wisely and try to get as much information as you can into just a sentence or two. Character limits are the barrier here, so if you have to change things up in order to meet that requirement, take out any fluff words and narrow down what your audience really needs to know about you.
One last tip: Try to avoid posting the same thing to each profile (I know, that sounds like the opposite of consistency!). A lot of your followers probably follow you on multiple platforms, so it can seem spammy when your word for word exact post shows up on several of them. Instead, try changing up the wording to suit the platform you’re using, and scatter the posts throughout the day to catch readers who may not have been online earlier!
How do you use social media to establish your online presence? Have you discovered any tricks to retaining followers on those profiles? I’d love to know!
The post How To Establish A Consistent Social Media Presence appeared first on The Blogging Brew.
]]>The post How To Use Group Pinterest Boards To Gain Blog Exposure appeared first on The Blogging Brew.
]]>Pinterest has done great things for my blog since its start back in March 2014. It’s consistently held the top referral spot for my blog (over 75% of my views are referred through Pinterest!), and it’s where I discover new blogs to follow. Of all it’s features, group Pinterest boards have to be my favorite simply because of all the opportunity they offer!
Group Pinterest boards are just like any other Pinterest board, but they’re pinned to by more than one person rather than just the creator. This is great for several reasons:
- More contributors means more content, and more content means more activity.
- A large group of contributors can also bring in a bigger following.
- By having a diverse group of pinners, your pins will be exposed to people who don’t follow you yet.
- Group boards often have rules that require members to repin other pins within the board after pinning something of their own, so you’re guaranteed some repins!
- If your blog graphics have a consistent style to them, the members/followers of the group board will start to differentiate between your pins and the pins of other members.
So, are you hooked yet? Here are my strategies for making the most of group boards:
Finding A Group Pinterest Board
Of course, the first step to using a group board is finding one! There are several websites that aggregate group boards in one giant list, like PinGroupie, although these types of sites can leave you searching for hours to find a good board. You can also search for a specific topic in the Pinterest search bar, and then filter your results for “boards”. If none of these options lead you to a board you like, try checking out the boards of people you follow. I run my own group board, Blogging Is Our Jam, where members can share their posts about all things blogging! (If you’re interested in joining, head here)
There are a few things you should consider when choosing a group board to ensure you’ll benefit from it:
- Are the members active? Is there new content being pinned every day?
- How many repins does each pin on the board have on average? Are there a lot of pins without any repins? This could be a bad sign!
- Do you content that would interest the average follower of this board?
- Are the pins on this board of good quality? Would you repin these pins?
- Is there a lot of spam in this board? Do members pin things unrelated to the board’s topic?
- How strict are the rules for this board? Is there a daily pin limit?
Once you’ve found the board for you, just follow the instructions provided by the creator in the board description. No instructions? Try commenting on one of the pins asking to become a member—this doesn’t always work, but it may be your only option!
Start Pinning!
After creating some great graphics for your posts, slowly start pinning them to the new board. I say slowly because you don’t want to seem spammy, and some boards may have a limit as to how many pins you can add a day. I try to max out my pins to about 5 a day, with a couple of hours between each. This can also help you figure out when the best time to pin is!
Take note of your pins’ success
This is when the real strategizing comes in. Every time you add a pin, make note of it somewhere, and check back every once in a while to see how that pin is doing. What was the pin about? How many repins did it get? Any comments? This can help you learn a few things about your pins:
- If you’ve pinned from a specific post multiple times, but with different graphics, you can see which graphic caught the most attention from its audience.
- If your graphics are fairly consistent, a difference in the number of repins between different posts could show that your audience is interested in one topic more than the other. For example, if your pins that link to posts about blog growth are doing great, but the ones about social media aren’t, this could be a sign that your audience is more interested in learning about blog growth than social media. Use this kind of data to come up with new post topics that you know your audience will enjoy!
- Similarly to testing graphic styles, you can also test out post titles by creating graphics for the same post, but with different text, to see which ones grab the most attention. For example, the graphic I created for this post says, “How To Use Group Pinterest Boards To Gain Blog Exposure,” which is also the title of this post. However, I could’ve shortened it to something like, “Using Group Pinterest Boards To Grow Your Blog”. The takeaway here is that the text in your pin doesn’t have to match the title of your post—use whatever attracts more traffic!
Repin Other Members’ Content
More of a courtesy than anything else, repinning content from other members will ensure you keep a good reputation among the board members and don’t make any enemies. Don’t be that person who just takes advantage of the board—the only way group boards work is if everyone contributes by both pinning and repinning. Besides, there’s probably some great content to repin!
Are you a member of any group boards? I’d love recommendations!
The post How To Use Group Pinterest Boards To Gain Blog Exposure appeared first on The Blogging Brew.
]]>The post How To Set Up Rich Pins For Blogger And WordPress appeared first on The Blogging Brew.
]]>Rich Pins are popping up everywhere on Pinterest, and it’s slowly becoming the norm for bloggers to have them. They’re pins that include extra information—your website name and favicon—so pinners know exactly who they’re repinning from (aka you!). Whether you know it or not, you’ve probably seen them, and you can check out an example on my blog’s board. I got approved about a month ago and since then, my profile views and average monthly viewers have more than doubled! Setting up Rich Pins is extremely beneficial to your blog, and it only takes a few minutes to do!
Setting Up Rich Pins On Blogger
1. Adding Rich Pins on Blogger requires a bit of code, but nothing too complicated! First, go to Settings > Search Preferences > Meta Tags and edit the Description section to be “enabled”. Here you can add a short description of your blog, and when you go to edit your posts, you’ll see a new box in the options sidebar allowing you to enter a search description. This is a great place to write a brief summary of your post, although you can leave it blank and the first few lines of your content will show up instead.
2. Now go to Template > Edit HTML > and search for
<b:includable id='post' var='post'>Underneath that, paste the following:
<meta expr:content='data:post.title' property='og:title'/>
<meta expr:content='data:blog.metaDescription' property='og:description'/>
<meta content='article' property='og:type'/>
<meta expr:content='data:blog.url' property='og:url'/>
<meta expr:content='data:blog.title' property='og:site_name'/>
<meta expr:content='data:post.timestampISO8601' property='article:published_time'/>
<meta content='YOUR BLOG'S TOPIC' property='article:section'/>
<b:loop values='data:post.labels' var='label'>
<meta expr:content='data:label.name' property='article:tag'/>
</b:loop>
Replace “YOUR BLOG’S TOPIC” with a word that sums up the content of your blog. For example, if you run a lifestyle blog, use “Lifestyle”.
3. Now that your code is all set up, head over to the Rich Pins Validator and enter a link for your most recent blog post. Click Validate, and once all of your information is correct, click Apply. If you have any issues with the installation, go back and check to ensure you placed the code in the right place.
4. That’s it! It can take as little as a few days or up to a month to be accepted—it took me about a week. Pinterest will email you and set everything up from there!
Setting Up Rich Pins For WordPress
1. Thanks to the beauty of plugins, setting up rich pins on WordPress is super simple! First, go install the Yoast SEO Plugin. It’s a search engine optimization plugin that can help your blog’s search engine rankings, and even if you don’t use rich pins, I recommend installing it! After you activate the plugin, go to SEO > Social > Facebook and make sure the “Add Open Graph meta data” box is checked.
2. Head over to the Rich Pins Validator and enter a link to one of your blog posts. Then click “Validate”.
3. Make sure all of your information is correct and apply. That’s it! It could take as little as a few days or up to a month for Pinterest to email you, so be ready to wait.
While you’re waiting to be accepted, consider upping your Pinterest game by joining a group board and gaining more blog exposure!
The post How To Set Up Rich Pins For Blogger And WordPress appeared first on The Blogging Brew.
]]>The post Attempts At Becoming An iPhonetographer appeared first on The Blogging Brew.
]]>A few weeks ago I talked about finding my Instagram style, and I was pretty stuck on which one was the most “me”. Am I bright and colorful? Am I warm and earthy? Am I crisp and clean? I’m honestly still unsure of which one I want to stick with, but this week I’m experimenting with clean, white backgrounds and pops of color. Word of advice: a white foam board is SO HELPFUL if you’re going for this style. Desks are way too inconvenient. So anyway, here are some of the pictures I ended up with!
Have you ever played around with your Instagram style? What style do you think you have right now, if you’re trying to have one?
The post Attempts At Becoming An iPhonetographer appeared first on The Blogging Brew.
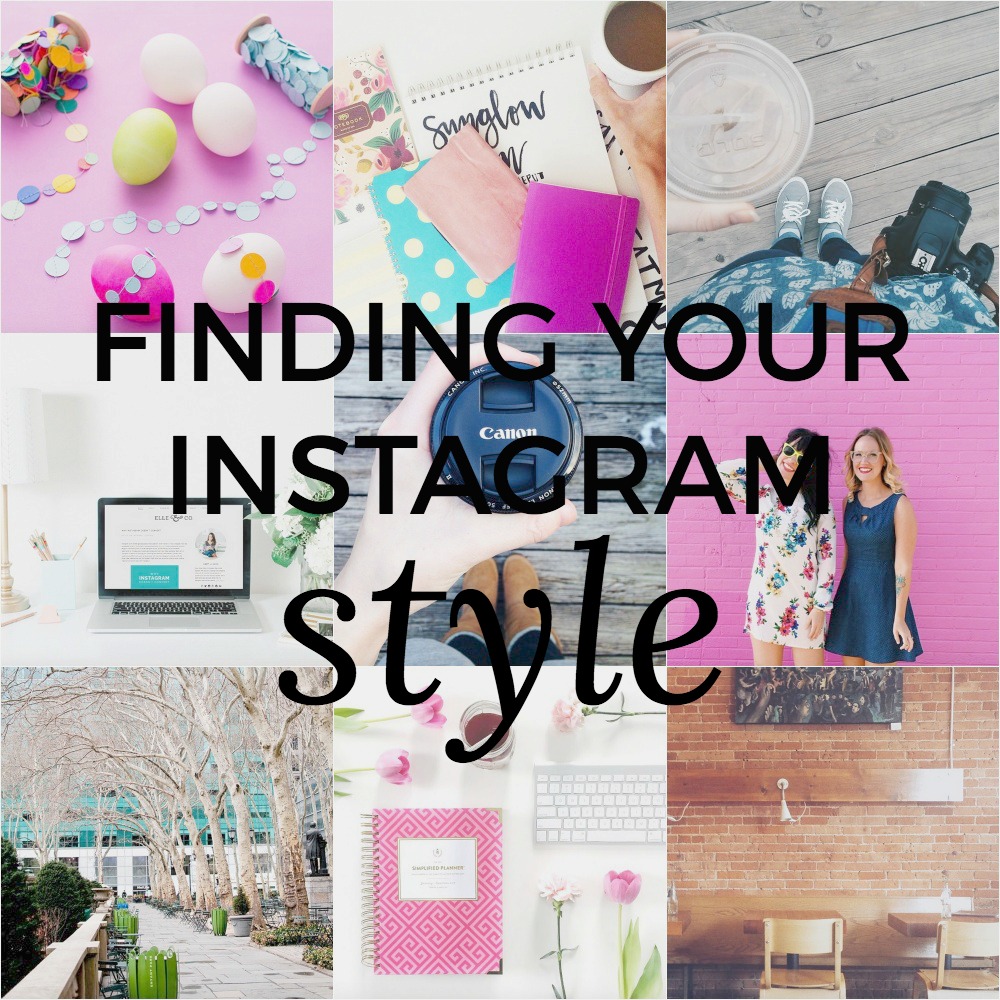
]]>The post Finding Your Instagram Style appeared first on The Blogging Brew.
]]>Update: Check out the new Instagram!
My name is Jessica Slaughter, and I am a blogger who sucks at Instagram. There, I said it.
Contrary to most of my posts, this one isn’t a “how-to” based on my experience of actually doing what I’m talking about. Instead, I’m writing about my struggle to find my own Instagram style, and sharing the steps I’m taking to get there. So here we go.
Instagram is becoming extremely popular in the blogging world, not only as a way of gaining more readers, but for connecting with your followers and letting them see your personality rather than just read about it. “Professional Instagramers” have become a thing, experts are holding classes on how to get to their level, and making an Instagram post has become almost as important as making a blog post. It doesn’t seem like a hard skill to develop. Just snap some photos, throw on a filter, make a clever caption, and bam, 500+ likes. But it is. Instagraming is a skill, and I’m determined to attain it.
Now I know there’s a lot of controversy in the blogging world about social media and comparing yourself to others on it. That’s not necessarily what I’m trying to do here, though it’s sort of coming out like that. It’s not that I feel bad about myself for not being Instagram famous, or for not having perfect photos like some other bloggers. I mean, it’s just a picture. I just think it’s awesome that some bloggers have found a sense of style in their photos, and are able to share that style with the world. It’s so inspirational! So no, I’m not comparing myself to other bloggers because I don’t think I’m good enough. I’m comparing myself to other bloggers because I personally want to get better at using Instagram, and they’re the perfect source of inspiration and motivation.
To make this search for my style a bit easier, I decided to find a few favorite Instagramers and look through their photos (this was a very creepy process) to get a sense of where they’ve come from, the style stages they’ve gone through, and where they are now. One of the most encouraging things I got out of this step was seeing that most of these bloggers started out exactly where I am – with a mishmosh of photos, experiments with every filter imaginable, and no clear sense of style. Lesson learned?
Anyone can develop an Instagram style — your Instagram history doesn’t matter.
After narrowing down my favorites, I started focusing on the current styles they had, and sorted them into categories.
Warm Vibes, Contrast, & Coffee
Top: @oakandoats, @kthrnhnsn
Bottom: @elahtree, @megmcilvaine
These Instagramers share several style characteristics, and they’re also some of my favorite bloggers! Their pictures always make me happy, because they’re real life moments captured in a beautiful way. Their attention to contrast really brings out the colors in their photos, while giving them an in-the-shade look so they’re not too in your face. As for coffee? Well, the idea of coffee just has a certain vibe to it, and that’s the only way I can describe this style. Coffee. Oh, and they’ve all perfected the coffee-in-hand shot.
Color, Color, Color

@abeautifulmessofficial, @britandco
If you ever need color inspiration, check out these Instagramers. Their feeds are exciting, bright, and full of energy! It’s pretty much impossible to scroll by one of their photos without noticing it, because they always stand out in a feed. I love how they are able to combine such contrasting colors in a beautiful way, and their staging is perfect. There’s a reason the owners of these accounts are so successful in the blogging world! (hint hint, they really know what they’re doing)
White Space, Desks, & Pops Of Color
@laurenelizhook, @whitv, @thenectarcollective
These ladies have beautiful feeds filled with bright colors and lots of white space. I’m loving the clean, sharp look this style creates, and it draws all of your attention to the subject, whether that be a notebook, food item, or person. A lot of their photos have to do with their personal businesses and blogs, but they’ve managed to do so without seeming spammy at all. This style also translates well with product-based Instagram accounts, because you can shoot in the same place every time with whatever product you’re trying to promote. I’ll talk a bit more about how these ladies have used products in their photos later!
A Few Things To Consider
- Prop styling is another huge aspect to Instagram style, and these ladies have it down. Social media is all about connecting with others, and I know that whenever I purchase from a small business, I want to share how much I love their product with my own followers!
- Consistency is something I’ve always struggled with. The last time I posted to Instagram was over two weeks ago, so there’s no reason I should expect to be growing my following. I hope that once I find my style, I’ll be more motivated to post a few times a week!
- Captions have never been my expertise. I’ve tried emojis only, quotes, puns, and no caption altogether, and I’m really not sure what route I want to take. I definitely want to connect with my followers more though, so maybe I’ll try asking a question at the end?
I’m not entirely sure yet which style I’m heading towards, but I’m thinking the first one would fit best with my lifestyle. Although I love the white space look, I just don’t have many places to shoot photos like that. And while I love color, my belongings and clothes are definitely more toned down and natural, which again fits in with that first style. I guess I have some decisions to make!
Was this tutorial helpful for you? Consider endorsing me on my Activate by Bloglovin’ profile! It helps me understand what I do best, and what types of posts y’all find the most helpful!
The post Finding Your Instagram Style appeared first on The Blogging Brew.
]]>The post 7 Resources For Tracking Your Social Media Presence appeared first on The Blogging Brew.
]]>When I think about social media, I like to imagine little messengers going out and telling everyone about my new post. Every time someone finds out about it, they share it with someone else, who then share’s it with another person, and so on. Social media seems so simple, but it’s kind of crazy to think about how many eyes could end up on your content just by posting about it outside of your blog. Take Pinterest for example. A few people initially pin your post, then their friends see it and pin it as well, and then their friends see it and pin it too, and if you’re lucky, that process will continue for a long time. Soon enough, you’ve got yourself a viral pin that will bring in readers for years to come. But how do you know which techniques are working, and benefitting your blog in the long run?
As my following has grown, it’s become a lot easier to keep track of my social media presence. More posts means more sharing, which means more data to go off of. I’ve also bookmarked my fair share of resources that are really helpful in this process, and today I want to share those with you!
ShareTally
I heard about this website a few weeks ago, and I can’t believe I hadn’t found it before. You input a url to a specific post, and it scans all the shares that post has gotten on 21 different social media platforms. It’s super specific too, getting down to the number of likes vs. shares vs. comments on Facebook. I love using this website to see the long term popularity of a post. I check it every once in a while and compare the number to see if an old post is still getting shared around, which is always a good thing!
Twitter Analytics
Twitter tracks a lot about the tweets you make, so why not take advantage of that! The engagement rate (the number of users who engaged with your tweet divided by the number of users who saw it) is a great way to see which tweets capture your audience’s attention the best. You might begin to see a trend between high engagement rates and a certain aspect of your tweets, like an added picture or the use of hashtags. The graph is also an awesome visual tool for seeing which days your tweets do the best.
Pinterest Analytics
Pinterest also came out with an analytics tool, and it’s probably one of my favorite resources. They track traditional data like profile views and repins, but they also include a section tailored to tracking pins from your website (if you have that hooked up to your Pinterest account). I LOVE this feature, because I can see which posts are doing the best, which images may need improving, and which pins are staying popular in the long term. Without this tool, I never would’ve known that my college shopping list post from last year got over 100 repins! That might not be a lot in the big blogging world, but anything over like, 10, is a huge accomplishment for me.
Pin Plugin
This tool isn’t as detailed as Pinterest analytics, but it gives you a quick look at how well a post did on Pinterest by gathering the total number of pins made from a specific post. If you don’t feel like digging through the traditional analytics system, this tool is perfect for you!
Iconosquare
This is my central hub for Instagram statistics. Along with its beautiful interface, it has all the stats you could possibly want to know about your Instagram. You can even track your follower count, which could be really helpful during giveaway times if you added your Instagram URL to one!
Bitly
Most people see this solely as a way to create short URL’s, but it has a great statistics tool too! If you create an account, you’ll get a feed of all the links you create and some data about their performance. You can see how many total clicks the link got, as well as the number of clicks made on each social media platform. This might help you rethink your link placement strategies if one platform isn’t doing as well as others.
Pinterest Source Page
I know, lots of Pinterest, but this platform has proven to be the most helpful for my blog, so I track it the most! I had no idea this page existed, but it’s pretty fantastic. It compiles all of the pins made from your website, making it a great visual representation of how popular a post is. Just add your blog’s URL to the end of it so you can see pins from your website.
p.s. : 6 Tips For Growing Your Blog With Twitter + Using Pinterest Boards To Organize Your Life
The post 7 Resources For Tracking Your Social Media Presence appeared first on The Blogging Brew.
]]>The post 6 Tips For Growing Your Blog With Twitter appeared first on The Blogging Brew.
]]>I’d say Twitter was the last social network I really got into, and I still don’t use it very often. I kept seeing posts from other bloggers about their success with it though, so a few weeks ago I decided to start investing more time into promoting my content through it. I won’t say I’m entirely in love yet, but that’s mainly because I’m super impatient when it comes to waiting for results. I just want to get a thousand new followers and 50 retweets and have people tagging me and all that jazz, and I think a lot of bloggers can relate to that feeling! I have picked up a few pointers along the way though, and I can definitely tell that they’re making a difference in my Twitter stats.
USE IMAGES
This is something I didn’t pick up on at all until, well, yesterday (see it here). I’m not sure why it took me so long, considering this is something I tell every blogger when it comes to making a great post. It’s been shown that tweets with images receive more interactions (like retweets and favorites), which of course is what we’re going for! The minimum size to have your full image shown is 440 x 220 pixels, but I made my image slightly larger (880 x 440 pixels). Just be sure to keep the main content at the center so it shows up correctly!
ENGAGE
Like any form of social media, engagement plays a huge factor in becoming a well-known user. By engagement, I mean tweeting at other members, tagging them in tweets (#FollowFriday?), retweeting their content, and just interacting with others in general. I love retweeting my blog friends when the tweet about a new post, because it gets their content in front of more eyes and connects them to new people. Engaging also gets your name around to more users, which could lead to more followers for you!
SHARE CONTENT FROM OTHER BLOGGERS
This goes along with engagement, but rather than just retweeting what another blogger already said, try being more organic and tweet about their content yourself! It can make someone’s day if they see a tweet about a positive reaction to their post. If I find a post I absolutely love, I’ll grab the link for it and tweet about what I liked in the content. Don’t forget to tag the author—extra engagement points!
JOIN GROUP CHATS
The first group chat I participated in was with @FireworkPeople. It was so energetic and positive and I met a ton of new people! Group chats are basically scheduled times when the host will tweet about something, or ask questions to their followers, and anyone that’s available at that time can just join in on the conversation! They’re super casual, and oftentimes everyone will follow each other afterwards.
SCHEDULE YOUR TWEETS
I know there are quite a few tweet schedulers out there, but I’ve been using Buffer for a while now and I don’t think I’ll be switching anytime soon! Most schedulers work about the same though. You make tweets beforehand (hours or days) and schedule the exact time for them to be posted. When I make a new post, I schedule 3 or 4 tweets about it for the next day scattered between 7am and 7pm. Then I don’t have to worry about forgetting till after dinner!
TWEET FOR YOURSELF
While scheduling is fantastic for the busy blogger, you should avoid using it for everything you tweet. If your dash is filled with links to your blog posts and that’s it, people will get annoyed and unfollow you. No one likes over advertisement, especially on their Twitter feed! Do include those scattered scheduled tweets, but tweet organically throughout the day as well. Your followers want to get to know you, not just your blog!
Btw, you should definitely follow me on Twitter.
p.s. grab your freebies and check out these fantastic apps
The post 6 Tips For Growing Your Blog With Twitter appeared first on The Blogging Brew.
]]>