The post How To Start A WordPress Blog appeared first on The Blogging Brew.
]]>Whether you’re transitioning from another blogging platform or creating a blog for the first time, starting a blog on WordPress can be a bit confusing. There’s a good chance you haven’t used hosting before, or even a custom domain name. Don’t worry though, I’m going to give you all the steps you need to start a WordPress blog in just a few minutes using Bluehost, my host of choice!
I chose Bluehost for several reasons. Initially it was because so many of my blogging friends were using them, and I figured they must be good if they have the trust of all these amazing bloggers! After some research though, I learned about some other great benefits:
- Bluehost offers great hosting for a very reasonable price at less than $5 a month.
- Their customer support is fantastic! I always hear back within a few hours when I send in a ticket, and it took less than 5 minutes for me to hear back from a DM I sent to their Twitter support team.
- WordPress has recommended Bluehost as a great host for their platform; it doesn’t get more trustworthy than that!
1. Setting Up Your Domain + Hosting
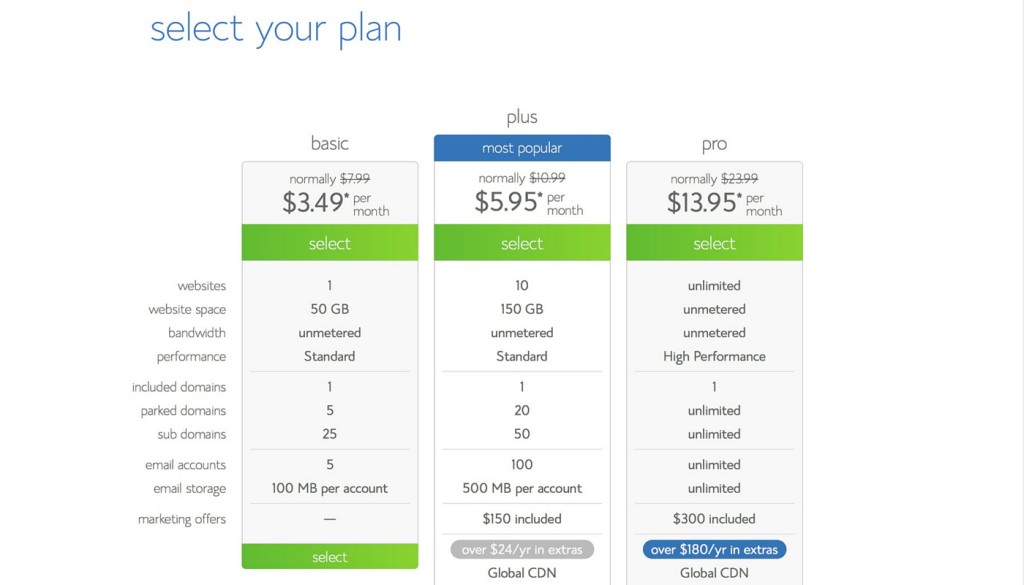
After heading to the Bluehost website, click on the get started now button. If you’re only planning to have one website (your blog), all you need is the Starter plan. I went with the Plus plan, but only because I’m hosting multiple websites!

Now you’ll need to choose a domain name. If you haven’t made one yet, Bluehost will let you create one for free!

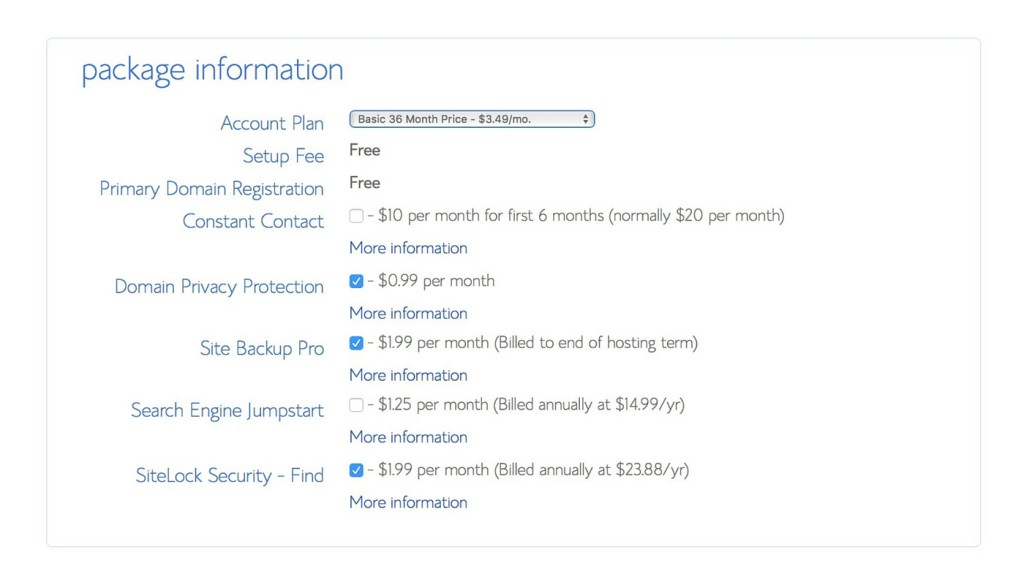
Within the package information, there are a few add-ons you can purchase. I only selected the Domain Privacy Protection, but SiteLock Security and Site Backup Pro are other great choices for extra security!
You’ll also be able to choose how many months of hosting you’d like to pay for. The more months you select, the cheaper the monthly rate is, so if you feel confident that you’ll be sticking on WordPress for a while, I’d recommend paying for more than a year!
After filling out the package information, you can follow the rest of Bluehost’s instructions to complete your purchase.
2. Installing WordPress
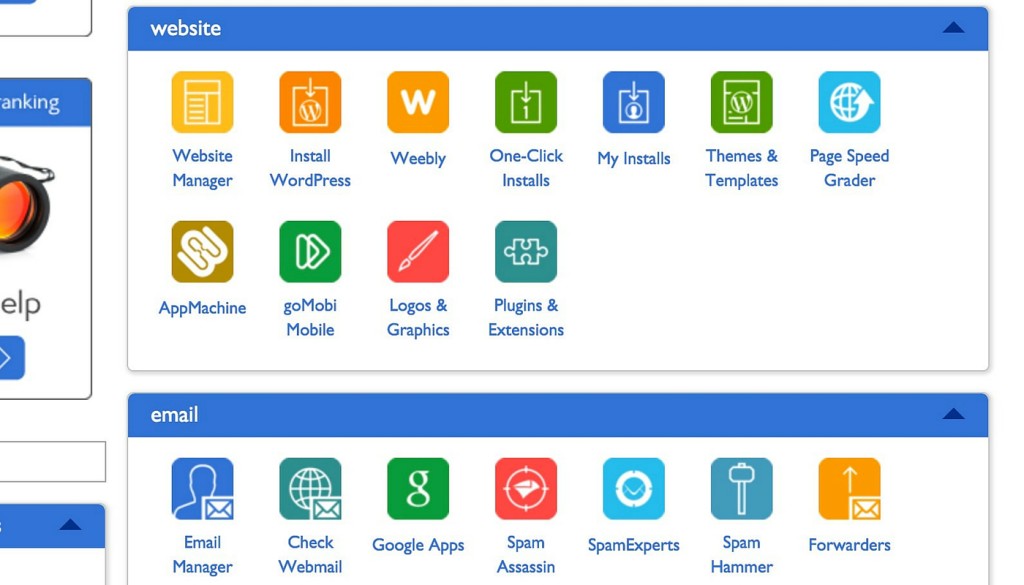
Head to your Bluehost dashboard or cpanel and select Install WordPress. On the next page, choose Install from the area that advertises free installation.
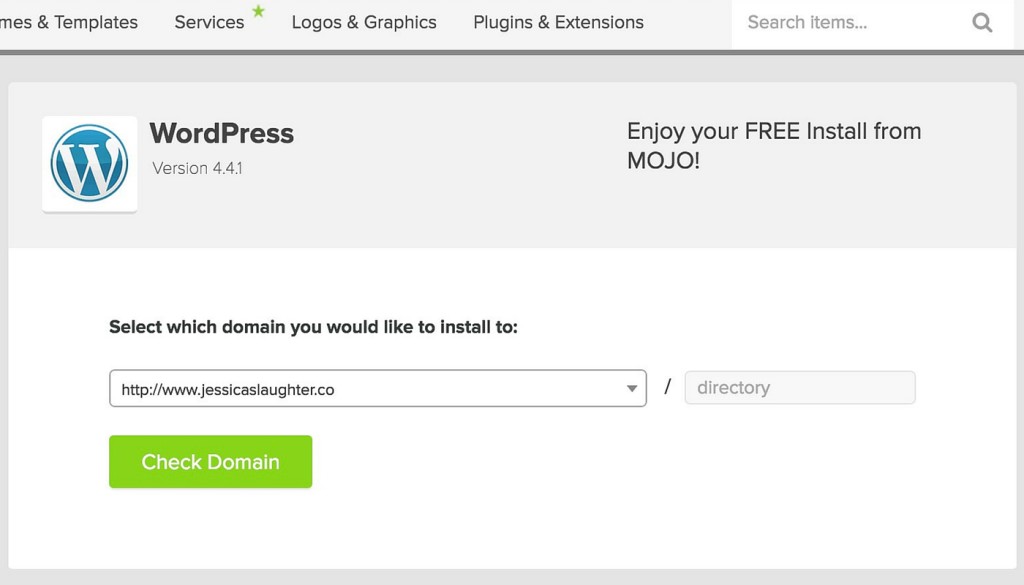
Select the domain you want to install WordPress on (if you have multiple websites), and click Check Domain. You only need to add something to the text box if you’re planning to install WordPress on a separate page, like mywebsite.com/blog, but generally you can leave that part blank!
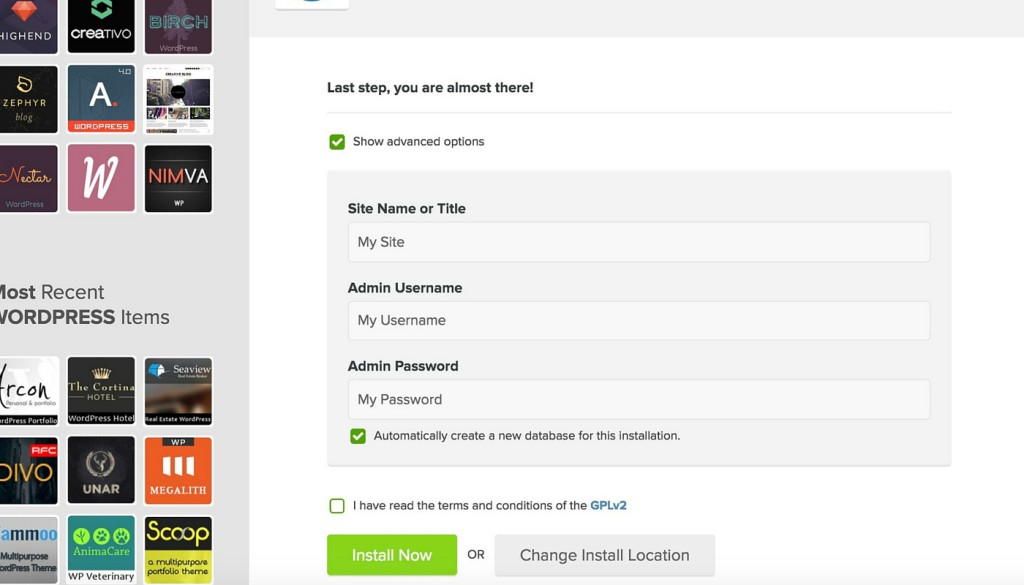
Open the advanced options section and fill out your information, then click Install Now.
You’re done installing WordPress! Just wait for the installation to complete, and you should be sent an email with all of your installation credentials. Make sure you keep this or write down the information somewhere.
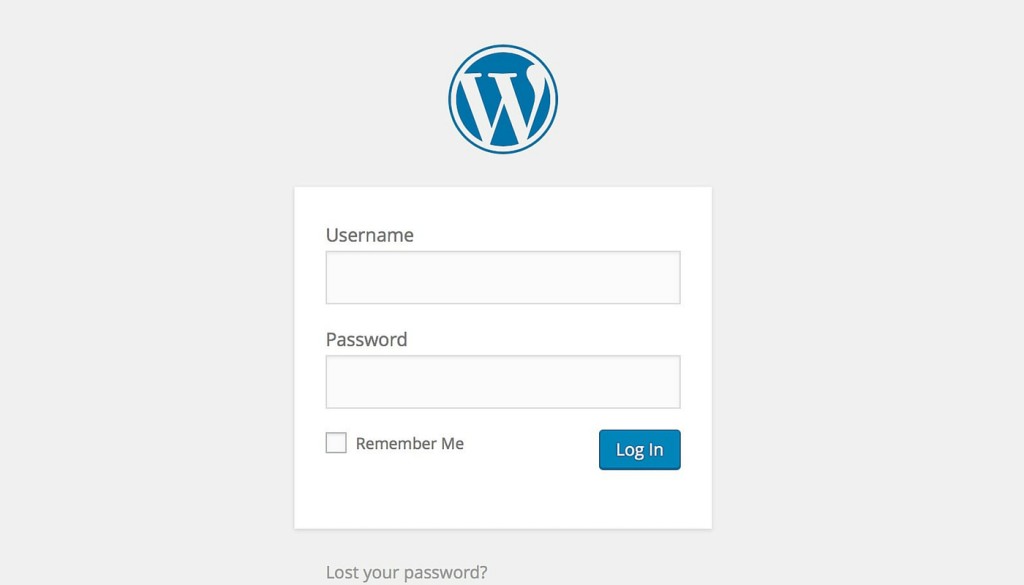
To login to your new website, visit your WordPress dashboard by going to http://www.yourdomainname.com/wp-admin. You’ll be visiting this page a lot, so I’d recommend bookmarking it!
3. Set Up Your Design
Now that WordPress is installed on your site, it’s time to make it look good! Find a theme that will best display your content and meets your needs. I’d advise against using a free theme you found somewhere online, as these often have bad code and can cause you problems in the long run. I’m using a customized version of the Fun theme on the Genesis Framework!
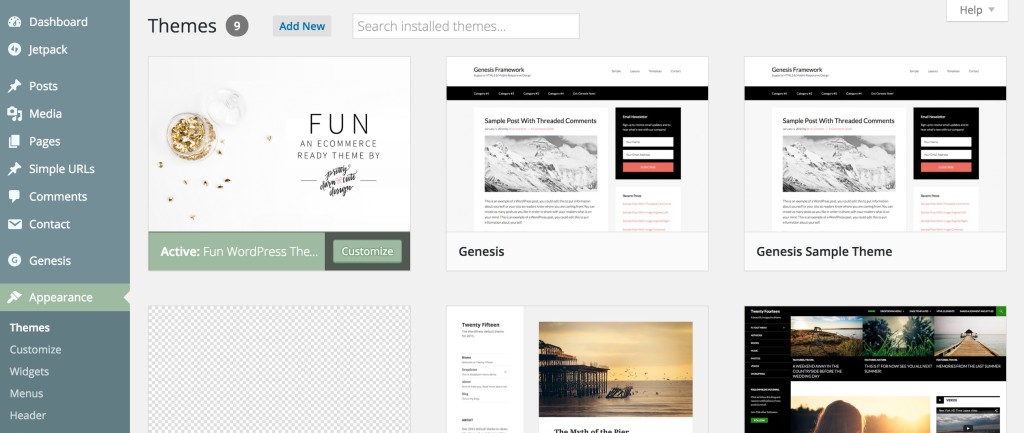
To install your theme, go to your WordPress dashboard and head to Appearance > Themes. Select Add New and then Upload Theme. Upload the .zip file for the theme you chose, and click Install Now.
Your WordPress blog is now live! Head to your domain to see it in action. To get you started, here are some posts you might want to check out:
Investments Worth Making For Your Blog
How To Make The Most Of Your Sidebar
How To Make A Custom MailChimp Signup Form On Your Blog
Ways To Make Money For Your Blog
If you’ve set up your own blog on WordPress, leave me a link in the comments below so I can check it out! ☺️
Disclaimer: Some of the links used in this post are affiliate links, meaning I’ll make a commission if you make a purchase using them. I only use affiliate links for products that I have experience with. There’s no additional cost to you for using them!
The post How To Start A WordPress Blog appeared first on The Blogging Brew.
]]>The post How To Start A Blog On Blogger appeared first on The Blogging Brew.
]]>Starting a blog was absolutely one of the best decisions I’ve ever made. It’s provided me with countless opportunities, from working with big brands to meeting some incredible people, and has recently become a great source of money to put into savings while I focus on my studies. I honestly never thought blogging would become such a huge part of my life, but over the past year and two months, I’ve grown my blog from a 5 views a day personal journal to a 70k+ views a month hub of tips and resources for young people looking for college and blogging advice.
It takes a lot of time and work to grow a blog, but even if you’re just considering starting one, now is the time. I put off starting my blog for years, and man do I wish I would’ve started earlier; think of all that extra time that could’ve been spent growing this place even more! So if today’s your day, here’s a super simple tutorial for starting a blog on Blogger, the platform I recommend for new and old bloggers alike!
First Things First, What’s Blogger?
Blogger is a free blogging platform made by Google, and is one of the most popular platforms available. While my blog is on WordPress now, I started it on Blogger and had no complaints! It’s easy to use, offers great design flexibility, and of course, it’s free. In fact, the only money I ever spent on my blog prior to switching platforms was on a domain name, which was only $10 a year. So step one, head over to Blogger!
Related: Choosing A Blogging Platform
Setting Up Your Account
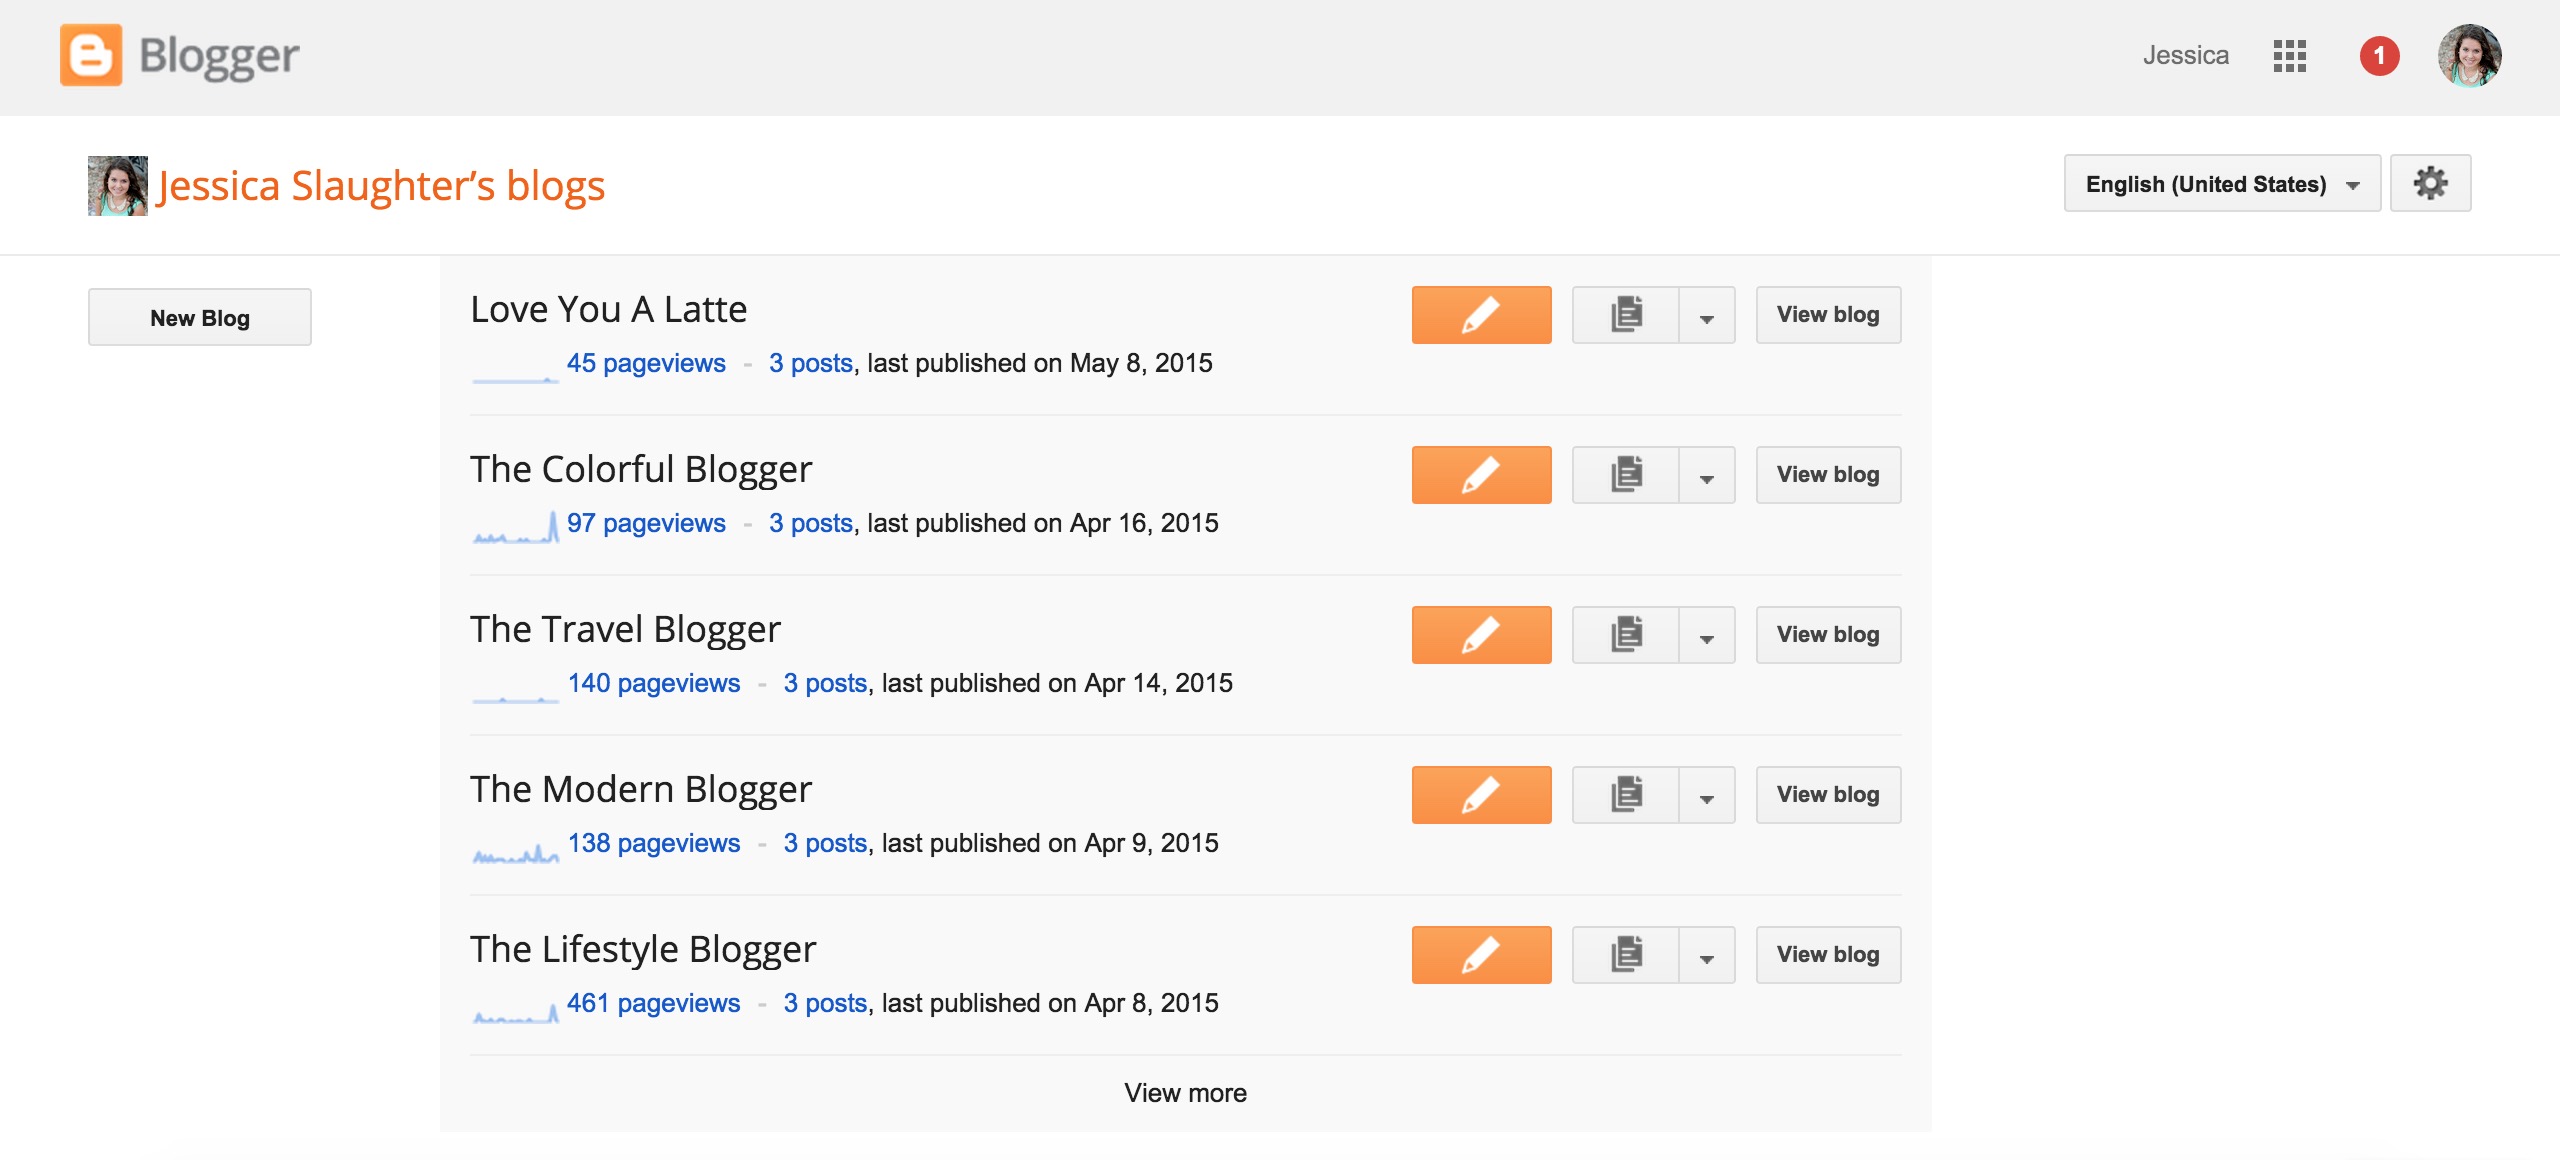
If you already have a Google account, you’re one step ahead! If not, you’ll need to create one by clicking the “Sign Up” button. After that, log in and you should see a page similar to this (I have a lot of test blogs, oops):
Creating Your Blog
Click “New Blog” and fill in your blog’s title and address. To keep things simple, these names should match, unless an address is taken or your title is extremely long and needs to be shortened for the url. If the address you want is taken, that’s a good sign you should expand a bit and come up with something more unique! I was super annoyed when I found out my own name was taken by a blog whose last update was in 2010, but some things aren’t meant to be!
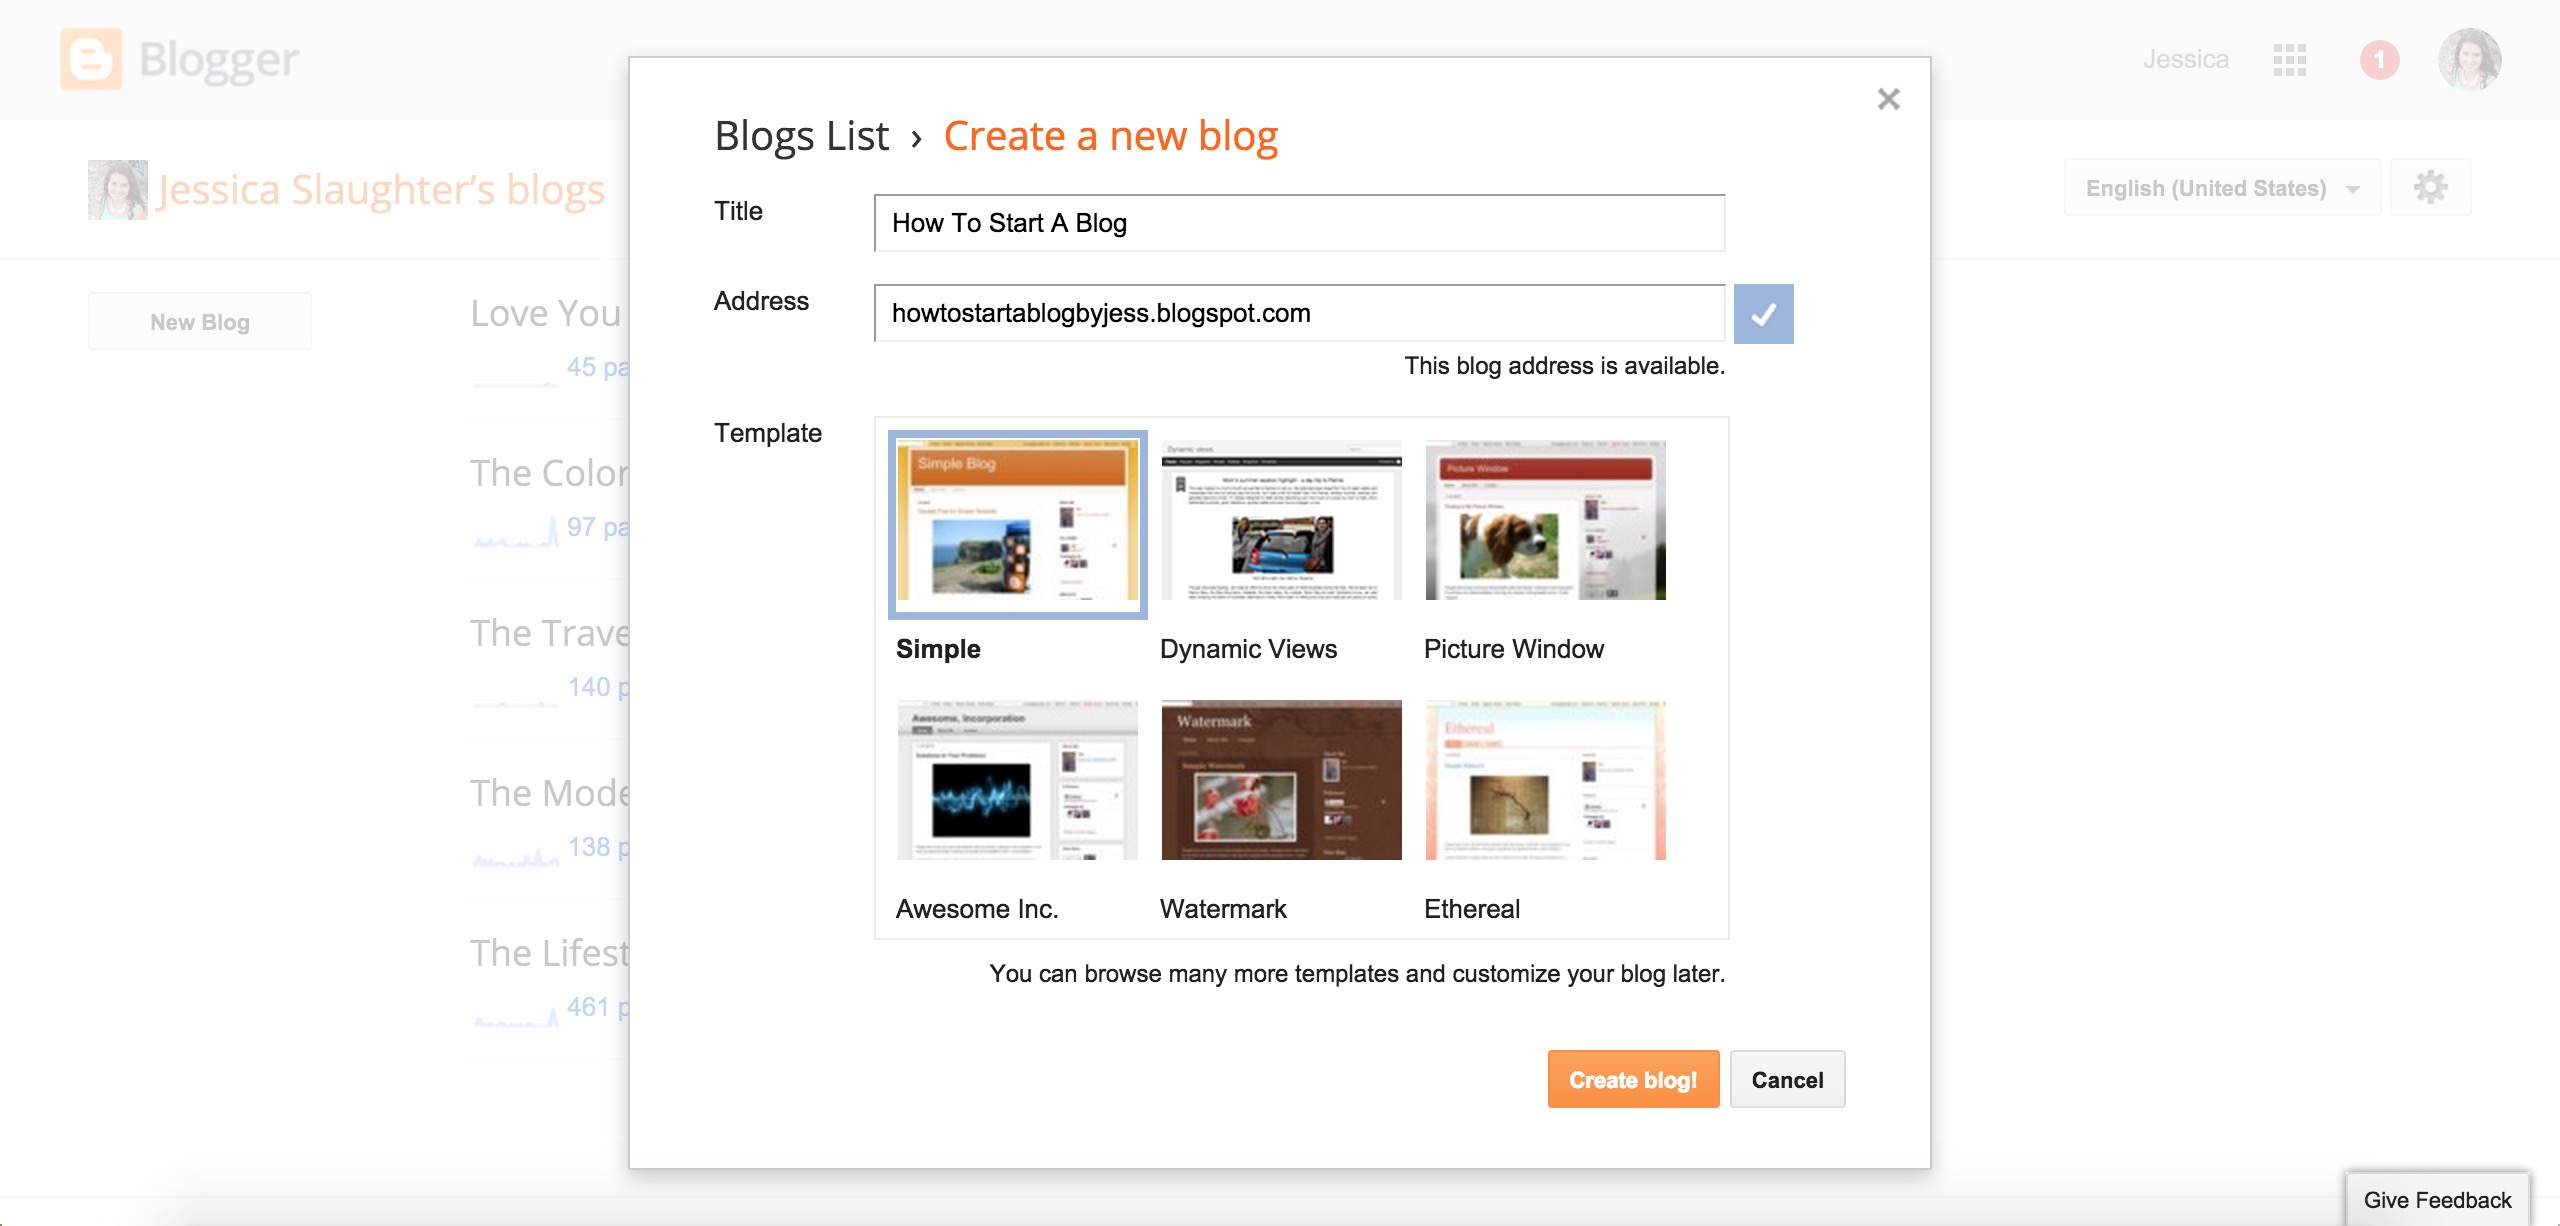
You’ll also be asked to choose a template. These are usually treated as frameworks for you to build on or replace with purchased templates, although if you find one you like, that’s perfect! If you’re planning on editing the template yourself (which will require some CSS knowledge), I would go with the Simple template. Like its name states, there’s not much to it, so it’s a great template to start from. You can also purchase templates from websites like Etsy, or hire a designer to create a custom design for you.
Related: Getting A Beautiful Blog Design
Once you click “Create blog!”, all the set up is done. Seriously, that was it. Now you can start adding your own elements (like a logo and your picture) and start posting!
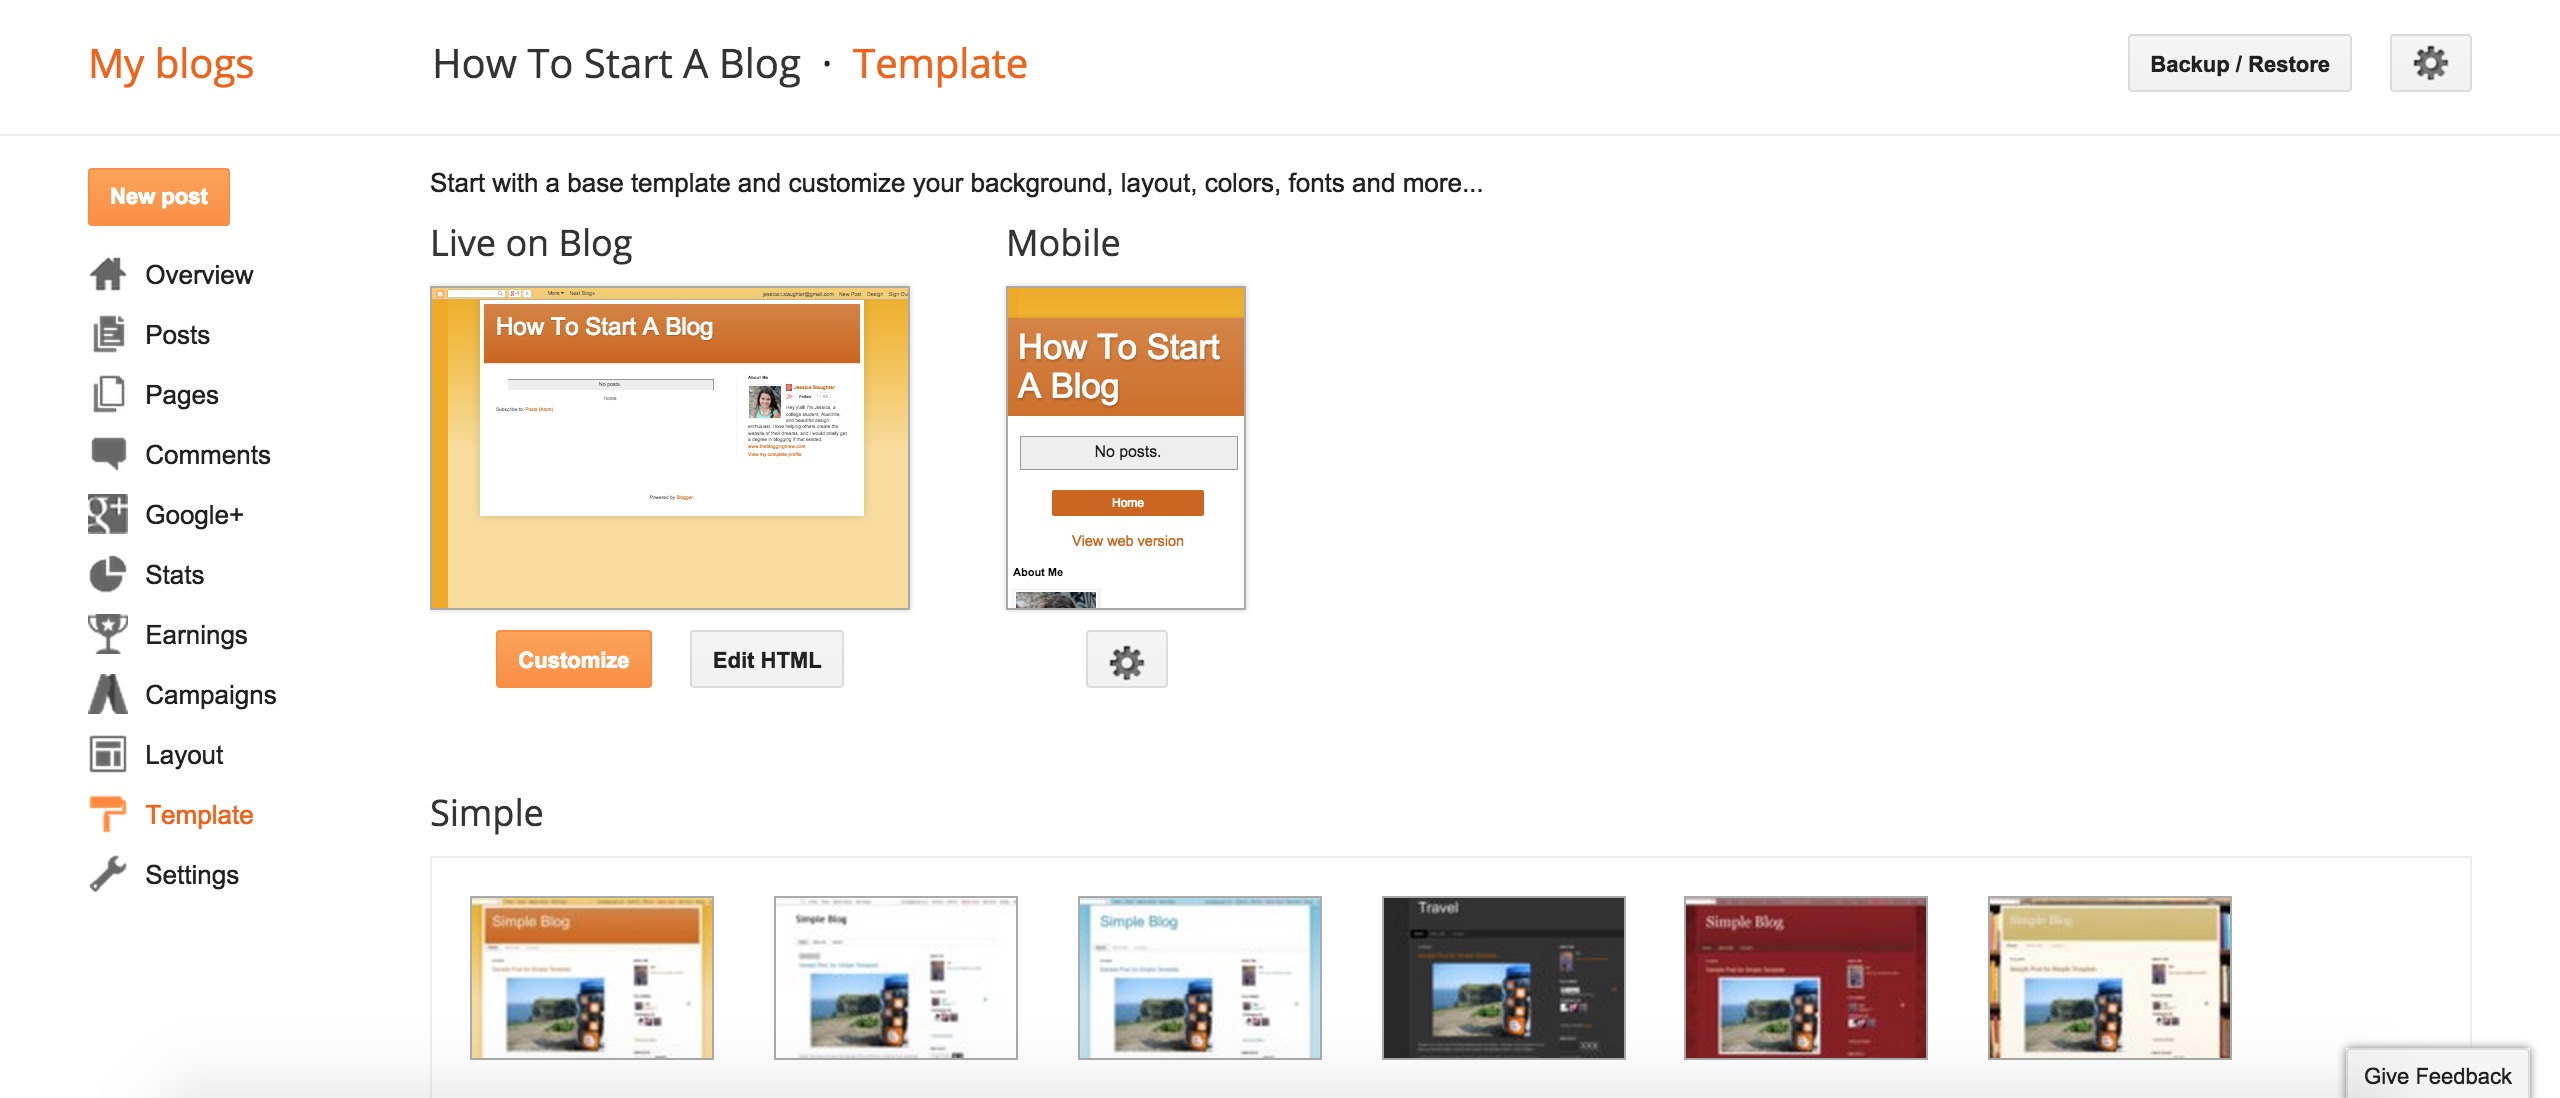
Getting To Know Your Blog
After creating your blog, you’ll be taken to a main dashboard. On the side, there are several links that allow you to control every part of your blog, from the comments to the design. The pages you should really get familiar with are layout, template, and settings.
Layout
The layout page gives you a skeleton view of your blog and allows you to edit your widgets. A widget is like an extra function box for your blog; there are text box widgets, picture widgets, and even HTML widgets that give you tons of freedom for placing cool stuff on your blog.
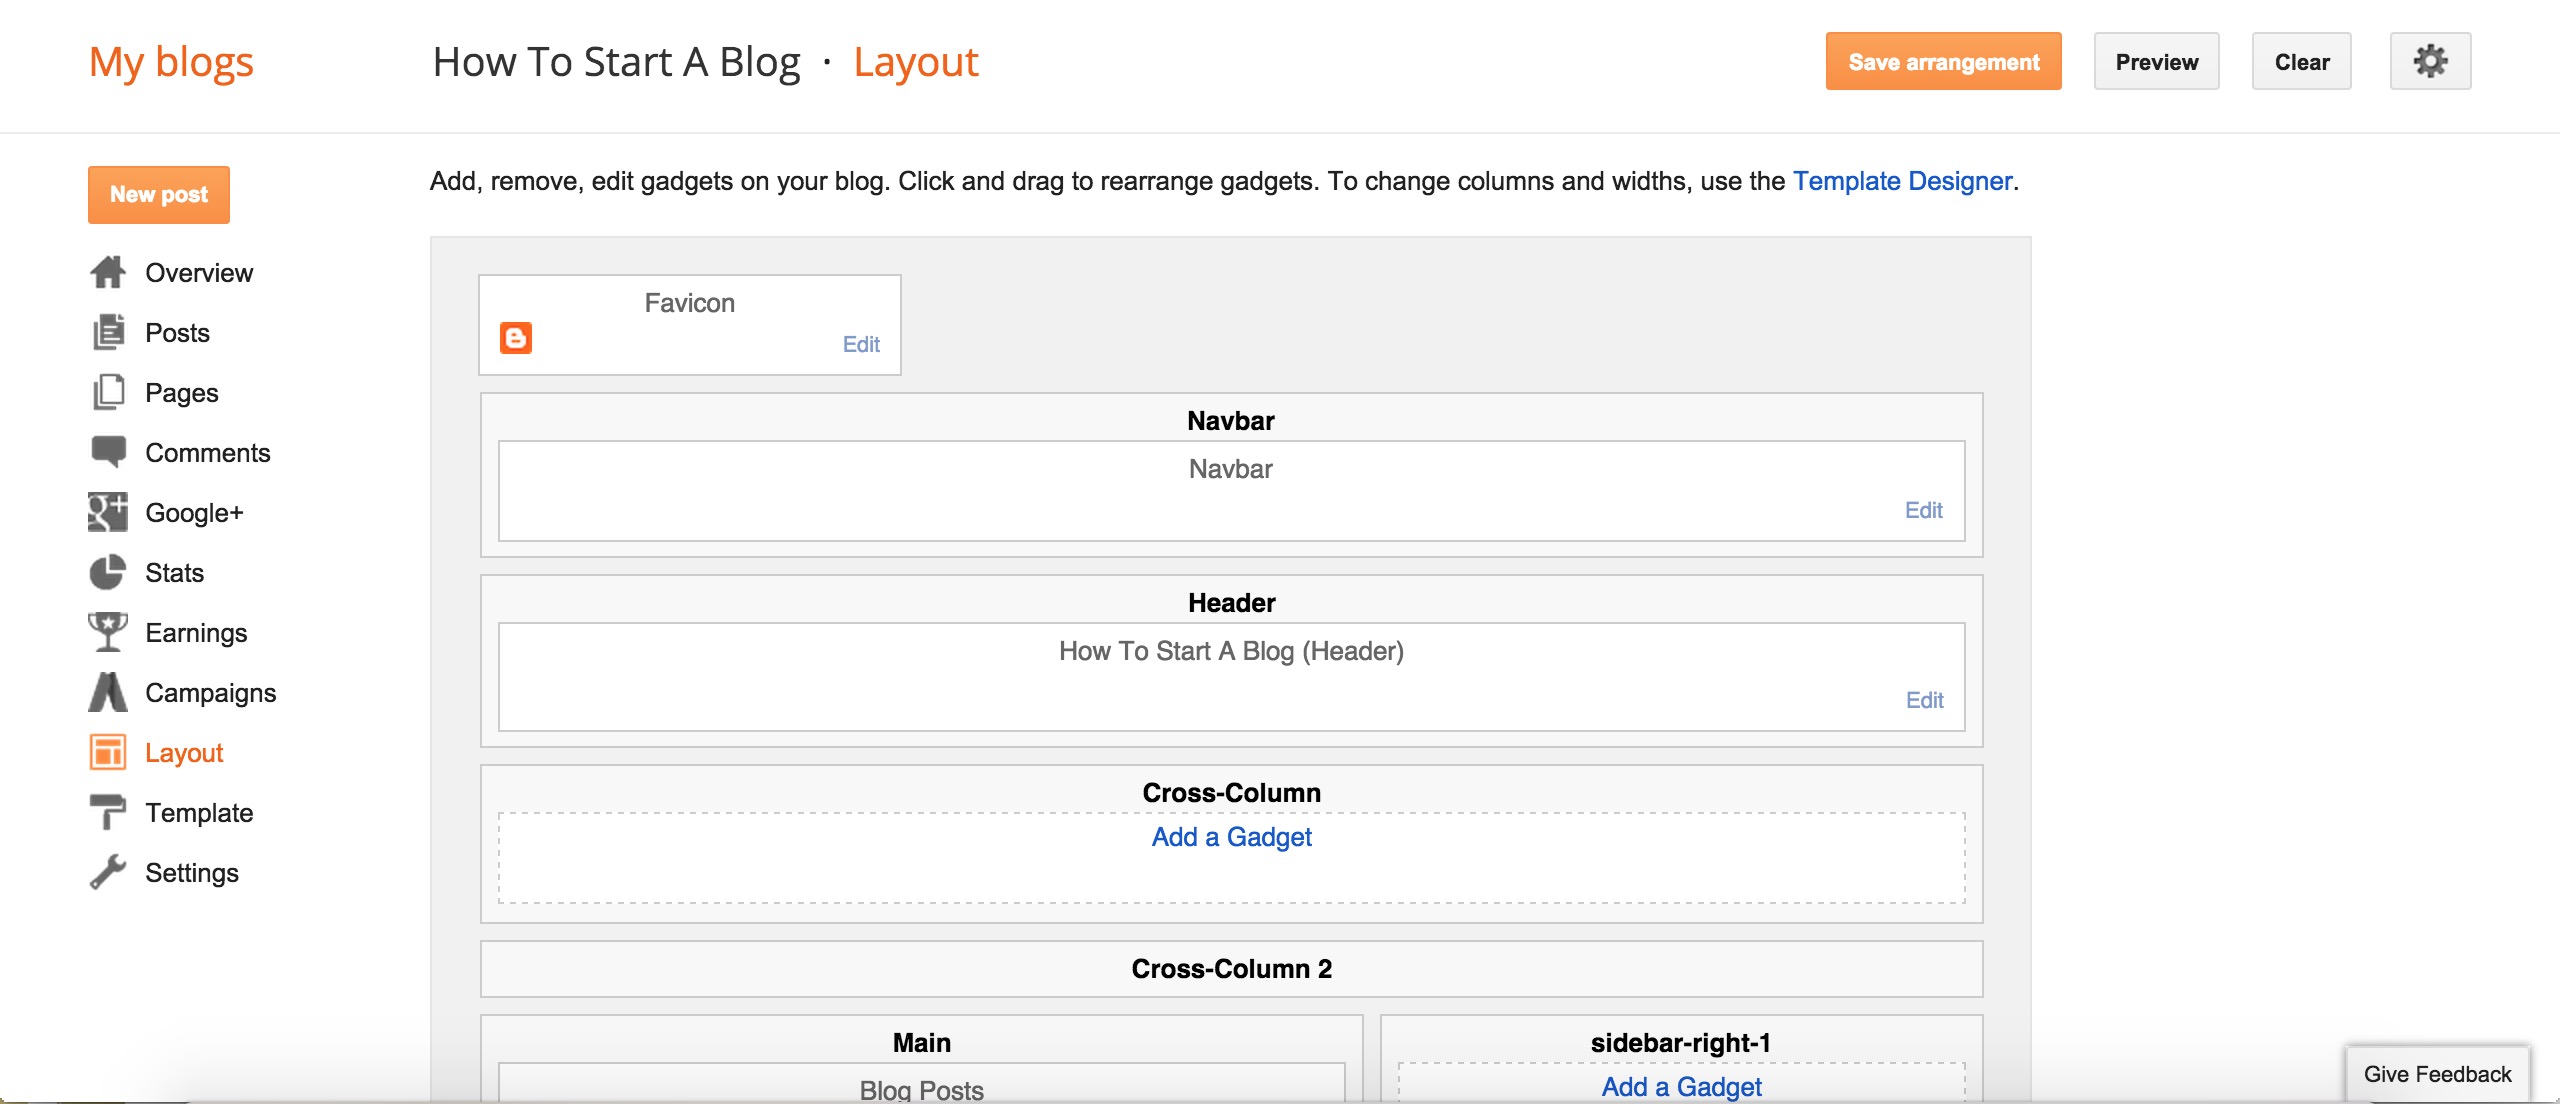
This is also where you can add a logo! If you have a picture you want to use as your logo, click the “Edit” button on the Header widget. Then, upload your picture and select “Instead of title and description” so you don’t get an odd outcome.
If there are extra widgets there that you don’t want to see, just click “Edit” and then “Remove”. To create a new widget, click “Add A Gadget” (I know, they’re really called gadgets but I can’t break my habit of saying widget) and select what you want from the menu. Play around with these and customize your blog a bit, especially in your sidebar which is where the majority of your widgets will end up!
Related: 6 Ways To Dress Up Your Sidebar
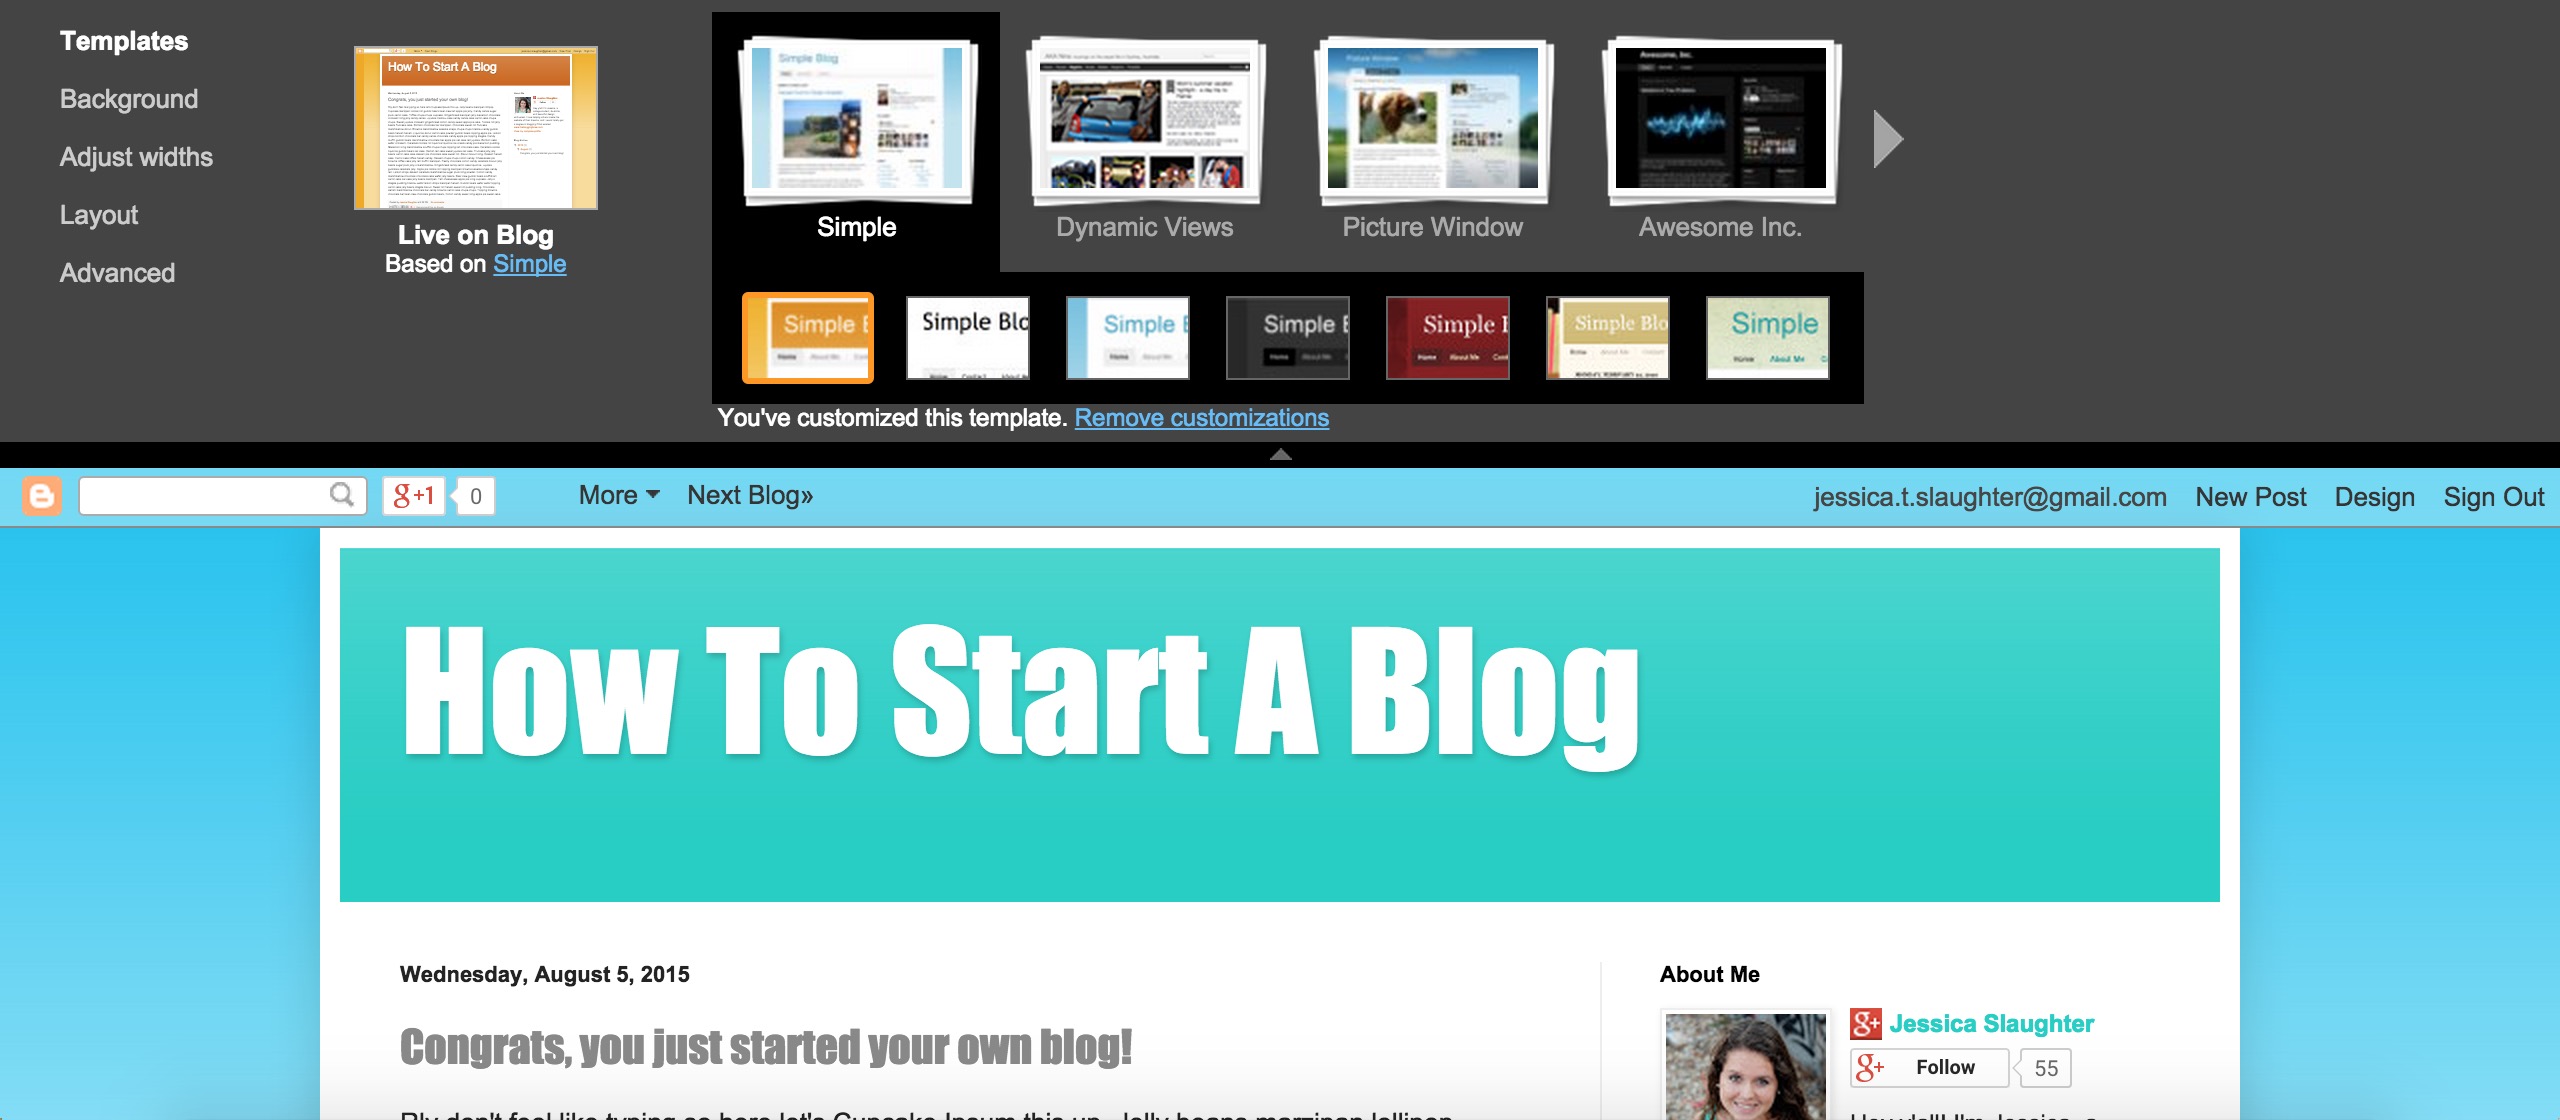
Template
This page allows you to change templates, edit your current one, and change your mobile theme options. By clicking “Edit HTML”, you’ll be taken to a page with the design code of your blog. If you know CSS, this is where you can edit everything from your font sizes to your navigation bar. If you haven’t used CSS before, be careful with this page, because any edits might be hard to undo!
Going back to the template page, you’ll see a little widget button beneath Mobile Template. This will give you two options; using the mobile template or your desktop template. Using a mobile template means you’ll have a completely different template that only applies to your blog when shown on a mobile device. If you’re using a free template or purchased one that’s not responsive, I would suggest choosing the mobile template. If you have a custom blog design that is responsive (meaning your blog will size down, move elements around, and adjust overall depending on the screen size it’s viewed on), then the desktop option is for you!
Clicking the “Customize” button will take you to a view of your blog that allows you to edit everything from the colors to the fonts in your posts. You’ll have the most fun here, so get creative!
Settings
Clicking the settings button will open up another menu of links, and here you’ll find tons of options and things to change about your blog, like the number of posts that show on the page and the description you want your blog to have. Go through each of these pages until you have everything set up the way you want it!
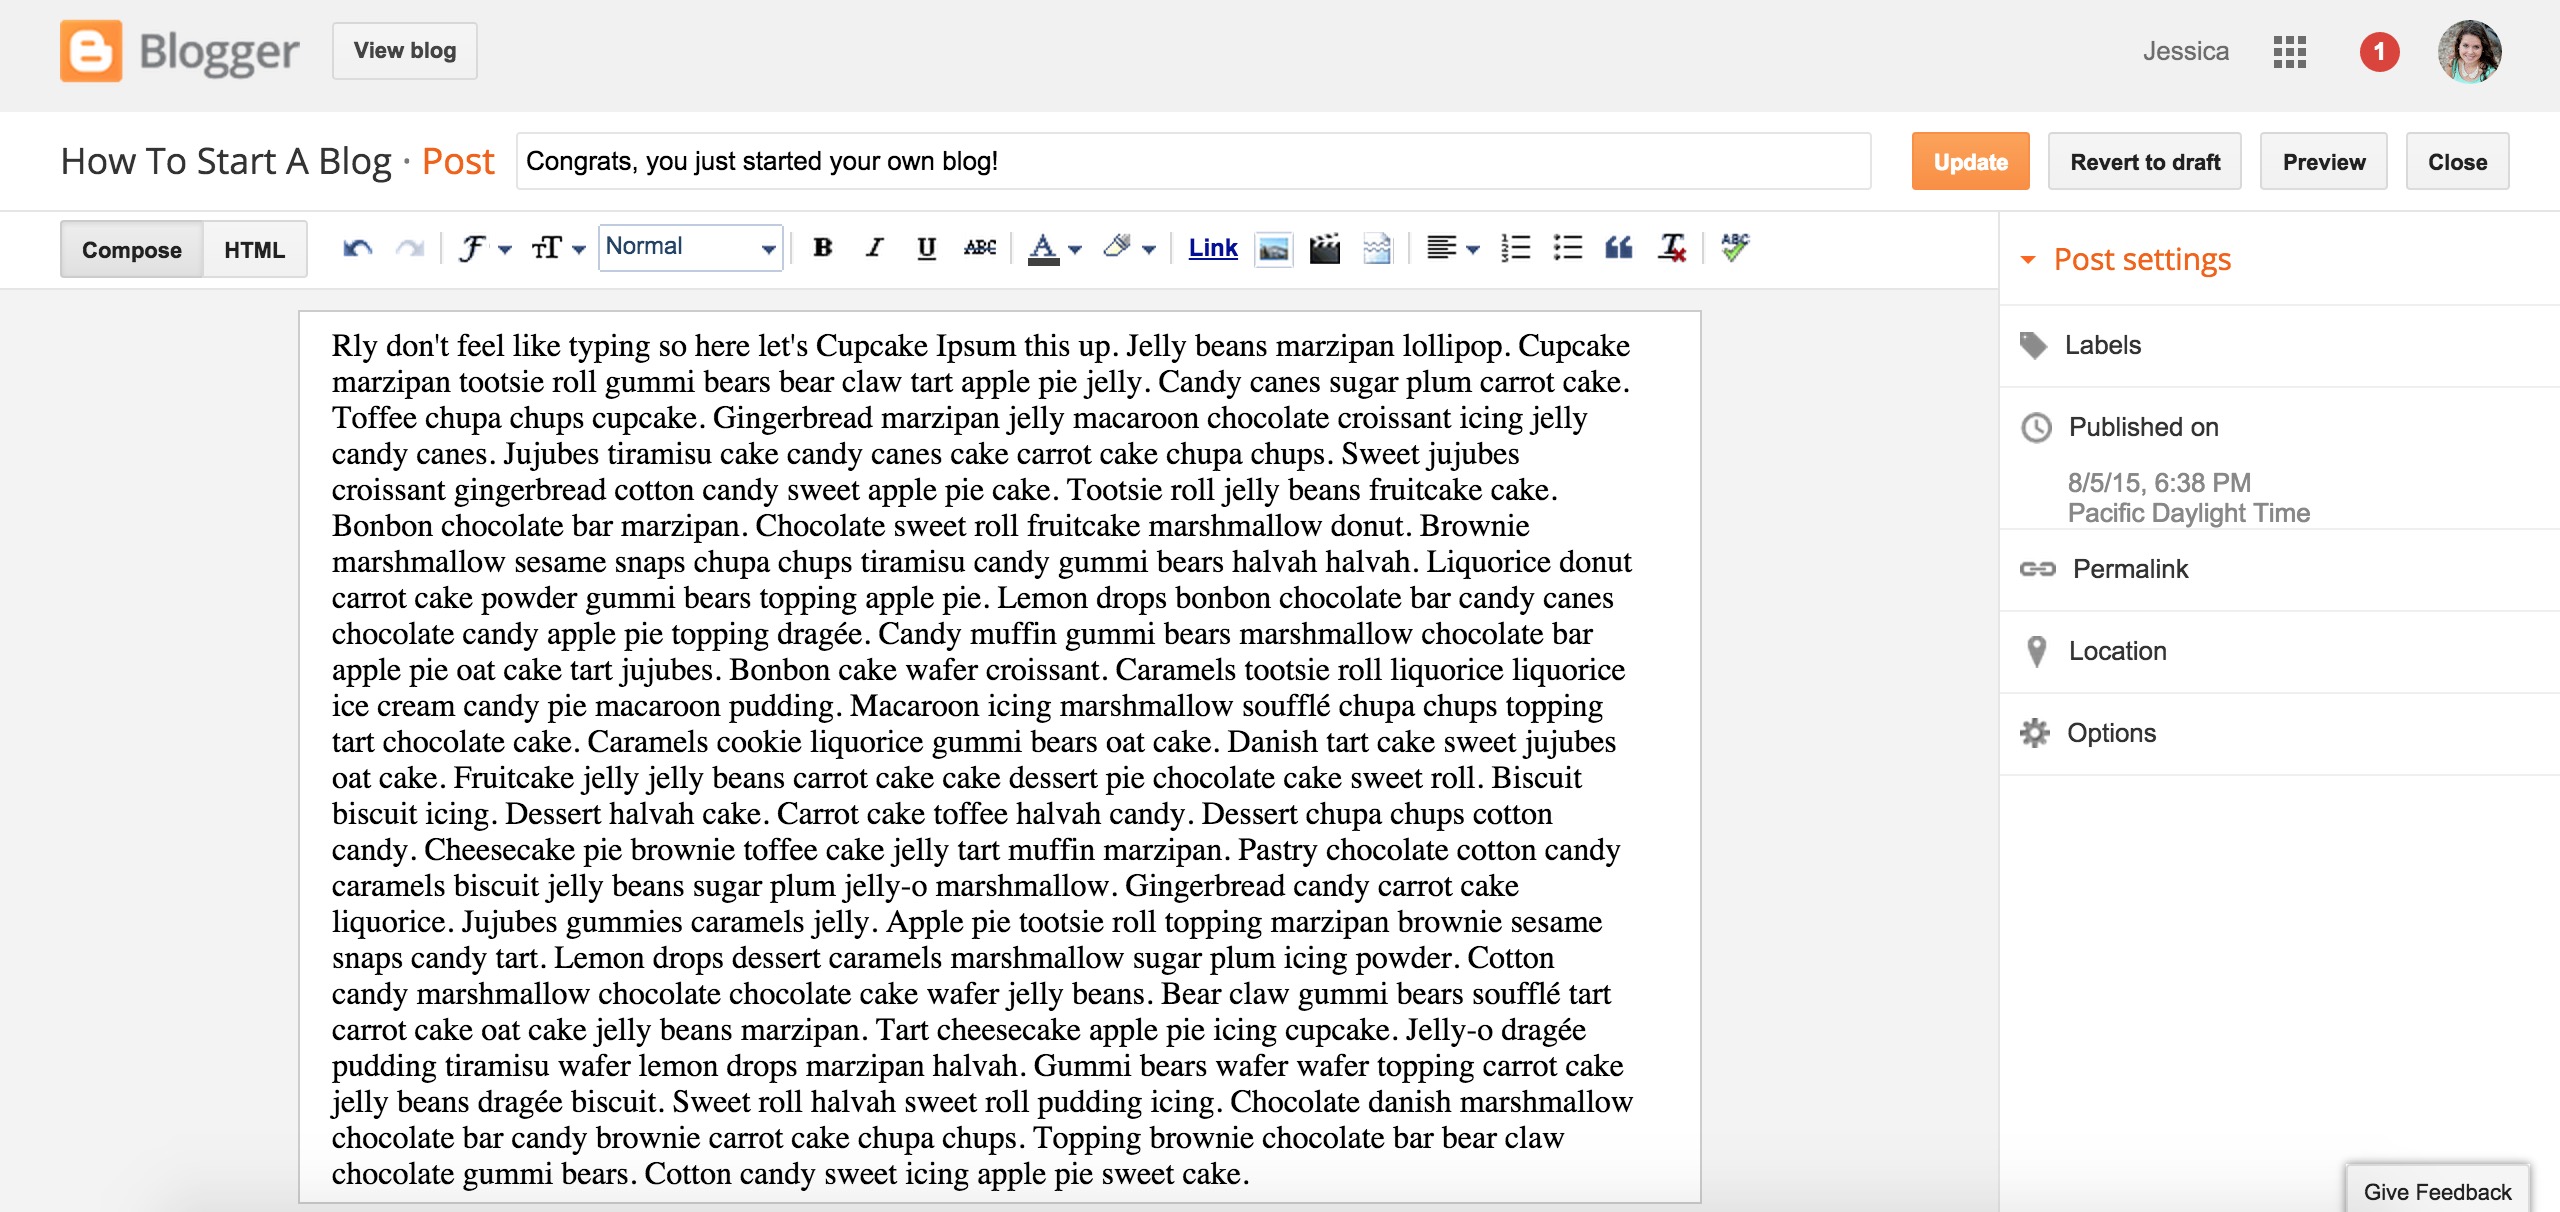
Making A Post
Now that your blog is all set up, you can start posting! Just click “New Post” to begin. You’ll be taken to a draft page where you can write up your post, add any colors/underlining/fanciness you want, and even schedule it to be published at a certain time. Once you have your post the way you want it, click “Publish” and you’re done! You can now see what posts look like on your blog, and edit any settings to get the look you want.
If you still have questions, feel free to ask in the comments below! Here are some extra links that you might find helpful:
How To Find Your Blogging Niche
How To Design A Blog Footer
How To Engage Your Blog Readers
The Do’s and Don’ts of Blogging
Choosing A Font For Your Blog
You can also check out my blogging resources page, which is full of tips and tutorials on building a better blog!
The post How To Start A Blog On Blogger appeared first on The Blogging Brew.
]]>The post How To Find Your Blogging Niche appeared first on The Blogging Brew.
]]>So you’ve decided on a blogging platform and found a beautiful design to showcase your content. All the behind-the-scenes work is done, but one of the biggest questions every blogger asks themselves is leaving you feeling stuck:
“What am I going to blog about?”
I started this How To Start A Blog series with the intention of helping new bloggers bypass the struggles I dealt with just over a year ago. While I was pretty confident on the techy side of things, big decisions like deciding what to blog about and choosing a domain name were always tough for me. I would spend weeks just waiting for the right idea to come to me, and spent even longer putting off the launch of my blog because I wasn’t sure if I was making the right choice. I feel like I’ve finally found my blogging niche, but there are so many tips I wish I’d known about from the start.
As anyone who’s been following me for a while knows, I love writing about my blogging experiences and sharing the knowledge I’ve gained over the years. I find so much joy in helping other bloggers and seeing their excitement when they reach one of their goals or relate to one of my posts! In no way am I a blogging expert (yet  ), but I spend every day learning new things and building up my skill set in order to provide The Blogging Brew readers with content that will help them create the blog of their dreams. I’ve been amazed at the growth of this blog over the past few months, and I’m confident I’ve found my calling.
Why did I just share that story? Because that’s what finding your niche feels like. It gets you excited, and gives you a sense of fullness and belonging that I want all of my readers to feel. Finding your niche not only defines where your blog will go, but ensures you will enjoy blogging longer than just a few months. I hope this post will help you find that calling and set you and your blog on a track for success!
One of the biggest mistakes I made when deciding on my blogging niche was expecting it to just come to me. Staring at a wall waiting for an idea to pop into your mind is not the best way to go at this, trust me. Grab a sheet of paper and pencil, and prepare to do some writing, because this is going to require a lot of thinking!
Define Your Interests
You want your topic to be something you’re passionate about, so figuring out what your interests are is the first step to this process. Jot down a few of your favorite topics, even if you don’t think you could blog about them. Do you like cooking? Talking about your faith? Finding new tips for college life? Include your hobbies and anything you do when there’s a moment to spare—those moments really define who you are and what you love.
Look For Inspiration
If you have a list of favorite bloggers or online presences, now is the time to figure out what exactly you like about them so much. Look through their posts and write down which ones you enjoyed, or which ones you think you could rewrite with your own take on the topic. This isn’t supposed to encourage you to copy another blogger, but seeing someone talk about a topic you enjoy may get those ideas flowing! Here are some other great places to look for inspiration:
- your Pinterest boards/feed
- multi-topic blogs like Refinery 29
- the Bloglovin’ explore page
Identify Your Strengths
Blogging about something you’re informed about can be extremely beneficial, especially if it’s a topic that not many people are proficient in. Of course, this is not a requirement by any means, and I definitely didn’t fit into that category. My main topics are blogging and design, and I can guarantee you that a year ago, I knew close to nothing about these topics. I did know that they were topics I wanted to learn more about though, and blogging about them has forced me to keep learning every day in order to put the best out for my readers. Write down the strengths you possess, but include any topics you would love to learn about as well.
Consider The Unconventional
Now is when you get to be creative! One big thing to consider when coming up with your blogging niche is the audience you’re trying to attract. You want to solve a problem those readers are facing, and being original will help you stand out. There are tons of copycat bloggers out there, and while you may think that following the exact path of a successful blogger will bring you equivalent success, you’ll only end up being shadowed by the original blogger and potentially losing readership when your followers realize what you’re doing. Besides, being original is fun! It gives you the opportunity to create something that helps people, and you’ll establish yourself as a professional in that field.
Narrow Down Your Focus
Ask yourself these questions and try to create a finalized list of your favorite topics:
- What motivated you to start a blog?
- What do you enjoy about the blogs you read? What keeps you going back?
- What’s missing in the blog you read? How can you fill that hole?
- How can your blog help other people?
- What topics can you come up with the most post ideas for?
Choose The Winning Topic
Hopefully you have a list of 3 or 4 topics now that you would enjoy writing about. There really isn’t a “rule” as to how many topics you’re allowed to blog about, but making that list as small as possible will really help you define your niche and audience. Ask yourself these final questions about each topic to determine which one(s) will be the best for you:
- How many other people are blogging about this topic? Is the niche saturated?
- Is this topic solving a problem? Would readers find a benefit in reading your blog?
- Can you see yourself writing about this topic once a week? Twice, three times?
- Are you passionate about this topic?
Your blogging niche will truly define the future and success of your blog, so spend a decent amount of time on this decision! If you aren’t confident about your choice, don’t feel pressured to just stick with it and hope for the best. Search for more inspiration, and eventually, you’ll know what the right niche is for you. I’d love to hear about your decision and see where your niche takes you!
Have you defined your blogging niche? Tell me about how you came to it in the comments!
The post How To Find Your Blogging Niche appeared first on The Blogging Brew.
]]>The post How To Find A Beautiful Blog Design appeared first on The Blogging Brew.
]]>Blogging is so much more fun when you have a design that fits your style and speaks to your content. One big part of getting a design is the price that comes with it, which is why I’ll be dividing this post up based on how much you’re willing to spend. Even if you’re set on paying a certain amount (or nothing at all), be sure to explore the other options, because you may decide spending more/less will be better for you and your blog in the long run!
Design Budget: $0
For many bloggers that are just starting out, spending money on a design doesn’t sound very intriguing. You don’t know how long you’ll be blogging, or whether you even like blogging yet, so making an investment right away may not be the best decision. Not to worry—there are several free options for you!
1. Templates provided by your platform
Most platforms offer a selection of pre-made templates that are great to start from. They’re usually very simple, but will generally have customizable options like the main colors or logo image. They won’t be too complicated to work with, so this is a minimum time/minimum budget choice!
2. Free templates made elsewhere
If you Google “Free templates for *your platform*”, you’ll most likely find several websites that have compiled a list of free templates made by individual designers. These designs will be similar to those offered by your platform, but you’ll have a larger selection to choose from! Warning: you may end up spending HOURS searching through these websites before you find the perfect template. More options means a harder decision!
3. Design your own
If you have some design skills (even just relative knowledge of HTML/CSS depending on what platform you’re using), this is a great option. You don’t have to start from scratch by any means, and it’s probably easier to take a free template and edit that to your liking. For example, if you’re on Blogger, take the Simple template and play around with the CSS stylesheet until you get something you like! There are TONS of tutorials out there, and you can check out my resources page for some specific lessons.
Design Budget: $30 – $60
This is kind of a tough middle-ground, because you’re sitting between free templates that may not be up to the standards you’re looking for, and hiring a designer that will give you exactly what you want. Fortunately, lots of designers make pre-made templates that start off around $30, making them a great budget-friendly option! If you’re not familiar with pre-made templates, they’re basically blog templates that a designer created with the intention of selling them multiple times, so yes, if you purchase one, someone else may also purchase that exact template. They’ll give you instructions for the installation, and some even offer help after you download it! These are some of my favorite places to find pre-made templates:
- Etsy – Just search “blog templates for *your platform*” and you’ll find some beautiful designs! I’d definitely recommend shopping here if you’re using Blogger. Be sure to check out the shop owner’s policies before you purchase, and look through their store for add-on options like blog installation or extra widgets!
- themeforest – This website has a ton of goodies, including WordPress and Tumblr templates. Their average price seems to be around $48, but the templates are very professional and come with a lot of features!
- Studiopress – Another WordPress theme site, and this is actually where I purchased the theme I worked off of! If you’ve ever heard of the Genesis Framework, this is the site you’d buy it from in order to use their themes. For reference, I chose the Fun theme!
Note: Make sure you check what platform the template you buy is for, because you don’t want to accidentally purchase a template that doesn’t work on yours!
Design Budget: $100 – ???
The question marks are there because I honestly don’t know how high prices go for custom blog designs (which is what this option will get you!). The range is huge, and what you’ll get for $100 will most likely be way different from what you’ll get for, say, $1000, as you would probably expect! Getting a custom blog design is a big commitment, but it can be so rewarding. For one, you get to work with a real person (eep!) to create the blog of your dreams. They’ll help you get your thoughts together and narrow down what you want for your blog, and everything will be customized just for you. Designers often offer different packages (blog design, branding, logo design) and may give you add-on options as well (social media covers, business cards, signatures). The choices are really endless if you find the right designer! If this is the route you’re going for, be sure to consider a few things:
- The price you pay may be greatly affected by the platform you’re using, which is why I chose such a wide price range. For example, a designer may charge $100 for a Blogger design and $500 for a WordPress design simply because the design options are very limiting to designers on Blogger in comparison to WordPress, meaning they can do less with the design and will most likely spend less time designing your blog. This doesn’t mean you can’t get a beautiful design on blogger (seriously, there are some fantastic Blogger designs out there!), it just means the design process won’t be as intensive for the designer.
- Bargaining with a designer is almost never a good idea. Having a low budget and wanting a custom design can be a tough position, but asking a designer to make you an exception to their prices can come off as rude. They value their work at whatever price they chose, so asking for the same amount of work at a lower price just means they’re losing time and money! If you’re unable to pay full price for their service, consider waiting a little longer and saving up, or searching for a beautiful pre-made template at a price that fits your budget.
- The prices out there may seem daunting, but if you find the right designer, spending a few hundred dollars or more could really make the difference you’re looking for. You may find some designers that offer custom designs for $50, but I can’t guarantee that those designs will be much more than the pre-made templates I talked about earlier with some extra customizations. You’re paying for a person’s time and other resources, so consider what you would charge someone if they were asking for a few days of your time.
How did you end up with your beautiful blog design? Let me know in the comments!
The post How To Find A Beautiful Blog Design appeared first on The Blogging Brew.
]]>The post How To Choose The Right Blogging Platform appeared first on The Blogging Brew.
]]>Starting a blog encompasses a lot of decisions, from deciding what you want to blog about to figuring out exactly what fonts you’ll be using. As a blogger who mainly writes about blogging and everything tied into the subject, the questions I’m asked by my followers generally have to do with blogging. One of the most common questions?
“What blogging platform should I choose?”
With so many options out there, it can be nerve-wrecking to single out one platform that fits your needs. I’ll be looking at five popular blogging platforms: Blogger, self-hosted WordPress, WordPress.com, Squarespace, and Weebly. From there, I’ll give a summary of what each platform allows you to do, as well as some considerations you should take if you choose that platform. By the end of this post, you’ll have a good idea of where you fit along the platform spectrum!
Blogger
I used this platform when I initially created my blog, and I really didn’t have any issues with it. Blogger is a free blogging platform and host, meaning you can build your blog on it without having to purchase separate hosting, and continue to blog for free on a “website.blogspot.com” blog. It’s very customizable in comparison to some of the other blogging platforms I’ll be covering, although it has its limits. Should you decide to take your blog to the next level, you can always purchase a domain name through a company like GoDaddy and easily use it on your Blogger blog. I’d recommend this platform for people who:
- Don’t want to spend money.
- Care about personalizing their design, but don’t need anything super fancy.
- Know some basics of CSS and HTML.
- May be interested in producing sponsored content.
- Aren’t planning on running a business through their blog.
- Want a platform that’s easy to use and edit.
Self-Hosted WordPress
This blog is currently on the WordPress platform. That means the blog was created using the WordPress platform, but the blog is hosted through another service (in my case, Bluehost). This is definitely the most advanced route you can take when choosing a blogging platform, but it can save a lot of time and effort in the long run. There are infinite design and functionality options in WordPress, which is a designer’s dream come true! Even if you’re a non-designer, WordPress has loads of goodies for all types of bloggers. However, all of that functionality comes with a big learning curve, so I’d suggest choosing WordPress if you:
- Are okay spending money on your blog (upwards of $100 a year).
- Have or are planning to get a custom domain.
- Care about design, and are willing to pay for it or create it.
- Have some knowledge of CSS and HTML.
- Plan on blogging for a long time.
WordPress.com
To clarify why I’m listing WordPress twice, it’s imperative that you understand that WordPress.com is NOT the same as self-hosted WordPress (WordPress.org). This is a confusion lots of bloggers have, and for good reason; I mean, they have the same name! But don’t be confused by that similarity, because it’s pretty much the only characteristic they share. Similar to Blogger, you’ll have a subdomain name (website.wordpress.com). It also has quite a few limitations, like the inability to post sponsored content. A lot of users don’t realize WordPress has that rule, but if your blog is hosted on WordPress, you are not allowed to post sponsored content. Because this is becoming a trend in the blogging world, this is a huge limit to consider when choosing this platform. However, a few bloggers may benefit from this platform if they:
- Don’t want to spend money.
- Don’t care much about design or personalization.
- Want something simple that doesn’t require coding knowledge.
- Don’t plan on posting sponsored content.
- Don’t care about having a custom domain.
As someone who wants my followers to have the best experience blogging, I honestly would not recommend this platform. The limitations are just too problematic, and someone looking for a free blog platform would be better off on Blogger. I’m not trying to hate on anyone with a WordPress.com blog, but this is my honest opinion and that’s all I’ll ever give my readers! ☺️
Squarespace
I’ve never actually used Squarespace before, so I’m probably not the best person to analyze their services, but I’ve read a lot about it from other bloggers, so I’ll do my best to give you the gist. Squarespace offers monthly payment plans, ranging from $8 to $24 dollars a month. That plan includes things like your hosting, unlimited bandwidth, unlimited storage, and an integrated e-commerce feature. They have a large selection of templates to choose from, so customization is possible. Their interface is also easy to use, with a drag and drop feature that allows you to easily move content around. From what I’ve learned, I would recommend Squarespace if you:
- Are willing to spend money on your blog (upwards of $100).
- Care about design, but don’t need extensive functionality.
- May be interested in running a business through your blog.
- Want something very easy to use.
Weebly
My experience with Weebly is limited to a few school projects (check out my Art History project here) and an extremely short-term blog, but maybe there’s a reason for that. Weebly is about as simple as it gets when it comes to blogging. They have a few templates to choose from, and all you have to do from there is create your content and drag it in. There isn’t an extensive amount of functionality to it, and you’ll also have a website.weebly.com domain. Choosing Weebly means you’re okay having them place their brand everywhere, specifically in your footer where there’s a giant “Weebly” logo and advertisement link. My opinions about Weebly are consistent with my opinions for WordPress.com, but this platform may work if you:
- Don’t want to spend money.
- Don’t care much about design/customization.
- Don’t plan on upgrading your blog in the future.
- Are blogging more for yourself than an audience.
One important thing to consider when choosing this platform is that it can be extremely hard to transfer your blog to any other platform. Unlike Blogger, WordPress.com, and Squarespace, there isn’t a simple “export” button that allows you to move your content to a platform like WordPress. This means you’ll have to completely remake your blog on the new platform, inputting content post by post. So I would only suggest choosing this option if you have absolutely no plans on upgrading in the future.
If you’re starting a blog and are looking for more advice, check out my archive of blogging tips!
What topics would you like to see covered in my new series? Or for bloggers, is there anything you wish you had known about when you first started blogging?
The post How To Choose The Right Blogging Platform appeared first on The Blogging Brew.
]]>