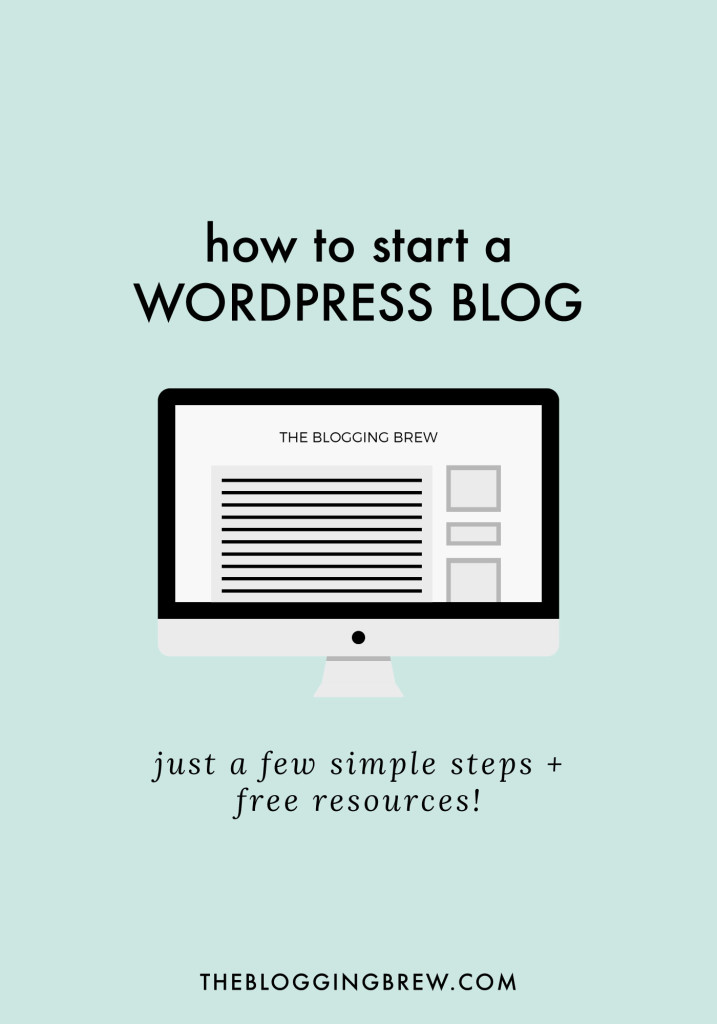
Whether you’re transitioning from another blogging platform or creating a blog for the first time, starting a blog on WordPress can be a bit confusing. There’s a good chance you haven’t used hosting before, or even a custom domain name. Don’t worry though, I’m going to give you all the steps you need to start a WordPress blog in just a few minutes using Bluehost, my host of choice!
I chose Bluehost for several reasons. Initially it was because so many of my blogging friends were using them, and I figured they must be good if they have the trust of all these amazing bloggers! After some research though, I learned about some other great benefits:
- Bluehost offers great hosting for a very reasonable price at less than $5 a month.
- Their customer support is fantastic! I always hear back within a few hours when I send in a ticket, and it took less than 5 minutes for me to hear back from a DM I sent to their Twitter support team.
- WordPress has recommended Bluehost as a great host for their platform; it doesn’t get more trustworthy than that!
1. Setting Up Your Domain + Hosting
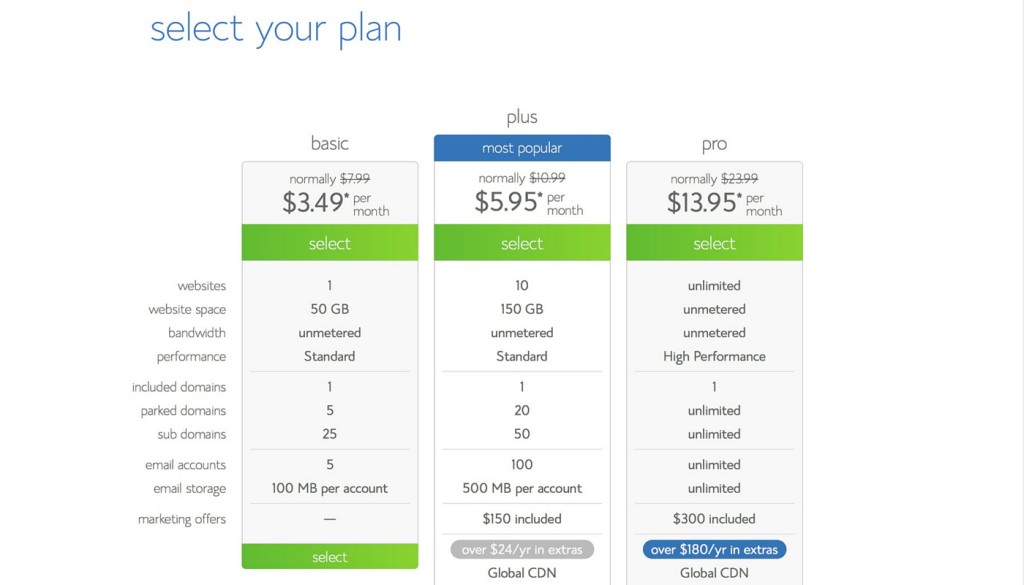
After heading to the Bluehost website, click on the get started now button. If you’re only planning to have one website (your blog), all you need is the Starter plan. I went with the Plus plan, but only because I’m hosting multiple websites!

Now you’ll need to choose a domain name. If you haven’t made one yet, Bluehost will let you create one for free!

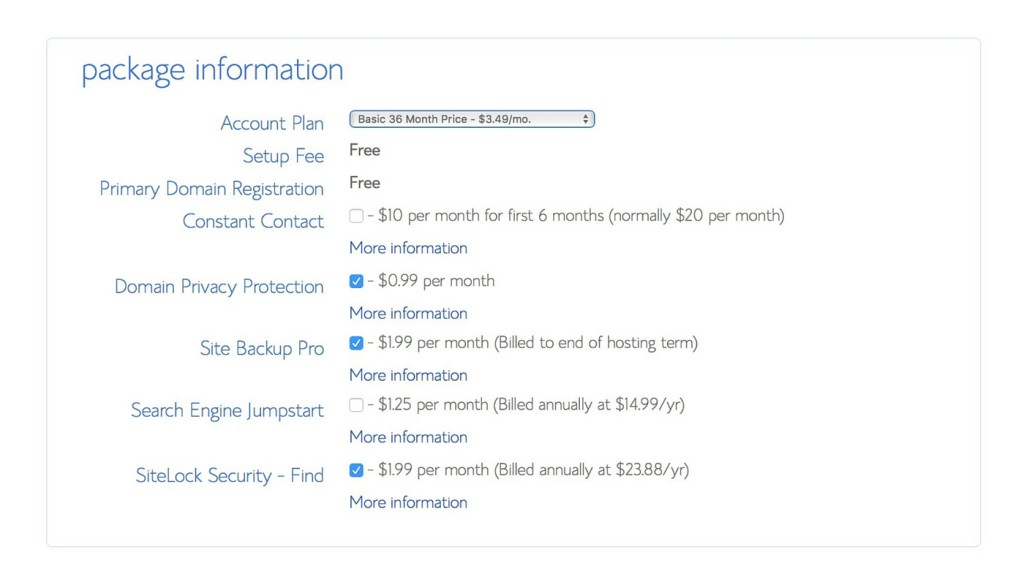
Within the package information, there are a few add-ons you can purchase. I only selected the Domain Privacy Protection, but SiteLock Security and Site Backup Pro are other great choices for extra security!
You’ll also be able to choose how many months of hosting you’d like to pay for. The more months you select, the cheaper the monthly rate is, so if you feel confident that you’ll be sticking on WordPress for a while, I’d recommend paying for more than a year!
After filling out the package information, you can follow the rest of Bluehost’s instructions to complete your purchase.
2. Installing WordPress
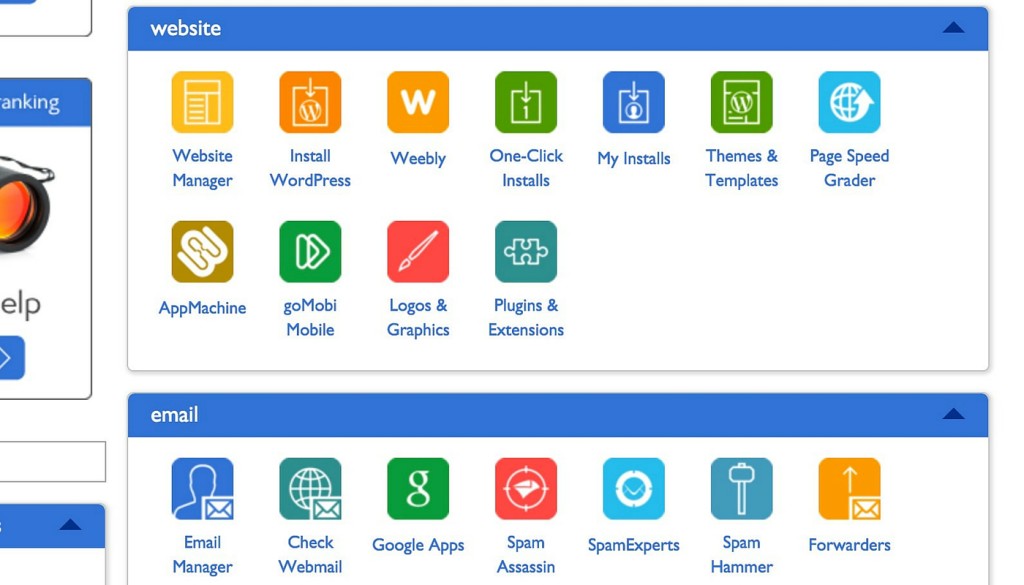
Head to your Bluehost dashboard or cpanel and select Install WordPress. On the next page, choose Install from the area that advertises free installation.
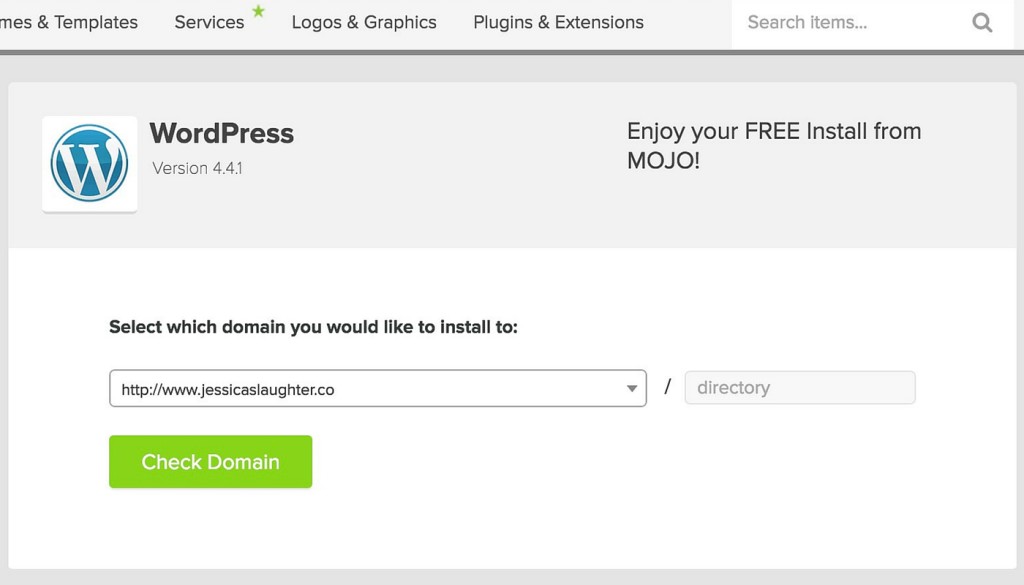
Select the domain you want to install WordPress on (if you have multiple websites), and click Check Domain. You only need to add something to the text box if you’re planning to install WordPress on a separate page, like mywebsite.com/blog, but generally you can leave that part blank!
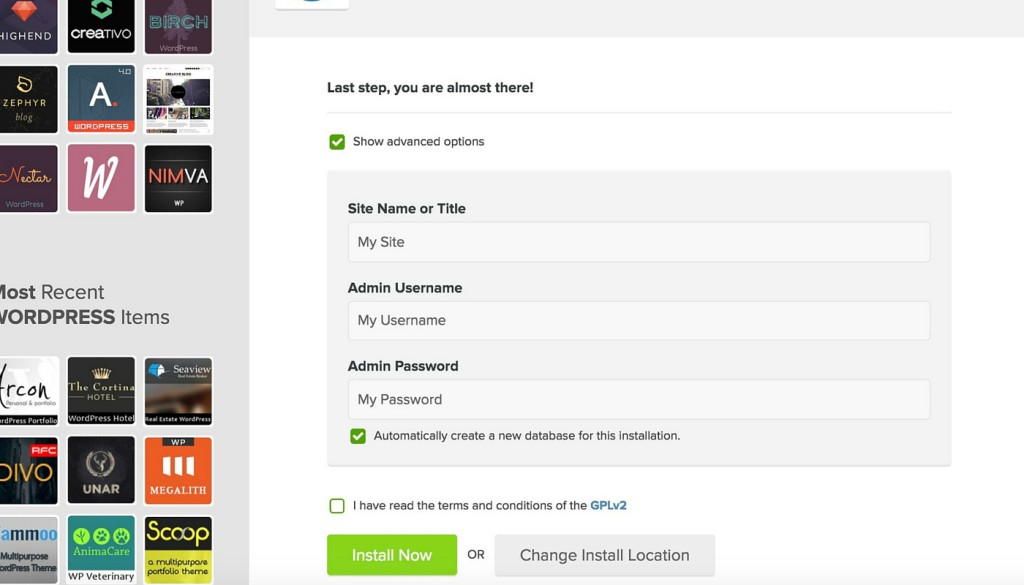
Open the advanced options section and fill out your information, then click Install Now.
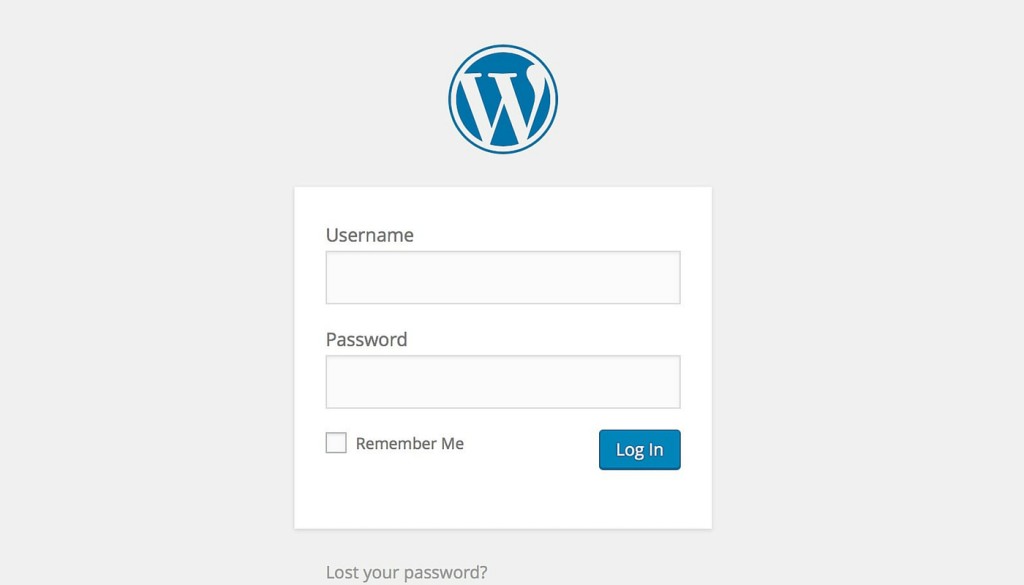
You’re done installing WordPress! Just wait for the installation to complete, and you should be sent an email with all of your installation credentials. Make sure you keep this or write down the information somewhere.
To login to your new website, visit your WordPress dashboard by going to http://www.yourdomainname.com/wp-admin. You’ll be visiting this page a lot, so I’d recommend bookmarking it!
3. Set Up Your Design
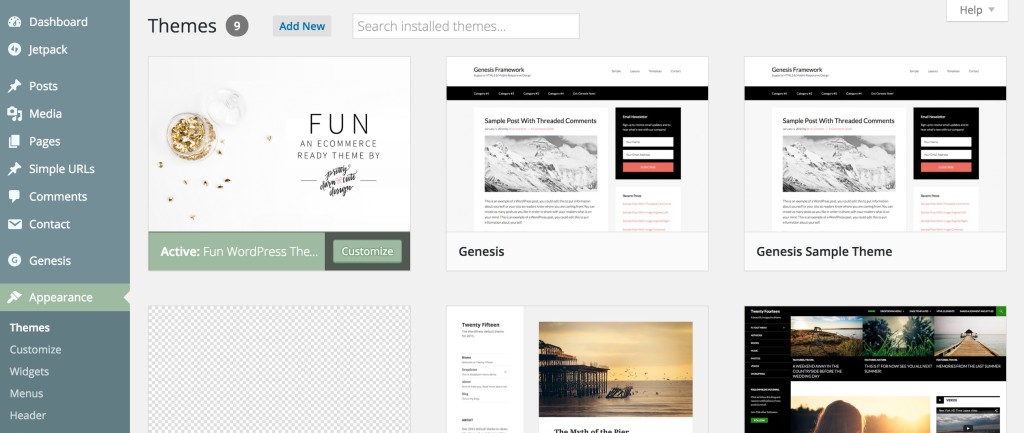
Now that WordPress is installed on your site, it’s time to make it look good! Find a theme that will best display your content and meets your needs. I’d advise against using a free theme you found somewhere online, as these often have bad code and can cause you problems in the long run. I’m using a customized version of the Fun theme on the Genesis Framework!
To install your theme, go to your WordPress dashboard and head to Appearance > Themes. Select Add New and then Upload Theme. Upload the .zip file for the theme you chose, and click Install Now.
Your WordPress blog is now live! Head to your domain to see it in action. To get you started, here are some posts you might want to check out:
Investments Worth Making For Your Blog
How To Make The Most Of Your Sidebar
How To Make A Custom MailChimp Signup Form On Your Blog
Ways To Make Money For Your Blog
If you’ve set up your own blog on WordPress, leave me a link in the comments below so I can check it out! ☺️
Disclaimer: Some of the links used in this post are affiliate links, meaning I’ll make a commission if you make a purchase using them. I only use affiliate links for products that I have experience with. There’s no additional cost to you for using them!