How To Design An Effective Blog Footer

I wrote about six ways to dress up your sidebar a few months ago, and I received a lot of comments from bloggers who were either thinking about or in the process of redesigning their sidebars. It sounded like everyone was excited to tackle that project, and I loved hearing how inspired they were! So to continue on the blog inspiration trend, I want to talk about another neglected space of most blogs—the footer.

Unlike the sidebar, the footer is hidden for most of the time a reader spends on your blog. The only way they’ll usually see it is if they’re curious about your blog and want to scroll through your home page, or if they decide to comment on a post they enjoy. It can seem redundant to spend time designing a part of your blog that doesn’t get nearly as many eyes as your content, but the eyes that do see it are most likely ones that are interested in your blog and want to learn more!

Similar to the sidebar, your footer takes up a good chunk of space on your blog, and has the ability to take up more than you might think. My footer is a little over 200 pixels in height, and I’ve seen even bigger ones! A lot of bloggers just put an attribution there, which is perfect if you’re looking for something simple and don’t want it to draw attention, but if you want to make your footer even more effective, there are tons of things you can add and style to your liking! Here are some examples:

  • Email subscription opt-in
  • Category buttons
  • A logo element
  • Your contact info
  • Social media icons
  • Navigation links
  • Instagram/Pinterest widget
  • Mini bio
  • Popular posts list

I decided to keep my footer fairly simple by placing some of my popular posts on one side, and social media buttons along with my attribution on the other. I achieved this look by using the built-in footer widgets on my blog’s template, which are separated into three sections. If your blog doesn’t have this function, you can try playing around with the “float” property.

What’s best for my blog?

Depending on your blog’s content and your content marketing plan, some footer elements may benefit you more than others. For example, if you offer a mailing subscription for your readers, I would definitely recommend placing an opt-in in your footer! Likewise, if you create beautiful artwork, products, or anything visual and post about it on a social network, placing a widget for that social network in your footer would be beneficial. It’s all based on your needs! That said, try to avoid putting too much in your footer. It can easily take on a cluttered look, which isn’t what you want your readers to see after they’ve finished reading your amazing content!

Styling Your Footer

For simple styling, you can generally just edit the CSS of the “footer” tag. Here’s an example on one of my demo blogs:

footer {
  display: block;
  background-color: black;
  color: white;
  border-top: 3px solid #c4a0a4;
}

This is the effect that code would produce (the link color was set elsewhere in the stylesheet):

Footer Screen Shot

Footer Inspiration

I’m sort of a blog design enthusiast, so I love finding inspiration from other blogs and seeing what creative ideas are out there. If you’re planning on redesigning your footer, try searching around your favorite blogs and see what they included, or how they went about designing their footer to match their blog. I’m not saying you should steal their ideas, but looking around can really help when you’re stuck on what to do! Here are some of my favorite footer designs:

Sun And Daughter Footer

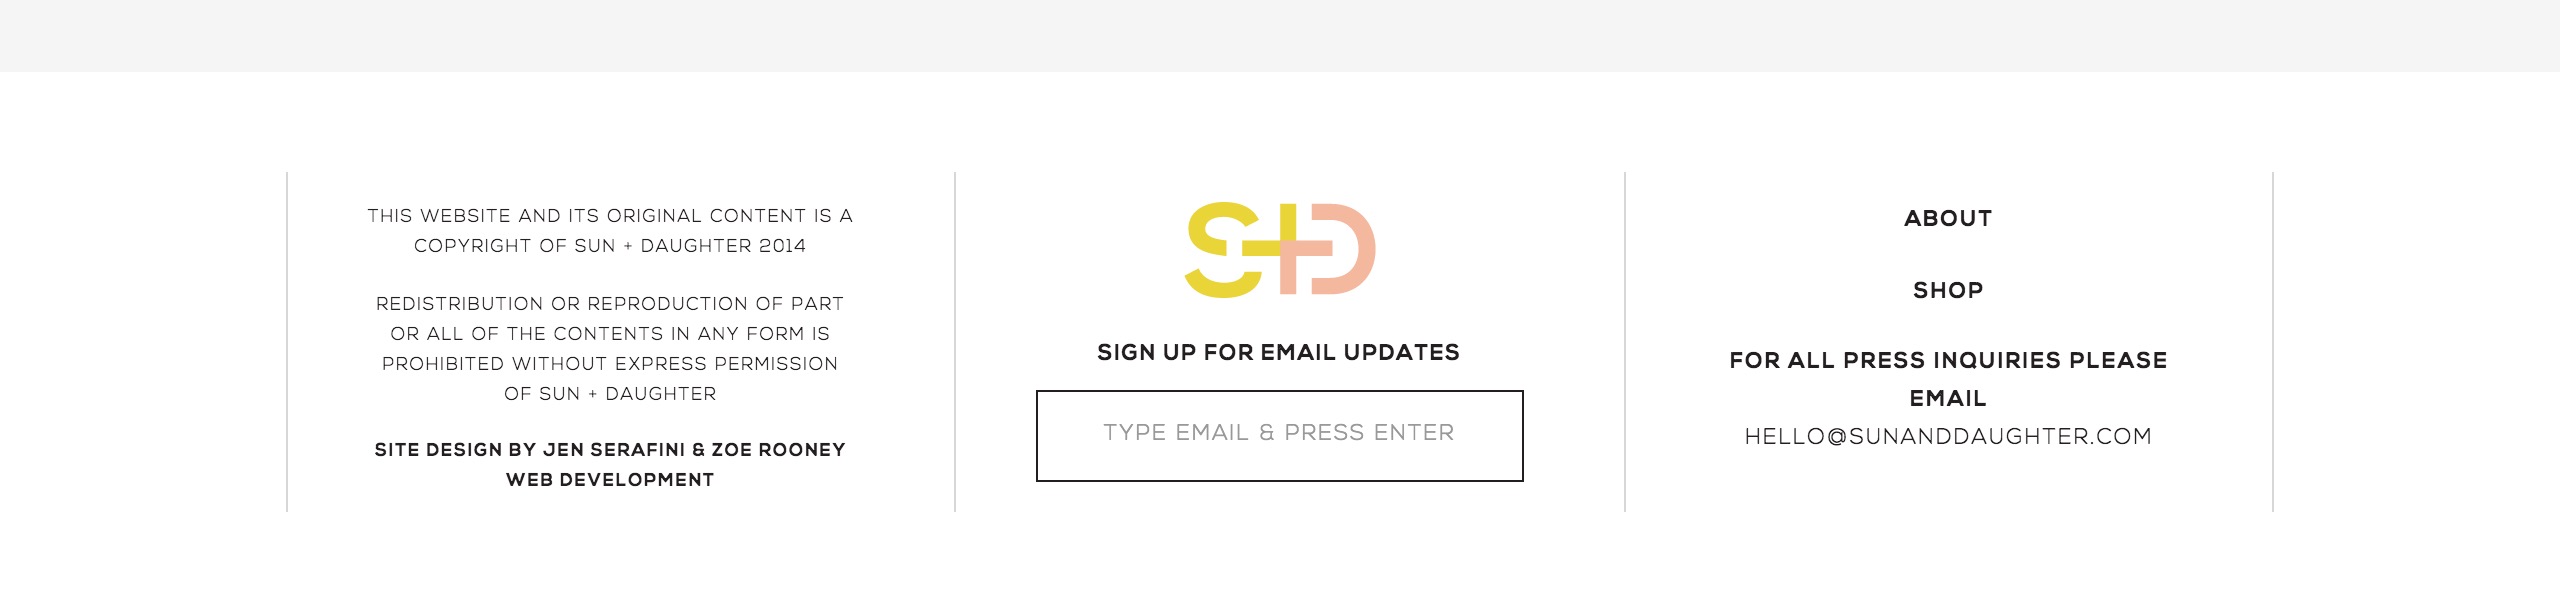
Source: Sun + Daughter

Love Grows Design Footer

Source: Love Grows Design

Meredith Noelle Footer

Source: Meredith Noelle

Whitney Blake Footer

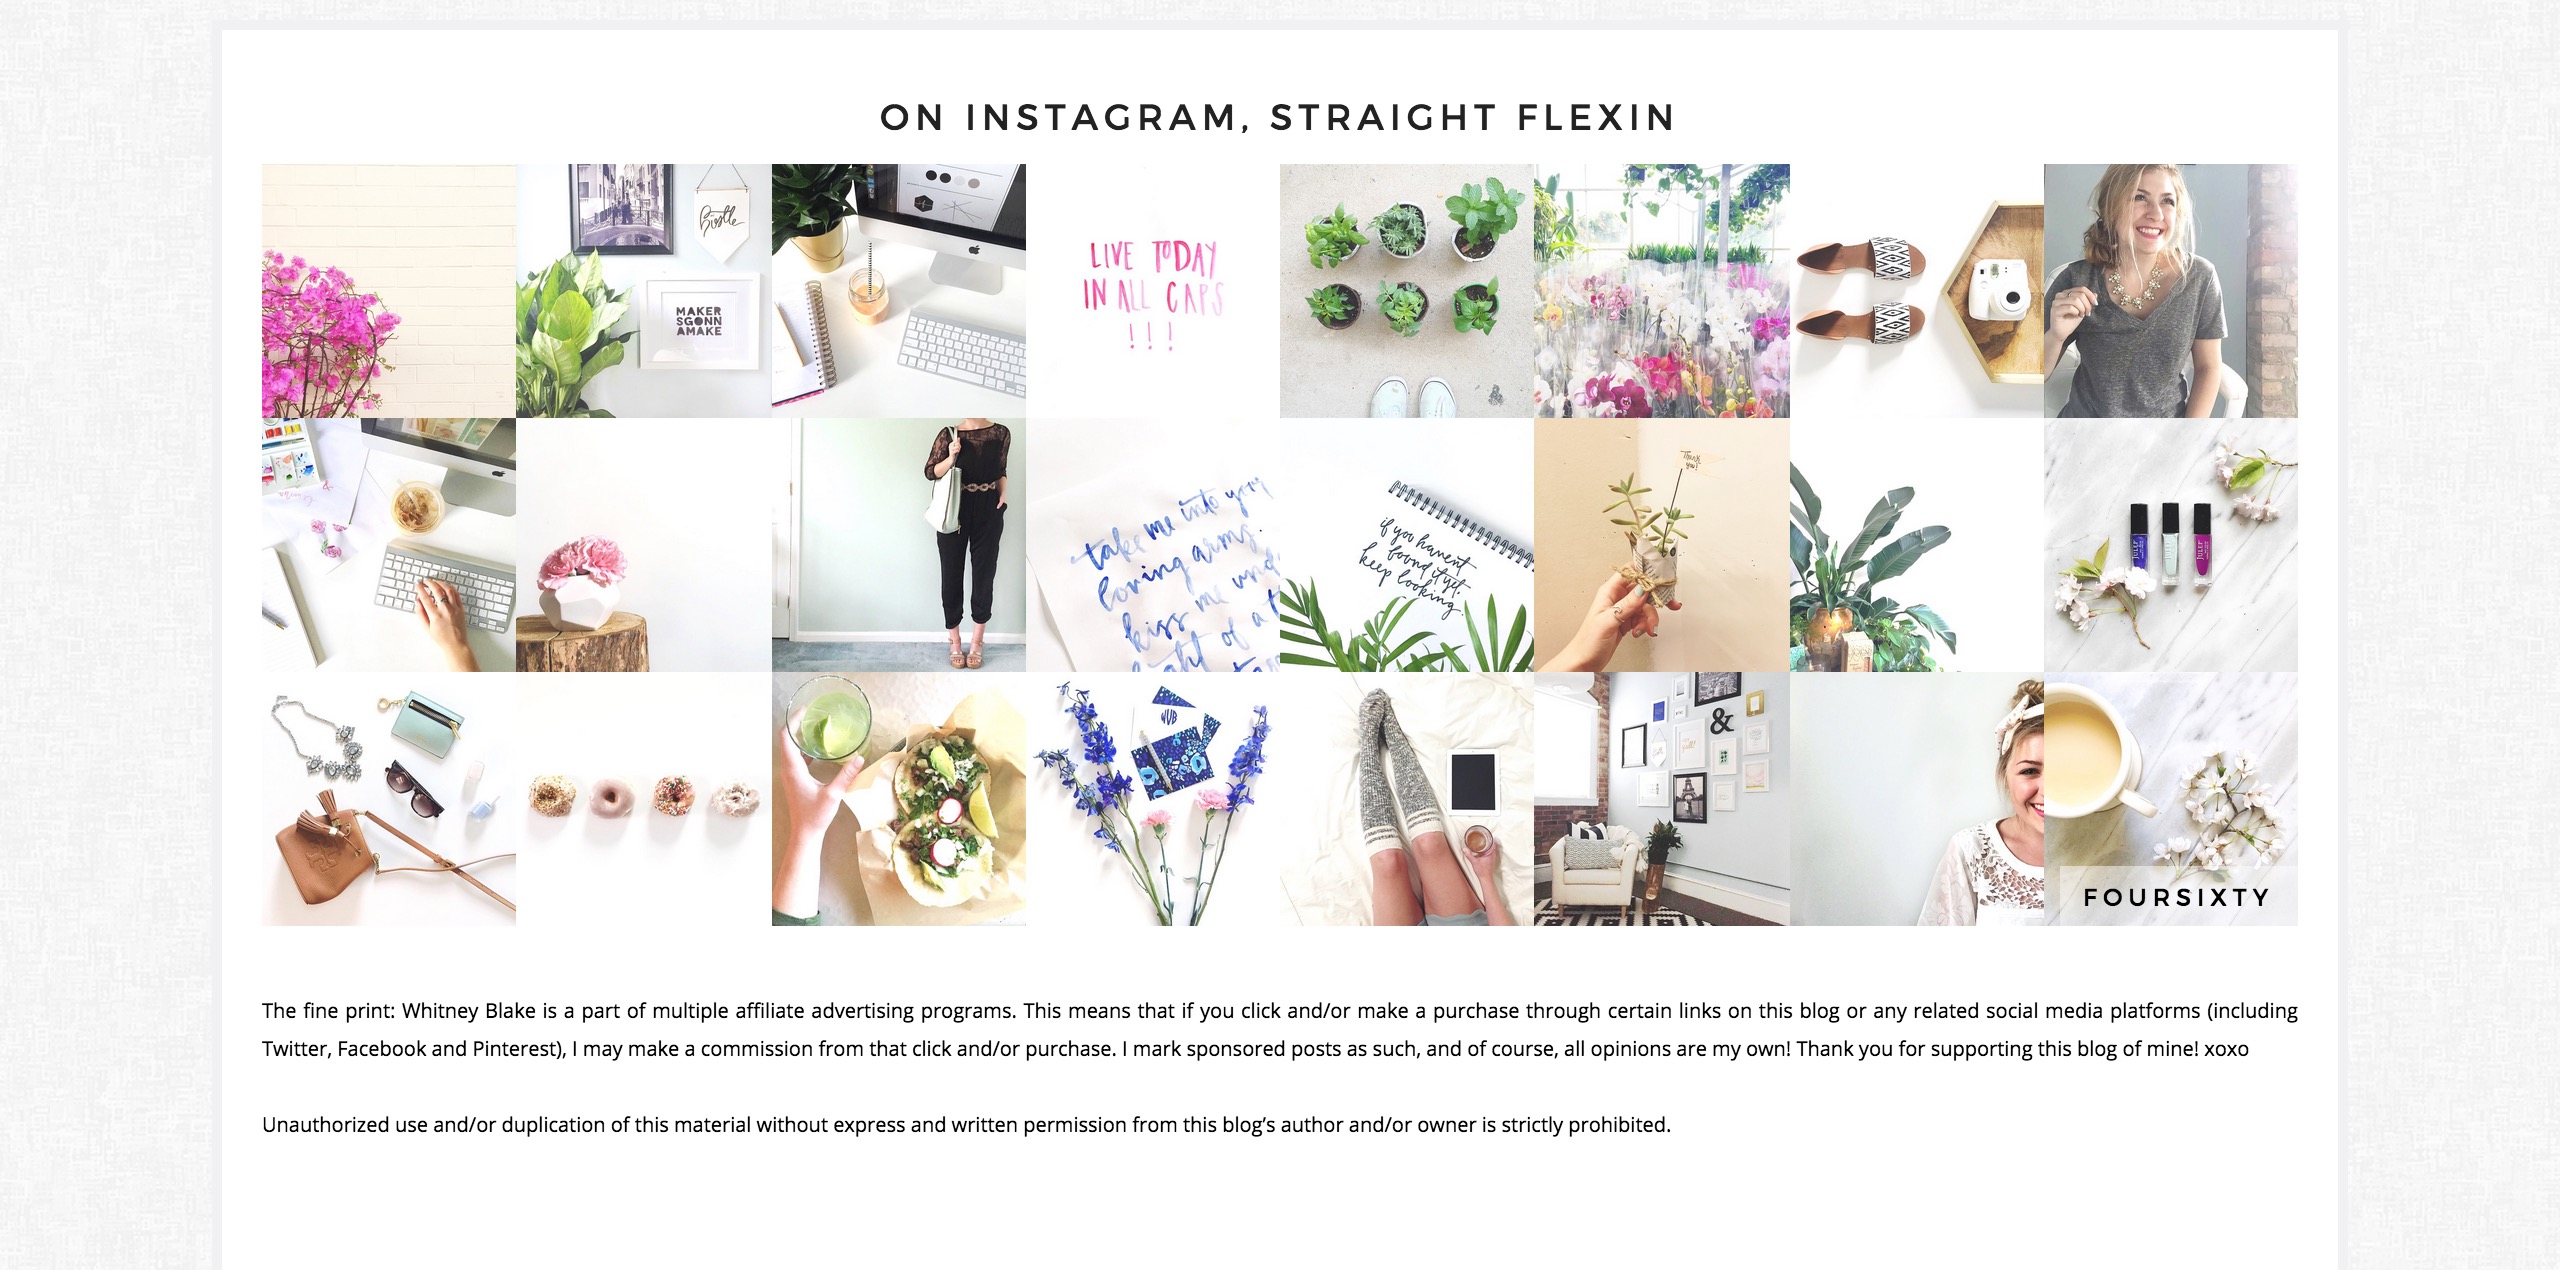
Source: Whitney Blake

Allyssa Barnes Footer

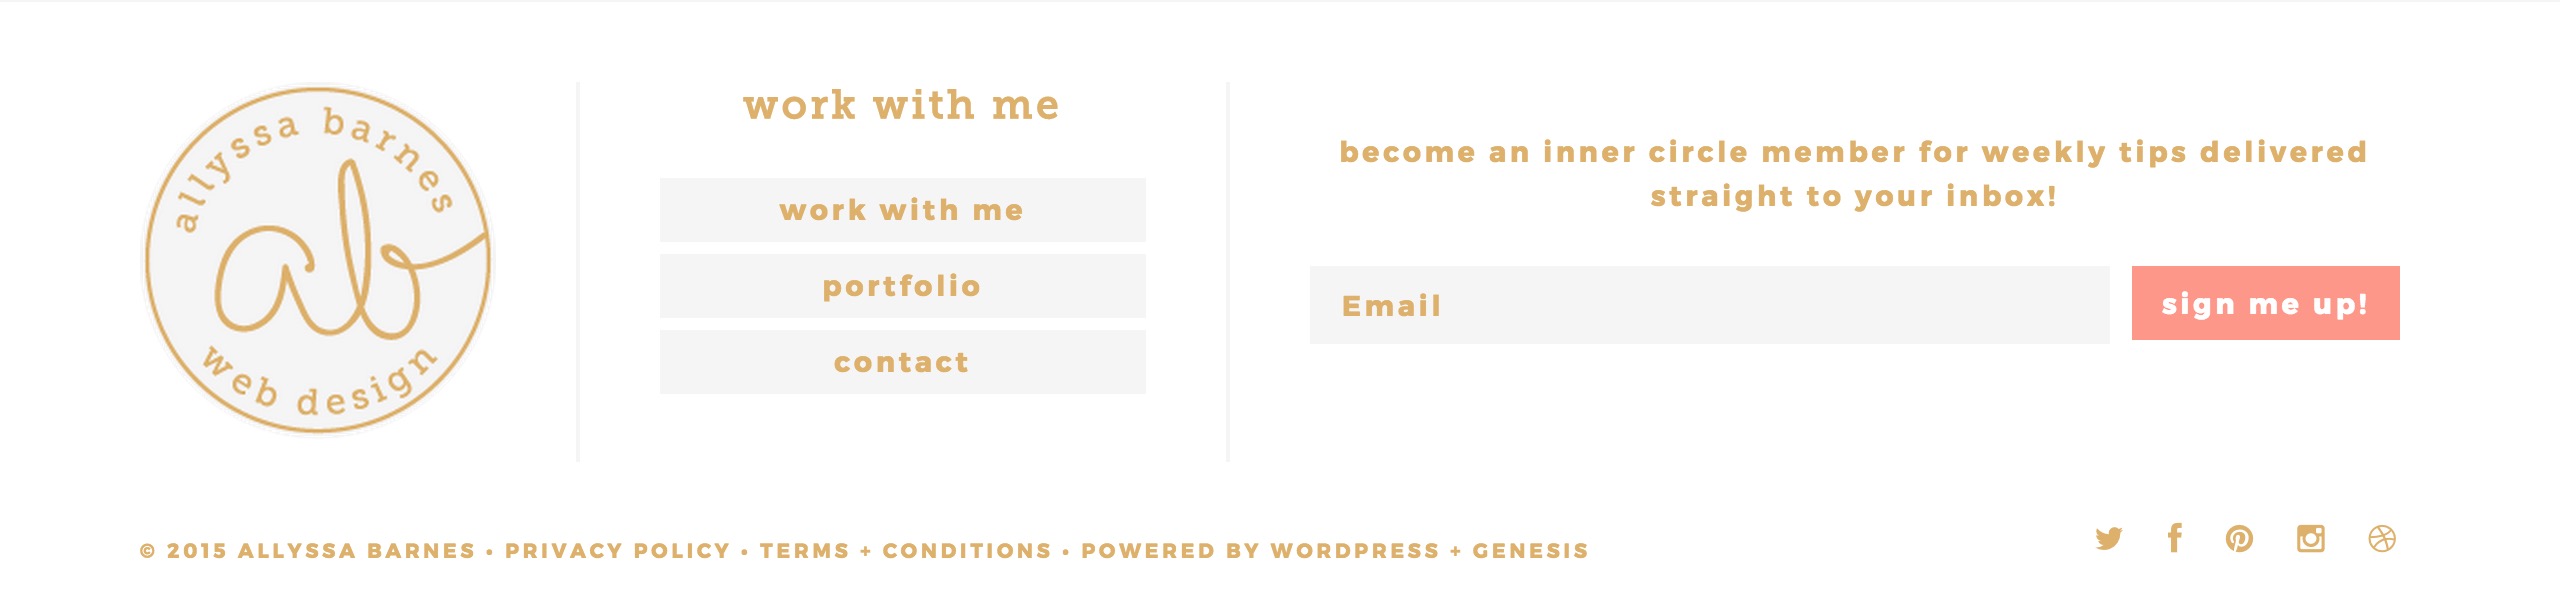
Source: Allyssa Barnes

Are you considering giving your footer a makeover? What are some things you’d consider “must-haves” for a footer?

Changing The Color Of Your Bloglovin’ Button

Bloglovin’ is my all time favorite feed for reading blogs on, so having a button for my readers to follow me from was essential. Anyone with an account can grab their own button from the widgets page, which is super convenient, but there’s one issue – it only comes in two colors, baby blue and a pastel pink. As you can see, neither of those colors fit with my blog theme, and I didn’t really want my Bloglovin’ button stealing the show on my front page. I’ve seen a few bloggers with custom-colored buttons and couldn’t figure out what kind of magic they were using, until I finally found the secret.

Changing The Color Of Your Bloglovin Button

That’s it. That’s all you need. Well kind of. See how all that’s in there is an opening and closing “div” tag? Those tags will do the magic, but you have to give it some extra code first. Create a text/HTML widget and paste in the above code. Now head over to that Bloglovin’ widgets page I linked to earlier, and choose either the pink or blue button (use the blue if you want to use my references in the next few steps). Copy the code they give you – mine looks like this:

Now paste that code between the “div” tags in the first code I showed you. If you chose the blue button and save your widget now, it should appear the same as mine. This is where the tedious part comes in.

See how there are five numbers, all set to “315”? To get the color you want, you’ll have to change all of those numbers to something else, but make sure when you change a number, you change all five of them to the same number. Otherwise your color won’t change. To test out how much the color will change based on how much you change the number, try changing the “315” to “300”. You’ll notice the color became a brighter green, so it’s going backwards on the color wheel. Now change the “300” to “330”. Now the color has a blue tint to it, so it’s going forward on the color wheel. Play around with that number until you get close to what you want, and know you won’t get the exact color.

Cool, right?

If you have any questions or trouble, let me know in the comments!


Have you discovered any cool blog tricks? Share your secrets!

ps – you should definitely follow me on Bloglovin’ if you haven’t yet. Shameless self promotion.

How To Create A Hover Effect For Your Blog Images

Note: This tutorial is currently for Blogger blogs only, but I plan on adding a WordPress version soon!

Every blogger has a common goal in mind when creating content: drawing their audience in. If you can keep your reader’s eyes on your content until they’ve read the entire post, then you’ve discovered the secret! But not a lot of blogger’s can say that confidently, including myself. I’m still learning all the tricks behind creating super fantastic content that readers just can’t resist finishing, but I’ve gathered a few tips along the way. Interestingly enough, one of those tips has nothing to do with the words on the page, and everything to do with the images you place between them.

Whenever a blogger asks me for tips on making their posts better, I always say that quality graphics are a necessity. They’re fabulous eye-catchers (I guess that’s kind of obvious), and they add a sense of professionalism to your blog. But what if I told you that those images could work even harder for you? That’s where hover effects come in.

I don’t know about you, but I just love when a blog has hover effects. Everywhere. On links, category tabs, social media buttons, and pretty much everything that’s clickable. They add a level of engagement that your content alone can’t create, and for some reason I feel more inclined to click something if it has a hover effect. Graphics are no exception, which is why today I’m going to teach you how to add a hover effect to your blog images! To keep things simple, I’ll show you how to change the opacity of an image on hover, which is the effect I have my blog images set for.

I made two different tutorials for this, with one geared towards those who have coding knowledge/want to learn about coding, and the other for my followers who want absolutely nothing to do with coding. I think I’ll try this method for the rest of my tutorial posts, because I know some people like having a simpler option.

METHOD ONE: NON-CODERS

1. From your blog’s Blogger page, go to Template > Customize > Advanced > Add CSS

2. Paste the following code:

3. Press Apply To Blog That’s it! If you want to change the intensity of the transparency effect, just change the “.7″ to a different number between 0 and 1. “0” means the image is completely transparent, and “1” means the image is completely opaque.

METHOD TWO: CODERS

1. From your blog’s Blogger page, go to Template > Edit HTML

2. Search for “.post-body img”. If you can’t find it, just add “.post-body img { }” within the “Posts” section of your CSS template. Your CSS template is the area between <b:skin> and ]]></b:skin>.

3. Between the curly brackets, type out opacity:1.0; This will make sure that when your image isn’t being hovered over, it’s completely opaque.

4. Below that section of code, paste the following:

This creates the hover effect. If you want to change the intensity of the effect, just change “.7″ to a number between 0 and 1. “0” means the image is completely transparent, and “1” means the image is completely opaque.

This is what the final code should look like:

That’s it! I love pairing this effect with a Pinterest button, because it highlights the button so well. Check out my other tutorial if you’re interested in making one!

If you’re nifty with coding, you can take this basic tutorial and make it your own with a few edits. Maybe add a border, or a text overlay! Take a few seconds to roam around my blog and you’ll notice I’ve hidden hover effects just about everywhere. One of my favorites is the hover drop down menu in my “categories” tab up top. Look out for a tutorial later on creating your own!